Results
Configuring variables
Overview
Using this function, you can individually configure which data is sent from the machine to Insights Hub, and how this data is sent. You can configure cyclic values and variables using machine agents.
Manage MyMachines for Industrial Operations X Cloud "Shopfloor Management Application" allows you to individually configure the following trigger:
-
Time-based/cyclic trigger
-
Variable value-based trigger
More information is provided in Chapters:
-
Alarm-based trigger
You also have the option of sending an alarm per email.
You can find more information on the configuration in this Chapter: Configuring an alarm message and sending by email
Principle
|
Icons |
Description |
|---|---|
 |
Creates a new configuration. |
 |
Copies the configurations of an asset to other assets. More information is provided in Chapter: Copying configurations When copying, the "Configuration activated" or "Configuration deactivated" setting is also copied. |
 |
Click the down arrow to open the area and to display the associated configurations. |
 |
Click on the up arrow to close the area. |
 |
Set the slider to the right to activate the corresponding configuration. The data for this configuration are recorded and sent to Insights Hub. As default setting, each new configuration is activated. |
 |
Set the slider to the left to deactivate the corresponding configuration. The data for this configuration are not recorded and sent to Insights Hub. |
 |
Opens a configuration that has already been created in order to make changes. |
 |
Deletes a configuration that has already been created. |
Procedure
-
In the launch pad, click on Manage MyMachines for Industrial Operations X Cloud "Shopfloor Management App".
Move the slider to the right to activate access to "Manage MyMachines".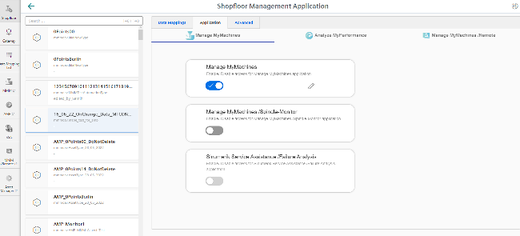
-
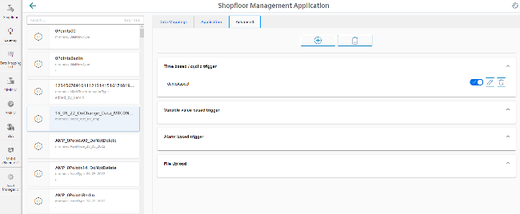
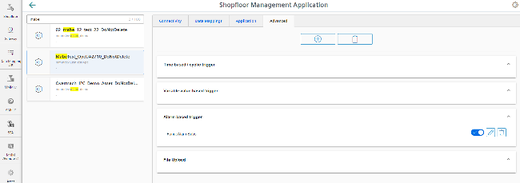
In the tab line, open tab "Advanced".
The input window for function selection opens.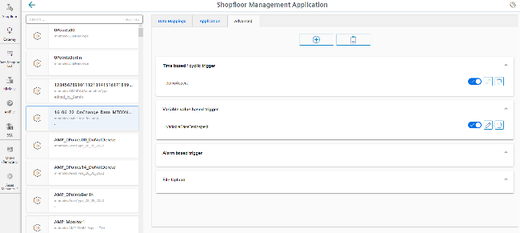
-
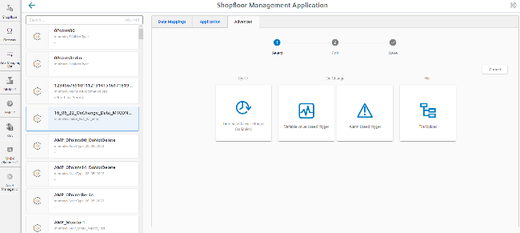
Click on "+" to select the configuration window for the following functions:
-
Time-based / cyclic trigger
-
Variable value-based trigger
-
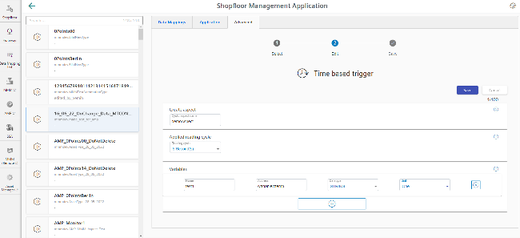
Time-based/cyclic trigger
By configuring "Time-based/cyclic trigger" you can send values of variables at periodic intervals from the machine to Insights Hub.
If you no longer require the configuration, you can deactivate this in the Manage MyMachines for Industrial Operations X Cloud "Shopfloor Management Application" using the slider.
Parameters
|
Parameters |
Description |
|
|---|---|---|
|
Create aspect |
||
|
Aspect name |
Enter a name to designate a common group of variables. The name must be unique and not exceed 30 characters.
|
|
|
Read cycle used |
||
|
Time interval |
The sampling rate of the data acquisition is specified with this value. Select the time period from the drop-down list:
|
|
|
Variable |
||
|
Name |
In the variable set, enter a name for the variables to be acquired. The name must be unique and not exceed 30 characters.
Remark: The name of the variable must not consist solely of numbers. In this case, the text box is marked red. |
|
|
Address |
Enter the address or the path of the variable. Examples: |
|
|
Axis data: |
/Nck/MachineAxis/AATRAVELCOUNT[1] /Nck/MachineAxis/AATRAVELDIST[2] |
|
|
Channel data: |
/Channel/ChannelDiagnose/CuttingTime[u1] /Channel/ChannelDiagnose/OperatingTime[u1] |
|
|
Machine operating mode: |
/Bag/State/opMode[u1] |
|
|
Data type |
Select the data type of the variable from the drop-down list:
Note: If values exceed the floating-point number accuracy, they are displayed with faulty decimal places. |
|
|
Unit |
Select the physical unit of the variable from the drop-down list. Example: m/s3 |
|
Procedure
-
Click on the "Time-based / cyclic trigger (variables)" function.
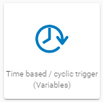
The "Time-based trigger" input window opens.
-
Enter a name in the "Create aspect" input field.
-
Enter the sampling rate in the "Read cycle used" input field.
-
Enter the variable properties in the text boxes.
-
Click the "+" button to add a new variable.
Repeat this step as often as necessary. -
Click the "Cancel" button to exit the Properties window without saving the entries.
You are taken back to the aspects overview.- OR -
Click the "Save" button to accept the entries.
The "Data recording saved successfully" message appears.
-
Click the "OK" button to complete the operation.
You are taken to an overview of the aspects. The supplementary time-based / cyclic trigger is displayed
-
-
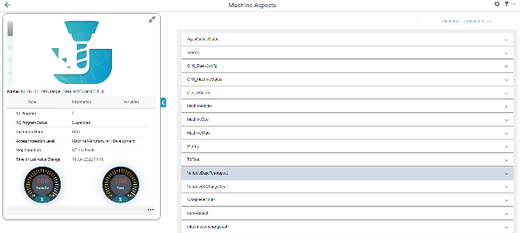
The new configuration is displayed in overview "Aspects".
More information is provided in Chapter: Aspects
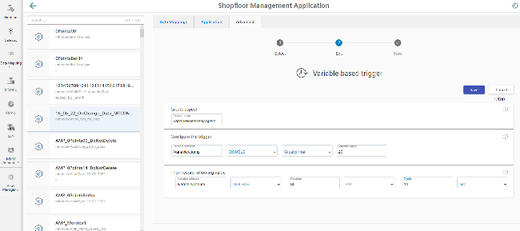
Variable value-based trigger
View "Variable-based trigger" provides you with functions to create user-defined condition rules based on variable values.
If a configured condition occurs, then the following data and values are sent to Insights Hub:
-
Variable value
-
Machine trace files
-
User-defined file(s) in the specified directory
If you no longer require the configuration, you can deactivate this in the Manage MyMachines for Industrial Operations X Cloud "Shopfloor Management Application" using the slider.
Parameters
|
Parameters |
Description |
|---|---|
|
Create aspect |
|
|
Aspect name |
Enter a previously created variable name. The name must be unique. If the aspect does not yet exist in Insights Hub, then the aspect is created when saving the configuration. |
|
Configuring a trigger With these settings, you specify the trigger conditions for the following actions. |
|
|
Variable address |
Enter the address of the variables. |
|
Data type |
From the drop-down list select the data type of the variable.
|
|
From the drop-down list, select the comparison operation that is restricted to the format of the variables:
|
|
|
Variable value |
Enter a value. |
|
With the following configuration |
|
|
Debounce time |
Enter the debounce time. Remark: After the Condition variable has reached a specified value, the control checks whether the condition is still present until the debounce time has expired. The control does not check the status again during this time. |
|
sec |
Select the time unit from the drop-down list:
|
|
Hysteresis |
Select the check box if you want to include hysteresis. |
|
The hysteresis can be a value or a percentage (absolute or relative). Example: The temperature is 30 degrees. The absolute hysteresis equals 5. In this case, the check is from 25 to 35 °C instead of 30 °C. Activate the "Quick Range" option button if the relative value in relation to the comparison value is to be recorded. Activate the "Absolute" option button if the absolute value in relation to the comparison value is to be recorded. A new trigger on the comparison value is only performed when the actual value differs from the comparison value by more than the specified hysteresis. Enter a comparison value, this is restricted according to the selection of the address format. |
|
|
Then acquire the following values The following variable is recorded and sent to Insights Hub. |
|
|
Variable address |
Shows the address of the variable. |
|
Data type |
Select the data type of the variable from the drop-down list:
|
|
Duration |
Enter the recording duration. |
|
Select the time unit from the drop-down list:
Minimum of 30 seconds. Maximum of 24 hours. |
|
|
Cycle |
Enter the cycle duration. |
|
Select a time unit from the drop-down list:
30 seconds is the minimum 24 hours is the maximum |
|
|
Adding trace files to the trigger Recorded traces are sent as files to Insights Hub. |
|
|
Trace files |
Activate the option check box for the following data:
Activate the action log setting on the machine. More information is provided in Chapter: Setting the action log. |
|
Selecting file(s) to be uploaded The selected files that are available on the machine are transferred to the corresponding Insights Hub tenants database. |
|
|
File or directory path * |
Enter the file or directory path.
|
Procedure
-
Click on the function "Variable value-based trigger" to specify dependencies.
-
The "Variable-based trigger" input window opens.
-
Enter a name in the "Cyclic aspect name" input field.
-
Define a variable as trigger.
-
Define the settings for the trigger.
-
Define which data is sent to Insights Hub if the trigger occurs:
-
Recording variables
Enter a variable address.
-
Trace files
Activate the corresponding check box for "HMI-Trace", "NC-Status" or "Machine Data".
-
Files
Enter a file name or a directory path.
-
-
Click the "Cancel" button to exit the Properties window without saving the entries.
A safety message is output, which you must confirm
You are taken back to the aspects overview.- OR -
Click on "Save" to accept the data entered.
Message "Data recording saved successfully" is output.
Click on "OK" to exit the operation.
You are taken back to the aspects overview. The "Variable value-based trigger" that has been added is displayed.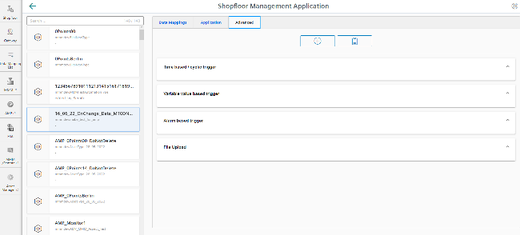
-
The new configuration is displayed in overview "Aspects".
More information is provided in Chapter: Aspects
Alarm-based trigger
The "alarm-based trigger" reacts to all alarms programmed in the Fanuc control.
With this function, you can send specific alarms for a certain aspect and acquired status data to Insights Hub.
These alarms also contained the user range of alarm numbers, which are assigned machine functions for machine diagnostics.
If machine diagnostics are not performed on the basis of alarm numbers, these error messages cannot be integrated.
You can enter the alarm numbers that are triggered, either individually or in ranges. You can also hide individual alarms
or ranges from a selection.
If certain alarms occur, you can upload user-defined files in Insights Hub.
If you no longer require the configuration, you can deactivate this in the Manage MyMachines for Industrial Operations X Cloud
"Shopfloor Management Application" using the slider.
The following special features should be noted for Fanuc controls:
-
No check box is displayed as no trace files can be used for the trigger.
-
Alarms cannot be excluded.
-
For an alarm-based trigger, you must also enter the channel and the alarm type.
Parameters and icons
|
Parameters |
Description |
|---|---|
|
Create aspect |
|
|
Aspect name |
Enter a descriptive name for the aspect. The name must be unique. |
|
Include alarms |
|
|
Alarm numbers: |
In the case of individual alarms, enter the alarm number or the alarm ID that activates the trigger. The alarm number must be within the range from 0 to 999999. The alarms are entered in the following notation:
The alarm list must not exceed 200 characters. |
|
Alarm intervals: |
Enter the alarm limits.
All alarms between 0 and 999999 are included. |
|
Selecting file(s) to be uploaded The selected files that are available on the machine are transferred to the corresponding Insights Hub tenants database. |
|
|
File or directory path * |
Enter the file or directory path.
|
|
Icons |
Description |
|---|---|
 |
You will receive more information. |
 |
Closes the entry field. |
|
|
Click on the down arrow to open and create further configurations. |
|
|
Click on the up arrow to close the area of further configurations. |
Procedure
-
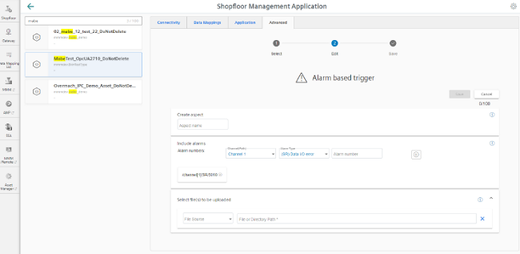
Click the "Alarm-based trigger" function to define alarm properties, such as when an alarm should be displayed.
-
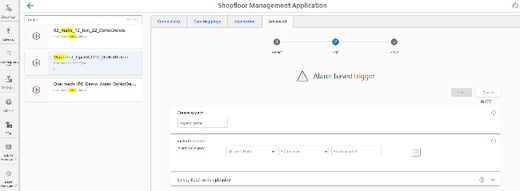
The "Alarm-based trigger" input window opens.
-
Enter a name for the aspect and specify the properties.
-
Click on the "Cancel" button.
You receive a safety message that you must confirm.
Then you will be returned to the overview.- OR -
-
Click the "Save" button to accept the entries.
The "Data recording saved successfully" message appears.
-
Click the "OK" button to complete the operation.
You are taken to the overview.
-
-
To add an alarm number, populate fields "Create aspect" and "Include alarms":
-
Enter a file or a directory path to load data from the control to Insights Hub.
To do this, in the drop-down list "File source", select the "Machine Agent Location".
If the alarm is triggered, the file source is uploaded to the machine agent with the storage location.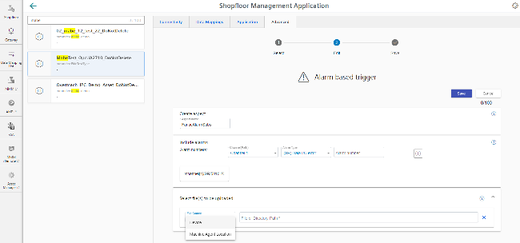
-
Once configuring has been completed, the alarm is displayed in the shopfloor management application:
File upload
Function "File Upload" provides the option of sending files from the control to Insights Hub.
This is also possible from Fanuc controls, whereby the following must be observed:
-
Trace files are not used for the trigger.
-
You do not select file paths, only files.
The upload is performed in a defined time cycle. The cycle duration is defined in the user interface.
The cyclic file upload does not check files for changes.
Parameters
|
Parameters |
Description |
|---|---|
|
Configuration name |
Enter a name for the configuration. The name must be unique and not exceed 30 characters.
|
|
Cyclic |
The files are sent to Insights Hub at defined intervals. Select the time interval from the drop-down list:
|
|
File source |
|
|
File |
Enter the file name. |
Icons
|
Icon |
Description |
|---|---|
 |
Create a new entry for the file or directory path. |
|
|
Change the entry for the file or directory path. |
 |
Save the entry for the file or directory path. |
|
|
Delete the entry for the file or directory path. |
|
|
You will receive more information. |
Precondition
Function "Variable Recording" was activated in Manage MyMachines for Industrial Operations X Cloud "Asset Manager".
NOTICE
There is a risk that an attacker, within the network between SINUMERIK Integrate and Insights Hub, gains access to the file system of the server or service clients. The attacker can then read or manipulate various system components (e.g. database content). As a consequence, the attacker can manipulate tool data, NC programs, machine archives or the system structure itself, for example. This type of attack cannot be prevented by Insights Hub.
-
It is therefore imperative that the person responsible for the machine network takes the appropriate industrial security measures for the production/machine network.
Siemens AG does not accept any liability in this regard.
Principle
The maximum file size is 100 MB.
Use the following file extensions for the "File Upload" function:
-
.xml
-
.txt
-
.log
-
.png
-
.jpg
-
.ohs
-
.pms
-
.ems
-
.mds
-
.pdf
-
.ini
-
.csv
-
.json
-
.sav
-
.mst
-
.bst
-
.stt
Procedure
-
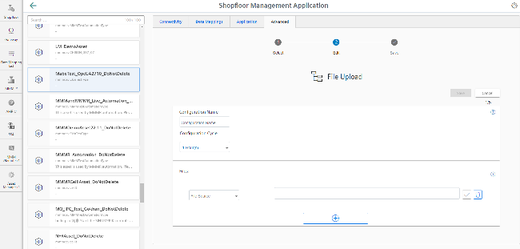
Click the "File Upload" function.
-
The "File Upload" input window opens.
In the "File Upload" area, you can see the number of configurations created/number of possible configurations on the right.
-
Enter the name for the configuration.
-
Select the cycle length of the file upload.
-
Select the file source.
The following view appears if you select "Device" as file source: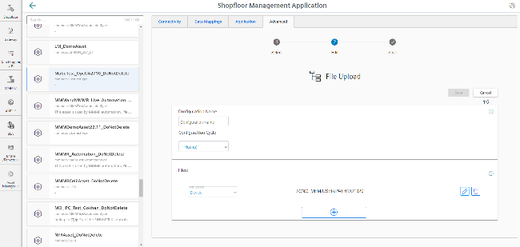
The following view appears if you select "Machine Agent Location" as file source:

-
Specify the files to be transferred:
-
Click the "+" button in the file area.
Click on the "+" button for each file.
The button is deactivated once the maximum possible number of files is reached. -
Enter the file name. You can use the asterisk symbol (*) as a placeholder.
If more than 10 files correspond to the file name with placeholder, only the last 10 most recently modified files are sent to Insights Hub. -
Click the "Checkmark" icon.
-
-
Click on the "Recycle bin" icon in the appropriate line to delete a file.
-
Click on "Save" to save the configuration.
- OR -
Click the "Cancel" button to exit the window without saving the entries.
You are taken back to the overview. -
The "Data recording saved successfully" message appears.
Click the "OK" button to complete the operation.
-
You can see an overview of the files in the "Operations Insight" application.
For more information, see Chapter: Displaying uploaded files in "Insights Hub Monitor".
NOTE
You can create a maximum of 50 variables with 5-second options.
A warning message appears when the maximum number is reached.