Results
- Manage MyMachines, Manage MyMachines /Spindle Monitor
- Introduction
- Security instructions
- Setting up the SINUMERIK control system for Manage MyMachines
- Integrating Insights Hub
- Activating data acquisition with Machine Agent
- Logging in to Insights Hub
- Using the Machine Agent
- Icons and buttons in Insights Hub
- Managing users
- Asset Manager
- Shopfloor Management Application
- Connecting controls with Insights Hub
- Configuring an alarm message and sending by email
- Displaying uploaded files in "Insights Hub Monitor"
- Machine agent
- Setting up MindConnect Nano for Manage MyMachines
- SINUMERIK Integrate Gateway
- Working with Manage MyMachines
- Overview
- Selecting a language
- Using the calendar function
- Configuring a machine overview
- Filtering machines
- Machine overview
- Filtering according to static variables
- Dashboard
- Displaying machine alarms
- Aspects
- Comparing machines
- Machine status
- Events
- Exporting
- My Dashboards
- Manage MyMachines /Spindle Monitor
- Machine location
- Motor temperature
- Files
- Machine snapshot
- Generating the identSNAPSHOT file on the SINUMERIK controller
- Remote sessions with Manage MyMachines
- Disconnecting controls from Insights Hub
- Troubleshooting when onboarding
- SINUMERIK controls
- Preconditions
- Checking the network configuration
- Checking that SINUMERIK Integrate has been enabled
- Checking that SINUMERIK Integrate has been activated
- Checking proxy settings
- Checking the SINUMERIK Integrate URL
- Checking the network connection
- Checking directory "boot_job"
- Checking the asset type in Insights Hub
- Checking the existence of onboard.key
- Resolving known faults
- More information
- Preconditions
- Machine Agent
- SINUMERIK controls
- Secure product disposal
- Appendix
- Glossary
Client update under Windows
Requirement
The SINUMERIK Integrate client update required "setup.exe" was transferred into the installation directory.
Procedure
-
Start the SINUMERIK control system in the Windows service mode.
-
Open the installation directory.
-
Start setup file "setup.exe" with a double-click.
SINUMERIK Integrate Client - InstallShield Wizard opens.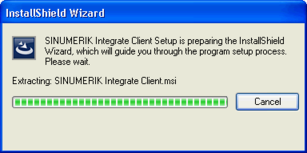
-
The welcome screen opens and shows the applications to which the update applies.
Click "Next >" to start the installation preparation.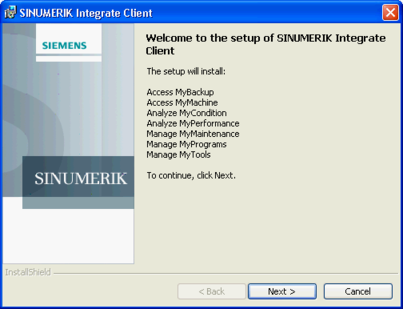
-
The "License Agreement" window opens.
Read the license agreement.-
If you want to print the terms, click "Print."
-
Then activate the "I accept the terms in the license agreement" checkbox and click "Next >".
- OR -
Click "< Back" to return to the previous window.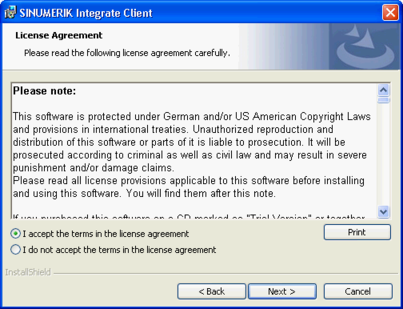
-
-
The next window displays the installation directory for the application.
Click "Next >" to accept the directory suggested by the setup.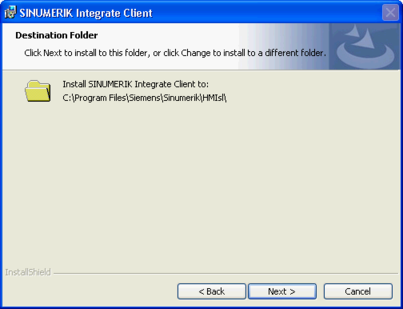
The default path for installing the SINUMERIK Integrate client is identical for SINUMERIK One. The screens displayed are different:

-
The Wizard is ready to start the installation.
Click "Install" to start the installation.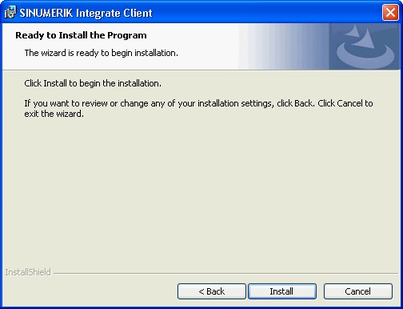
-
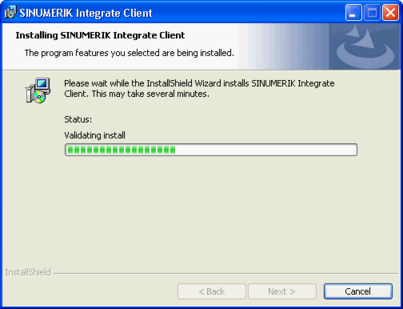
The installation is started, and the progress is displayed with a progress bar.
-
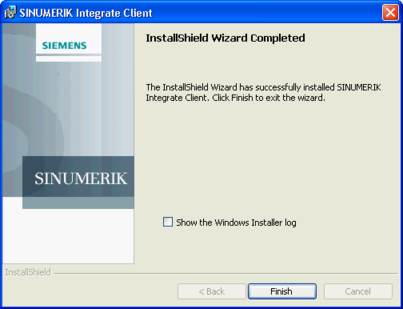
Click "Finish" to complete the installation.
Chap. 3.2.3