Results
Setting up a connection with the TIA Portal via the Internet
Using the "Remote STEP 7" function, as a remote user, you can execute all of the functions in SIMATIC Manager.
Prerequisites
-
The TIA Portal must be installed on the local PC.
Versions 15.0, 15.1, 16.0, 16.1, and 17 are supported.
-
If PLCs use the "Remote STEP 7" function with the TIA Portal, then OMS+ must be activated.
-
The Service Engineer Client must be installed on the local PC.
-
The client on the machine operator side must support "Remote STEP 7".
-
The device must be registered and online in the network.
-
The remote session must have been set up.
Start Remote STEP 7 on the SINUMERIK control system
-
To activate function "Remote STEP 7" click on the icon
 .
.
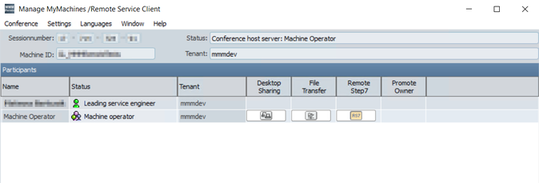
-
Wait for the machine operator's response. The machine operator must issue permission for the remote access.
Remote STEP 7 access is activated.
Connecting the device with the TIA Portal
-
Start the TIA Portal.
The TIA Portal opens and the portal view is displayed. You can now create a new project or open an existing project.
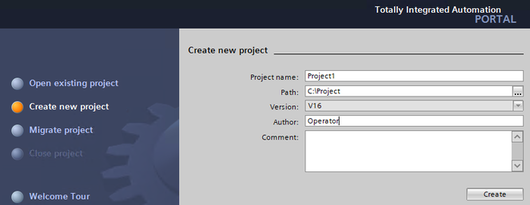
-
To create a new project, in the portal view click on entry "Create new project". Enter the basic project data at the right in the work cell.
- OR -
-
To open an existing project, click on entry "Open existing project" in the portal view.
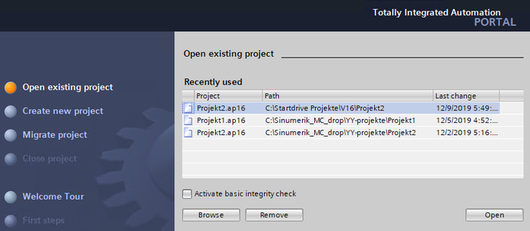
The last project used is displayed to the right in the work cell.
Here, select a project and click on "Open". Alternatively, using "Browse", you can open the directory structure of the PC, from where you can select a project.
-
In the TIA Portal, switch from the portal view to the project view.
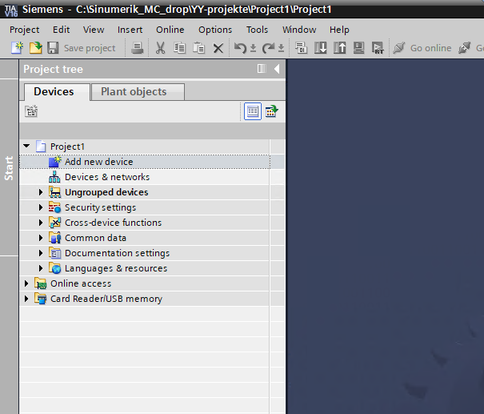
-
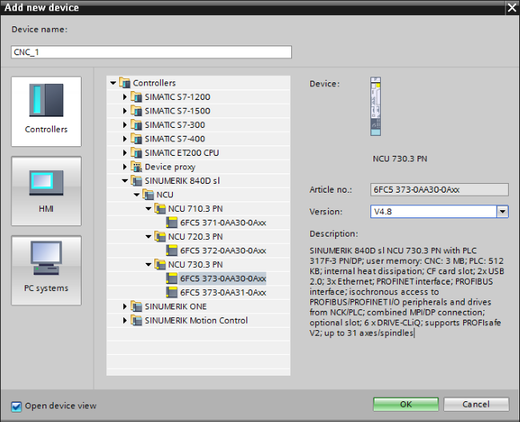
Double-click on entry "Add new device" in the project navigation.
A dialog with the same name opens.
-
Click the "Controller" button.
-
In the folder structure under "Controller", expand the corresponding SINUMERIK device family and then select the required device and confirm your selection with "OK".
The selected device is created in the project navigation.
-
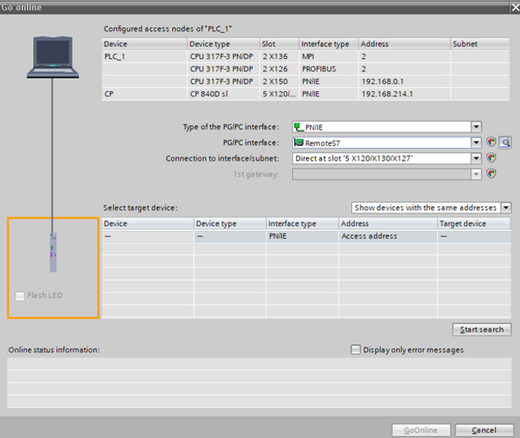
Select the device in the project navigation and call menu path "Go online / Extended online".
The "Go online" dialog opens.
-
Here, make the following connection settings:
-
Select "PN/IE" in the "PG/PC interface type" field.
-
Select the entry "RemoteS7" in the "PG/PC interface" field.
-
Select the entry "Direct at slot '2 X150'" in the "Connection to interface/subnet" field.
-
-
In the "Select target device" field, select option "Show devices with the same addresses".
-
In the dialog, click on "Start search".
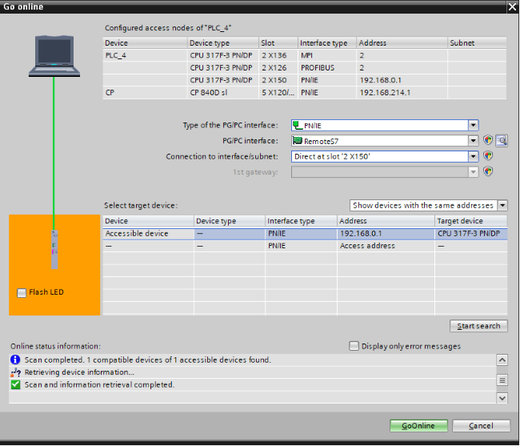
The search starts. The results are listed in the results list once the search has been completed.
-
Select the device you require from the list, and click on "Go online".
If your device was successfully connected with your PC, then this is displayed in the status information using this icon
 .
.
The project work cell is marked using an orange bar on the right-hand side.
Disconnecting the device from the TIA Portal
Click in the icon bar of the TIA Portal on icon "Disconnect online connection".
The connection is disconnected.