Results
Defining limits
Description
Under "Step time analysis settings", define limits for each step. When a limit is exceeded, the step is evaluated as faulty in the step time analysis and displayed as such in the dashboard.
Procedure for setting limits
You can define limits that are product-dependent. The requirement for this is that the asset in the Asset Manager has been assigned the aspect type "StepChainAnalysis_InitialStep".
To set limits for one or more steps, follow these steps:
-
Open My Plant and select an asset. The tiles of automatically generated and user-defined dashboards for this asset are displayed.
-
Display the automatically generated dashboard for step time analysis.
-
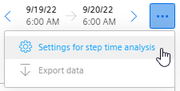
Click
 .
.
-
Select "Settings for step time analysis".
The list of steps defined under this asset are displayed. You can configure both product-specific and product-independent steps under an asset and set limits for this purpose.
-
Under "Product", you open the drop-down menu and either select the product for whose steps you want to define the limit values, or "Unassigned" if you are editing product-neutral steps.
-
If necessary, assign a corresponding name under "Display name". The name appears after the product name or after the label "Unassigned".
-
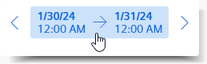
Use the button for the period to select a period whose data is to serve as the basis for defining the limits.
-
In the "Limits" column, set the values for the planned and actual duration of the respective step. When the value is exceeded, the step is evaluated as faulty.
-
Under "Overview", you can automatically assign a limit to all steps using a mathematical function.
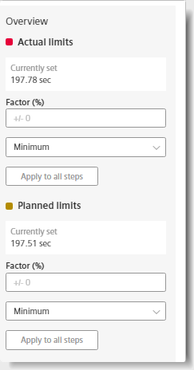
To use this function, follow these steps:
-
Decide whether to assign the automatic limit to the actual, planned or all step limits.
-
From the drop-down menu, you select the minimum or the maximum as the initial value of the step.
-
As the factor, you specify a percentage that is added to the initial value.
-
Click "Apply to all steps".
A limit is calculated for selected steps on the basis of the respective limit values and entered in the corresponding column for limit values.
-
-
To save the changes and switch to the dashboard view, click "Save".
If you want to continue working in the same view after saving, click "Save & Continue".
To exit the view without saving, click "Cancel".