Results
Configuring an alarm message and sending by email
You have the option of configuring an alarm trigger, which notifies you by email if a "Manage MyMachines" event occurs.
Procedure
-
In the launch pad, open the "Shopfloor Management App" MindSphere application.
-
Select the required asset in the left-hand side of the window.
-
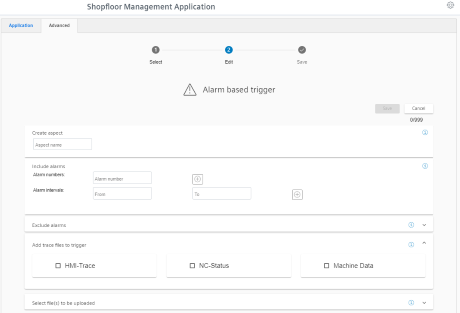
Click the "Alarm-based trigger" function.
-
The "Alarm-based trigger" input window opens.
-
Enter a name for the alarm and specify the properties.
-
Click the "Cancel" button to exit the Properties window without saving the entries.
You are taken back to the aspects overview.
- OR -
Click the "Save" button to accept the entries.
The "Data recording saved successfully" message appears. -
Click the "OK" button to complete the operation.
-
-
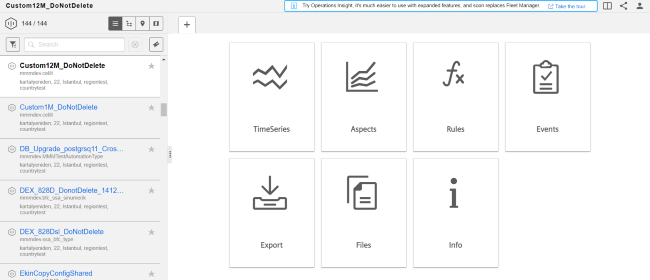
In the launch pad, open the "Fleet Manager" MindSphere application.
The "Fleet Manager" opens.
-
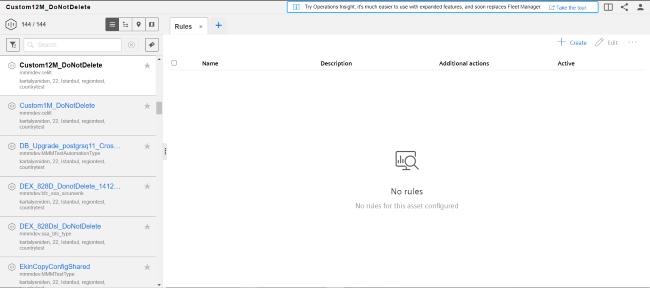
Select the asset and click the "Rules" button in the right-hand side of the window.
-
Click the "+ Create" button on the upper right-hand side of the window.
-
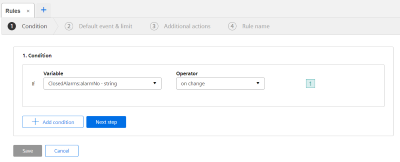
The window "Create" > "1. Condition " opens.
-
From the drop-down list, select one or more variable(s) to be monitored.
Sending an email is only supported for the "on change" condition. -
Click the "Next step" button.
-
-
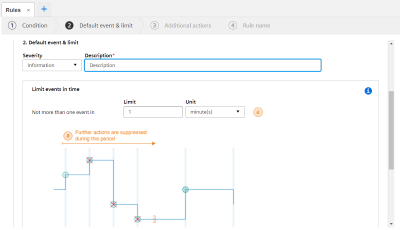
The window "Create" > "2. Default event & limit" opens.
-
Select the desired events from the drop-down list and enter a description in the "Description" entry field.
-
Click the "Next step" button.
-
-
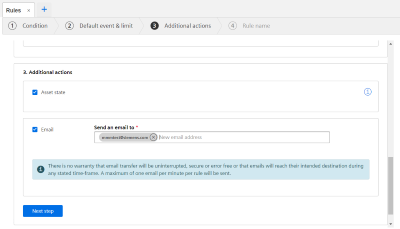
The window "Create" > "3. Additional actions" opens.
-
Enter the required email address in input field "Send an email to".
-
Click the "Next step" button.
-
-
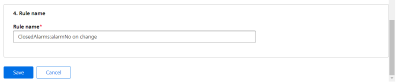
The window "Create" > "4. Rule name " opens.
-
Enter a meaningful name in the "Rule name" entry field.
-
Click the "Save" button.
-
-
The alarm trigger that was created, together with the following data, are displayed in the "Rules" overview window:
-
Name
-
Description
-
Additional actions
-
Active
You have the option of editing, activating/deactivating or deleting an alarm trigger.
-
NOTE
MindSphere supports a maximum of 40 alarms for an individual aspect of a machine. An email cannot be sent if this number is exceeded.