Results
Connect to the IoT2040 using the private key
Requirement
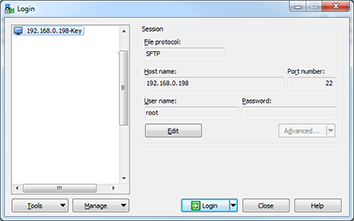
Create the connection to the IoT2040 either with WinSCP or with PuTTY once you have installed the private key, e.g. "id_rsa_PUTTY.ppk".
You can find more information at: Generating the private key in PuTTY format.
Procedure
-
Login to WinSCP.
-
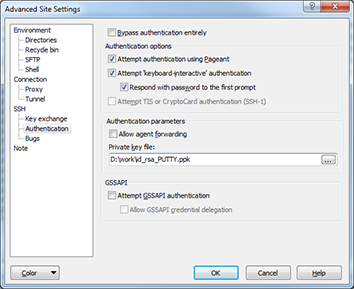
Select Edit > Advanced > SSH > Authentication > Authentication parameters > Private key file.
-
Deactivate the login with user name and password.
-
Create a backup before you perform the next steps.
-
Open the file "/etc/ssh/sshd_config".
-
Change the parameter:
PermitRootLogin without-password. -
Change the parameter:
PermitEmptyPasswords no. -
Remove any superfluous packages from the Yokto image (optional).
For security reasons, we recommend that the superfluous packages and binaries made available in the default image of the IoT2040 are deleted. -
opkg remove gdbserver --force-removal-of-dependent-packages -
opkg remove gdb-dev -
opkg remove gdb
-
NOTE
Perform this step only when you are sure that you can login with the created private key! Otherwise, you can no longer login to the IoT2040 and must reinstall the firmware.