Results
Creating a widget
Requirement
To visualize and calculate the data from the plant, such as production figures, machine operating times or water consumption, using KPIs, these figures must be transferred from the plant to MindSphere using the Asset Manager. The data structure of your plant is then automatically displayed in the app.
At least one dashboard is created on the desired asset.
Widget configuration
A wizard will guide you through the individual steps when creating a widget. However, the first four steps are identical for all widget types:
-
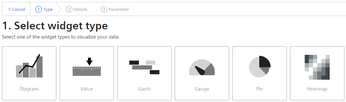
Step 1: Select the widget type
-
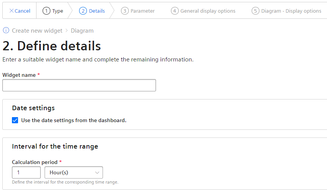
Step 2: Define details
-
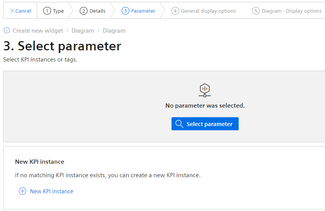
Step 3: Select parameters
-
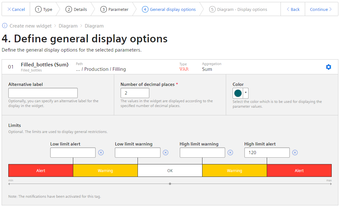
Step 4: Define general display options
-
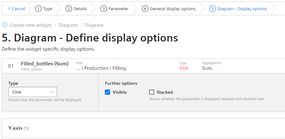
Step 5: Define widget-specific display options
Procedure for creating the general steps of a widget
To create a widget, follow these steps:
-
Either click "Create first widget" or click
 and "New widget" and select a widget type.
-
Assign a name and define the date settings:
Define date settings:
With the date settings you define the time range from which the values are to be visualized. You can apply the dashboard date settings to a widget or define your own date settings for this widget.
The following variants are available for setting your own date:
-
Default: "Use the date settings from the dashboard" to use the time range that is defined in the dashboard.
-
You disable "Use the date settings from the dashboard" to define a specific time range. You have the following options to do this:
Default: "Use current date" and enter the duration (e.g. week) under "Time range". The start and end time are given by the predefined time ranges (day, week, month, year, etc.).
If you prefer, you can also disable "Use current date" and enter the start date and start time manually. The end time is calculated based on the duration under "Time range". Under "Offset", you can enter the number of days, weeks, months or years by which the start time should be postponed. The start time can be either in the future or in the past.
If you use the dashboard date settings for the widget, all changes to the date settings are displayed directly in all widgets of the dashboard.
Define interval:
You can also specify an interval at which the values are to be displayed, for example, every 5 minutes, every 2 hours, etc.
-
-
You can select either a variable or a KPI type as parameter. Up to 10 parameters can be defined.
For each variable you can select one of the aggregation functions (Average, Min, Max, Sum, Last, Counter, Timer, EnergyToPower, PowerToEnergy, AmountToFlow, FlowToAmount).
You can find additional information on the aggregation functions here: Introduction to the aggregation functions
In this step, you can also directly create KPI instances and link the operands with the desired parameters.
You can find additional information on KPI instances here: Introduction to KPI calculations
-
In the general display options, you can assign an alternative label for the variable or KPI type. This label is then displayed in the legend in the detail view instead of the asset and the aspect name of a parameter.
In this step, you can also enter the limit values for warnings and alerts.
-
Red = the alert limit was violated
-
Yellow = the warning limit was violated
The limit values are also displayed in the detail view as dashed lines.
You can also specify the number of decimal places and a color for each parameter in which the graph is displayed in the detail view.
If you have already defined limits for the variable or KPI used, these are displayed in the widget as pre-setting. However, these limits can be overwritten at any time.
-
-
In the last step you specify all widget-specific details. You can find additional information on the respective details of the widgets here: