
Web Components for Insights Hub and Industrial IoT
Demo Application
The Simple Demo Application shows how to use MWeb Components for Insights Hub and Industrial IoT when building applications just using HTML, CSS and JavaScript.
It is provided via download on Siemens Industry Online Support.
The following picture shows an example of the demo application: 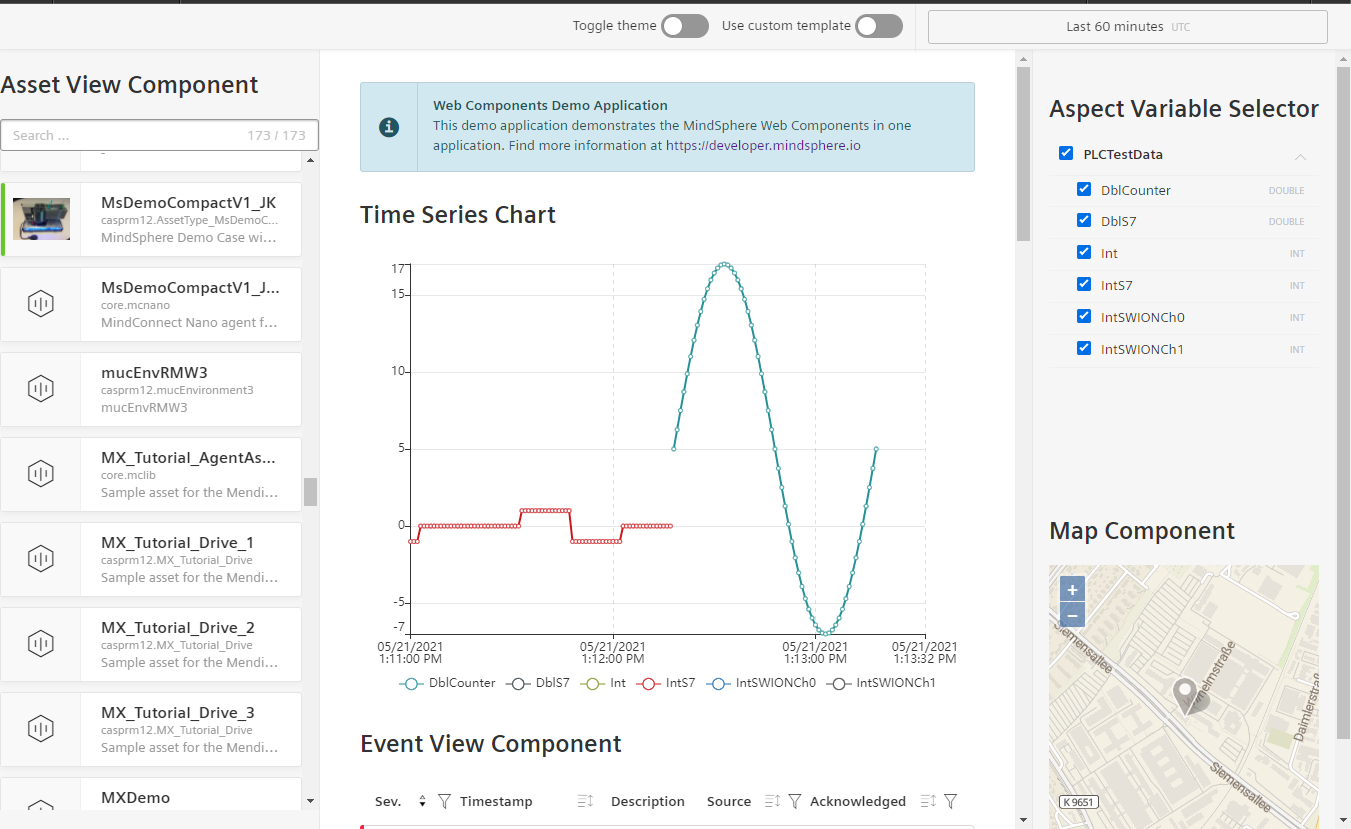
Prerequisites
- User account on a developer tenant
- Cloud Foundry Command Line Interface (CF CLI)
- A Cloud Foundry role which allows to push applications, e.g.
spaceDeveloper - A developer role, either
mdsp:core:Developerormdsp:core:DeveloperAdmin
Deploy the Application to Cloud Foundry
- Unzip the demo application folder on your local computer.
-
Open the manifest.yml and modify the
nameas desired. -
Open a command line interface (CLI) inside the folder with the application to be deployed.
-
Configure the proxy settings, if necessary.
Click here for detailed information on proxy settings
If you are in a company network behind a proxy, you may have to set the proxies to reach the Cloud Foundry endpoints. Contact your administrator, if you face any timeouts or connectivity problems.
Set the proxies for the Cloud Foundry CLI as shown below:
  set http_proxy=http://PROXY_IP:PROXY_PORT
  set https_proxy=http://PROXY_IP:PROXY_PORT
export http_proxy=http://PROXY_IP:PROXY_PORT export https_proxy=http://PROXY_IP:PROXY_PORT -
Log in to CF using CF CLI. Enter
cf login -a https://api.cf.{region}.{mindsphere-domain} --sso. - Open the URL printed by the CLI and log in using your WebKey credentials to get a One Time Code.
- Enter the One Time Code in the CLI.
-
Select your Cloud Foundry org and space using the following command:
cf target -o {org_name} -s {space_name}No Cloud Foundry Orgs displayed
If you do not see any Cloud Foundry orgs, you need to be added to your org. Refer to the How Tos for Cloud Foundry.
-
Push the application to your Cloud Foundry space using:
cf pushVendoring dependencies in region China 1
Pushing applications to Cloud Foundry in region China 1 sometimes fails while downloading dependencies due to unstable international network access from China. Refer to the Cloud Foundry buildpack's documentation for 'vendoring' your application's dependencies:
Integrate the Application into Insights Hub
Configure the Application via the Developer Cockpit
- Open the Developer Cockpit from the Launchpad and select the Dashboard tab.
- Click on Create new application.
- Select Type Standard and Infrastructure Cloud Foundry.
-
Enter an arbitrary Display Name and an Internal Name which will be part of the application URL. The Internal Name cannot be changed after initial creation!
-
Enter a version number.
Major.Minor.Patchscheme is supported.- Versions must start with a major number >= 1.
- The version cannot be changed after saving.
- Upload an icon for your application.
-
Enter the component name. The component name must be the same as specified in the
manifest.ymlfile. -
Add one endpoint for your component using
/**to match all of your application paths. - Enter the Cloud Foundry URL of your application.
- Use
cf app {app_name}to get the URL for your deployed application.
- Use
- Set the content-security-policy according to the examples:
    # "Europe 1"
    default-src 'self' *.eu1.mindsphere.io; style-src * 'unsafe-inline'; script-src 'self' 'unsafe-inline' *.eu1.mindsphere.io; img-src * data:;
11. Click on Save.
You are redirected to the application details. Your application is in the In-Development state and is ready for registration.
Configure the Application Roles & Scopes
- Switch to the Authorization Management tab.
- Select the application.
- Create an application scope, e.g.
simplecomponentdemo.all, for accessing the application from the Launchpad. - Add the following Core roles to enable access to the respective APIs. If one of these role is missing, the related web component will not work.
mdsp:core:assetmanagement.xxx
Required for asset view and custom mapmdsp:core:iot.tsaUser
Required for time series chartmdsp:core:iot.timUser
Required for time series chartmdsp:core:em.eventcreator
Required for event viewmdsp:core:iot.filAdmin
Required for file viewmdsp:core:tsm.full-access
Required for rule view
Register the Application
- Switch to the Dashboard tab.
- Open the application details.
- Click on Register.
Assign the Application Roles
- Open the Settings app from the Launchpad and switch to the Roles tab.
- Select the application role and click on Edit assignments.
- Assign your user to the application role.
- Click on End editing.
- Log out of from Insights Hub and log in again.
Logout
The user token is only updated with the new scopes after logging out and logging in again. In rare cases it might take a couple of minutes until the role assignment has been propagated through the system.
Congratulations, your very first application based on Web Components for Insights Hub and Industrial IoT is running in your tenant.
Feel free to adapt the web components with attributes, stylings etc. for your needs.
Troubleshooting
- The App is not visible on the Launchpad
Check if you assigned the application role to your user in the Settings app. After assigning new roles, a logout/login is required. - The App does not fully load and the developer console shows "Content Security Policy" errors
Unregister the app and update the content-security-policy settings in the Developer Cockpit as instructed above. - Web components are loaded, but there is an "assetList" error or no assets are shown
Make sure that themdsp:core:assetmanagement.***role is assigned to your application.
Except where otherwise noted, content on this site is licensed under the Development License Agreement.