Developing Mobile Apps with Mendix for Insights Hub
This documentation describes the adaptations needed to develop Mendix native mobile apps for Insights Hub. Native mobile apps do not render inside a web view - they use native UI elements. This enables fast performance, smooth animations, and allows access to all native device capabilities. Details about building native mobile apps with Mendix can be found the Native Mobile How Tos section.
The Siemens Insights Hub Mobile Starter Application is an app template which is based on the Native Mobile Quickstart from Mendix and includes all you need to start developing a native mobile app for your Insights Hub environment.
On a phone there is no Launchpad. Therefore, the app has to implement the login to Insights Hub itself. The template contains a login page which is shown to the user at startup. The end-user signs into Insights Hub outside the native application, in a browser, and your app is started after a successful login via a "Deep Link". Details about this process can be found in Developing Mobile Apps for Insights Hub in the documentation. But do not worry - the implementation is already part of the app template - just use it. To support deep links in your app, you have to create your own Custom Development App and register a deep link corresponding to your app registration.
As a prerequisite, we recommend that you follow the build a native mobile inspection-app tutorial from the Mendix Academy to get yourself familiar with mobile app development.
This documentation is structured into two main parts:
- Setup Development Environment - explains everything to get you started
- Module Details - describes the solution and what should be considered during development
Setup Development Environment
The setup of your development environment consists of the following steps:
- Register a new mobile app in Developer Cockpit.
- Create a project based on the "Siemens Insights Hub Mobile Starter Application".
- Build your own development app.
- Try it out.
Registering your Mobile App in Developer Cockpit
The Siemens Insights Hub Mobile Starter Application template provides the ability for a user to sign in to Insights Hub from within a mobile application. To get the mobile authentication running, it is necessary that the application itself is registered within Insights Hub. This registration can be done with Developer Cockpit by following the steps below.
-
Open the Developer Cockpit via the Launchpad of your Developer Tenant.
-
Click Add application and fill in the following:
Type = MobileInfrastructure = noneDisplay Name— give your app a nice display Name. Currently this name is only used in Developer CockpitInternal Name— give an internal name. We need this name later and will call it internal_nameVersion = 1.0.0

-
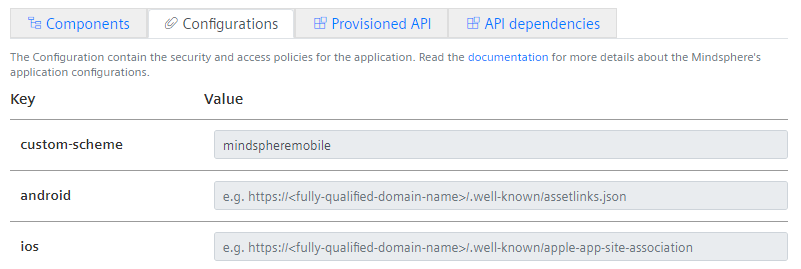
Open the tab Configurations and specify a value for the custom-scheme which is your Deep Link. Please copy the value, we will need it later again. Note: the value should be unique for your app. If another app installed on the phone is using the same value it might interfere with the authentication process. For example, use a combination of company and app name to ensure that it is unique.
-
Click Save to save your new app.
You have to map Mendix user roles to Insights Hub user roles (see a more detailed discussion of roles and scopes in the Roles & Scopes section of Insights Hub Module Details). The standard template will be delivered with the roles Admin and User therefore we will create the corresponding Insights Hub scopes. If this does not match the roles in your application, please adapt these instructions accordingly.
Info
The standard template also includes the role Anonymous which will be used for the authentication process. You should not register this role in the Developer Cockpit.
-
Click Configure to open the Roles and Scopes Management.

-
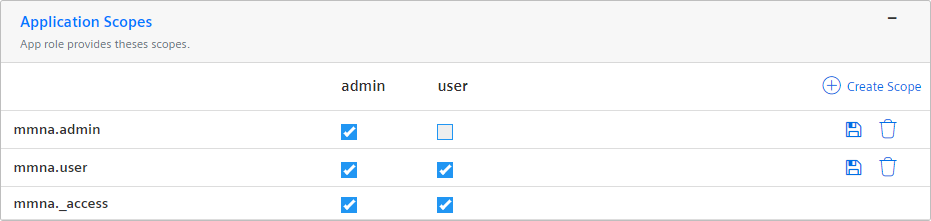
Extend the Application Scopes section and click Create Scope.
-
Add a scope with name admin and assign it the role admin.
-
Click Create Scope again and enter user as the scope name and assign it to the admin and user roles.
-
The final result should look similar to:
-
Click Back to App and Register to finalize the registration on Insights Hub:

-
You will see the following popup after registration:
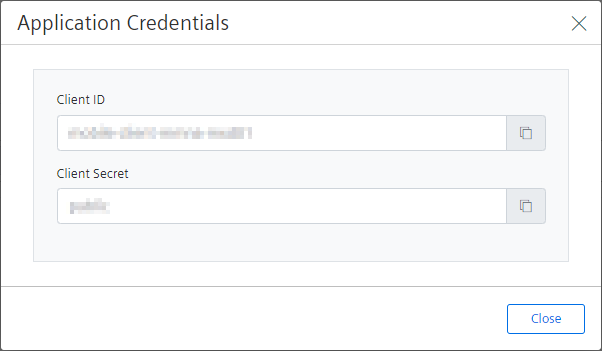
We will need the Client ID and the Client Secret later, so copy them somewhere – we will call these constants client_id and client_secret.
-
The last step is to grant yourself the user or admin role in the app Settings.

You now have successfully registered your application within the Developer Cockpit.
Info
The Insights Hub Mobile Starter Application can be used to build applications for both native mobile apps and 'normal' web applications.
Currently you can register either a mobile app or a web app in Developer Cockpit but not both together. If you need access in a web browser, set up another registration in the Developer Cockpit for your web application as described in Configuring the Mendix App in Insights Hub. This app can then be added to the Launchpad.
Start Developing your App with Mendix Studio Pro
Create a new Mendix Team Server project based on the Siemens Insights Hub Mobile Starter Application template.
Now, you need to make some configuration changes in the app itself.
In the project explorer open the configuration of the app store module MindsphereSingleSignOn:
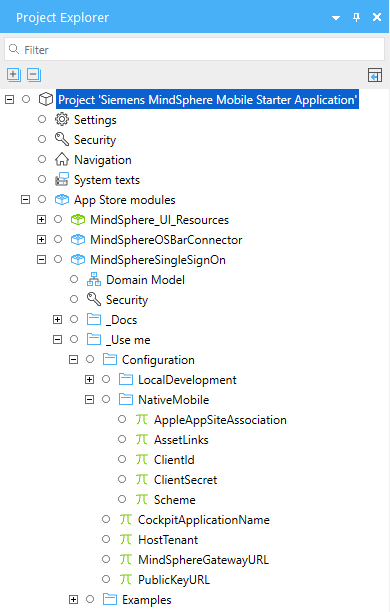
Change these constants:
- HostTenant = name of your tenant
If you are not working on eu1.mindsphere.io:
-
MindSphereGatewayURL
-
PublicKeyURL
In the NativeMobile folder:
-
ClientID = client_id from app registration in Developer Cockpit
-
ClientSecret = client_secret from app registration in Developer Cockpit
-
Scheme = custom_scheme from app registration in Developer Cockpit
Building your Own Development App
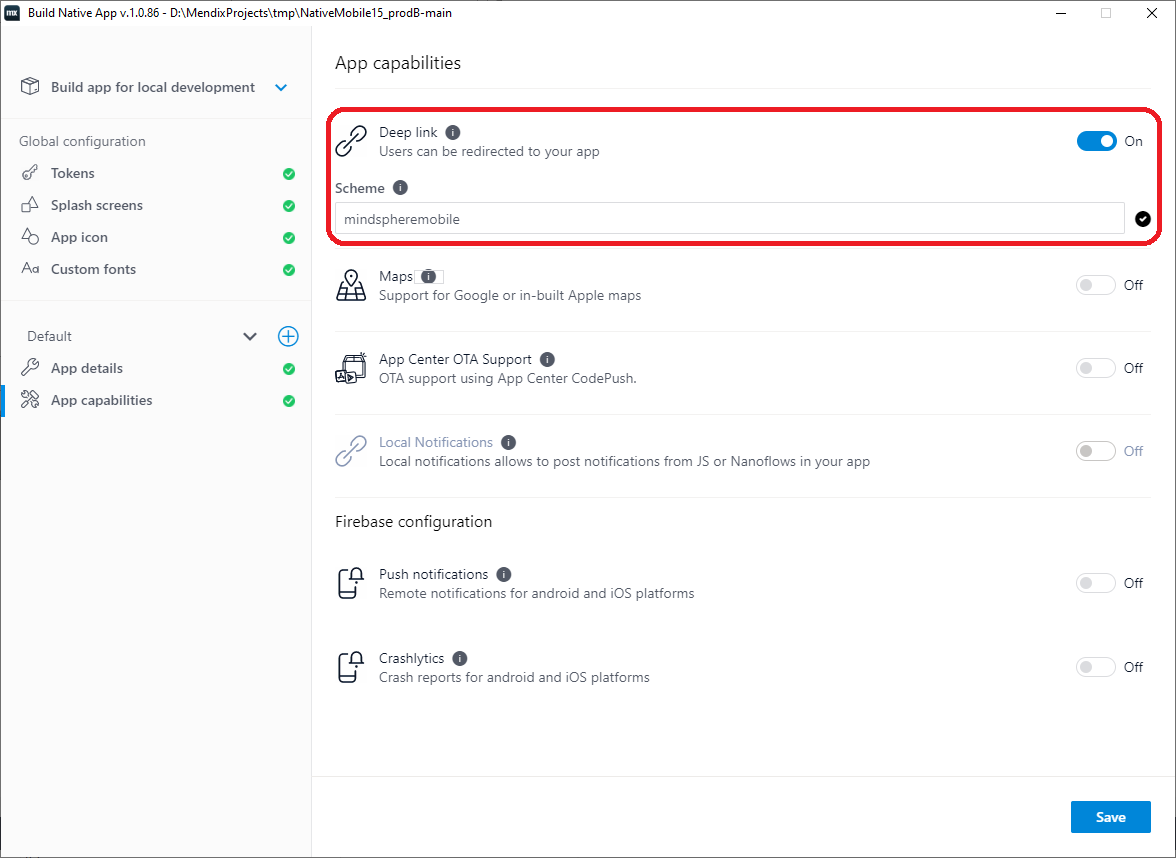
In this section you will create your own custom development app and register a deep link.
In principle, you have to follow the description of how to create a Custom Development App, and install it on your device or emulator as described there. There is only one additional thing required for the integration. The custom_scheme specified in the Developer Cockpit app registration process needs to be provided as the Deep link in the App capabilities section.
Try out your application
You should now be ready to start your application for the very first time on your mobile phone. For this, click the Run Locally button so that your own native application can connect to your Mendix Studio Pro. When your application is running you should see the login page of the Anonymous user role.

Please provide your developer tenant name and tap the Login button. The default browser of your phone will open and show you the credential page where you can sign in with your Insights Hub credentials.

After a successful login, your app will be restarted and a session created. Then your native home page is displayed.
Info
If you have trouble signing in to your application, it is a good idea to clear the cookies of your mobile browser. See your browser's documentation for further information.
Next steps
You now have a blank application which supports authentication for your specific Insights Hub application, which is an excellent starting point for developing your app further. We also recommend investigating the basic tutorial for web applications Build a Insights Hub app with Mendix to learn more about application development in general.
When you enhance your application with Industrial IoT API calls to use the IoT capabilities, you must consider the following two steps:
- Authorize your Industrial IoT API calls.
- Add Industrial IoT API roles to your existing Industrial IoT gateway registration.
Authorize your Industrial IoTAPI calls
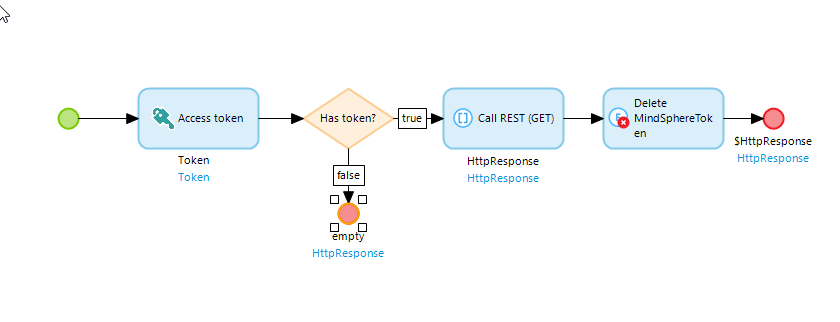
With each Industrial IoT API call you have to ensure that the corresponding user token is part of the request. Do this by adding the Industrial IoT Access Token action before your REST calls and set the Authorization header accordingly.
Extend your application registration with Industrial IoT API roles
As of now your application has the user roles admin and user, but none of those roles has the rights to access Industrial IoT APIs. Perform the following steps to achieve this.
-
Open the Developer Cockpit via the Launchpad of your Developer Tenant.
-
Select your application.
-
Click the Configure button to open the roles tab.
-
Open the API Roles section and click the Add API Role button.

-
Select the corresponding role you need for your particular API call and assign it to your user roles. For example:
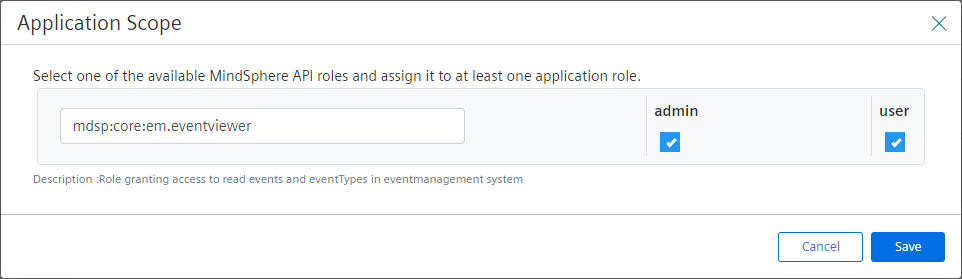
Your application has now been updated to be allowed to make API calls
Info
To enable this for your local test session you have to force a logout of the user. For this, tap the logout button within your mobile application and clear the cookies within your mobile browser. Afterwards sign in again. The token now includes the added API roles.
Module Details
The Siemens Insights Hub SSO module provides a couple of nanoflows which should be used to achieve a seamless integration with Insights Hub. These nanoflows can be found in the folder _Use me/NativeMobile of the SSO module. The Siemens Insights Hub Mobile Starter Application contains the SSO module and uses the provided nanoflows. The starter template just needs to be configured to get an application running. Nevertheless we would like to explain some details here.
Authentication
Authentication is based on the usage of Anonymous users and is enabled in the project securities.
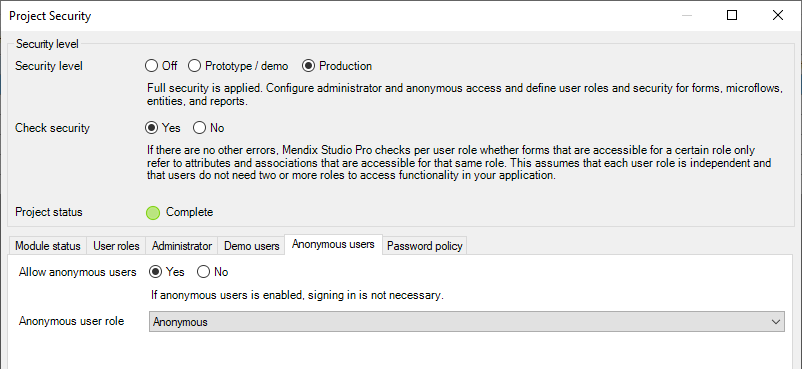
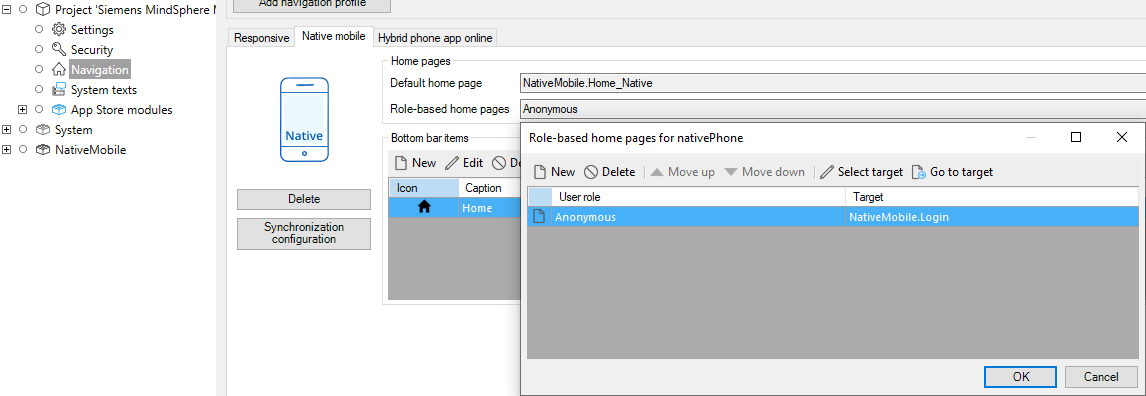
When the application starts it will provide the Login page from the Login folder where the user can provide the tenant name they want to authenticate against. To get this to work, the Login page is registered as the default homepage for the Anonymous role.
Clicking the Sign in button calls the nanoflow ACT_Login which opens the browser so that the user can provide their credentials. After a successful login, the deep link handler of the SSO module will fetch the Insights Hub Mobile Token and will start the user session accordingly. At the end of the authentication process the app will be restarted and show the home page of the corresponding user role.
If something went wrong during the authentication process, the corresponding error code will be displayed on the Login page.
Industrial IoT APIs and Token Handling
If you have already developed a Web application for Insights Hub, you will be aware that you need to use the included Access Token action with your REST calls.

The good news for native mobile is: this do not change. You can use the same microflows for Web apps and native apps to fetch Industrial IoT APIs.
If you are new to Insights Hub app development please check out Developing Mendix Apps for Insights Hub to learn more about this topic.
To support mobile native applications, Insights Hub provides a special mobile token, which is called the Insights Hub Mobile Token. As a Mendix developer you luckily don't have to do much with this token as this has been dealt with in the Siemens Insights Hub Mobile Starter Application, but it is may be worthwhile to present some details to help you understand the impact on your application better.
Actually the Mobile Token is not only one token. It contains two tokens
- the Access Token, which you need to fetch the Industrial IoT APIs and which has an expiration time of half-an-hour
- the Refresh Token, which will be used to refresh the Access Token when this expires. The refresh token itself is valid for 12 hours. After this time the user must sign into the application again to acquire a new token.
As tokens can expire, there are some events in the lifecycle of a mobile app which need to be considered. For each event, the tokens have to be checked and one of the following three things will happen:
- The token is still valid and nothing has to be done.
- The access token, which is only valid for half an hour, is no longer valid but the refresh token is still valid. In this case refreshing your access token is sufficient.
- Both the access token and the refresh token have expired. In this case the user will be logged out and has to sign in again.
As you need a valid Industrial IoT token to call Industrial IoT APIs, it is very important that these checks are done before you call a flow to access a Industrial IoT API. The Siemens Insights Hub Mobile Starter Application helps you to ensure this by taking care of the following events:
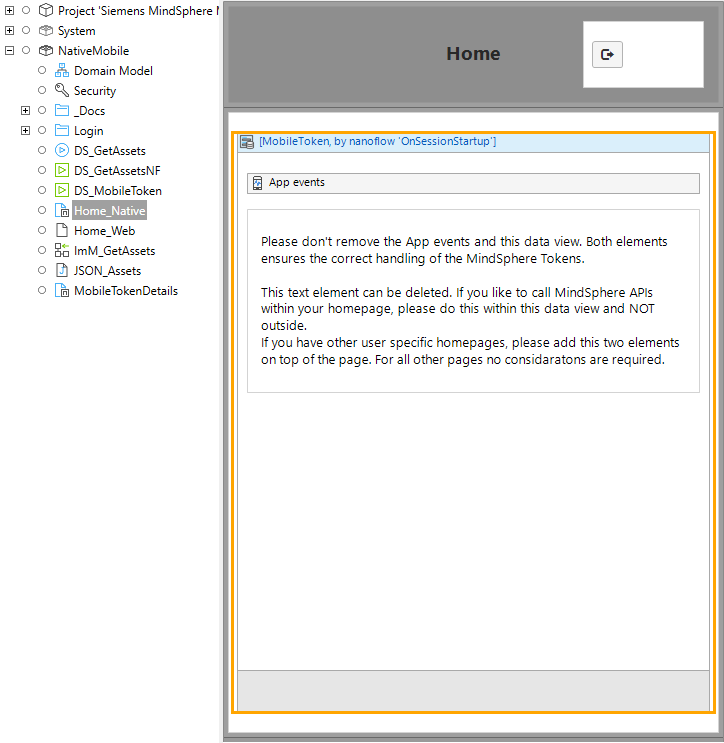
-
Application startup: The standard mobile homepage of the Native Mobile Application already has a Data view calling the nanoflow OnSessionStartup. OnSessionStartup will take care of the checks mentioned above.
-
Application resume: an App events element is placed within the provided Data view which causes the On resume event to call the nanoflow
MindSphereSingleSignOn.OnResumewhich does the checks mentioned above.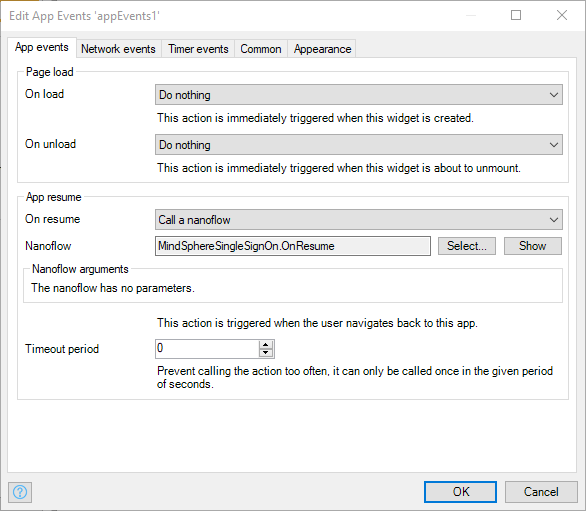
-
Application comes online: The same as on application resume but now the On online event of the App events will call the
OnResumenanoflow. -
Periodically your token needs to be checked while your app is running. Therefore the
MindSphereSingleSignOn.OnRefreshnanoflow is configured to be called every minute.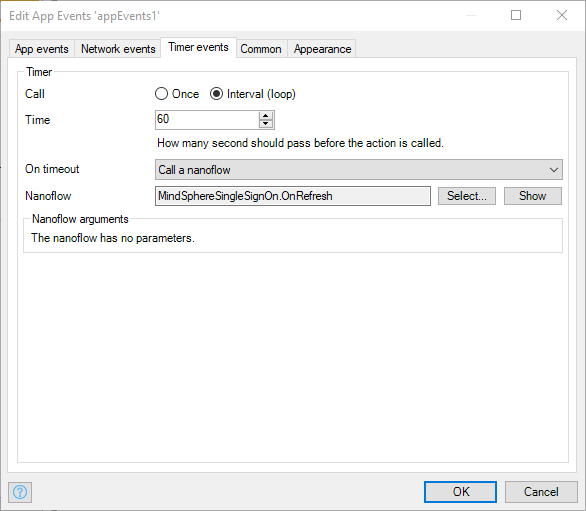
Info
You will want to change the home page to fit with the rest of your app. Please do this, but do not delete the initially provided Data view and App events.
Additional User Role Home Pages
If you want to create new home pages for different user roles, please ensure that they also include the data view with the OnSessionStartup nanoflow and the AppEvents as provided in the default mobile home page. This ensures that the token handling also works properly for this user role.
Except where otherwise noted, content on this site is licensed under the Development License Agreement.