Develop, Deploy, Register and Release an application
This tutorial provides information on application lifecycle. It provides information on creating an application using Java SDK and Web Components, uploading an application to Cloud Foundry, registering it on Developer Cockpit and handing it over to Operator Cockpit.
Application Development
Developing Angular Application with Web Components
Web Components are ready-to-use building blocks for use in custom applications. They can easily be integrated into individual development code and customized to accelerate the application development process.
Prerequisites
- Nodejs
- Angular CLI installed globally (npm install-g @angular/cli)
- Angular application
Procedure
-
Integrate Web Components into the application by adding below script in
index.html.<script id="mdsp-webcomponents-loader" type="text/javascript" src="https://static.{region}.{mindsphere-domain}/webcomponents/ v1/index.js"></script>After loading the source, Web Components can be integrated into web application by using the respective selectors.
-
Use the Web Components by adding the element selectors. For example, the Asset View Web Component selector can be used to display assets as a List.
<mdsp-asset-view></mdsp-asset-view>
Similarly, there are several Web Components available to integrate Angular UI. For more information refer Components and References. -
Generate the artifact for the UI application.
Info
Basic Web Components use the Industrial IoT APIs to display or handle data and will not call the APIs of Java backend defined in next section.
Developing Java Backend application with Industrial IoT SDK
Prerequisites
- Java 8
- Gradle or Maven as a build tool
- Java web application
-
Environment variable
HOST_ENVIRONMENTis set to current region. When hosting an application in Cloud Foundry, the variable must be added in themanifestfile:env: HOST_ENVIRONMENT: eu1
If not specified, HOST_ENVIRONMENT defaults to eu1.
Service credentials are of two types:
- Application Credentials
- Tenant Credentials
For application development, a developer can select between Application Credentials, Tenant Credentials or User Token.
For more information on how to procure the application credentials refer Application Credentials, and to set environment variables refer Environment variables.
For more information on how to procure the tenant credentials refer Tenant Specific Credentials, and to set environment variables refer Environment variables.
Proxy
If you work behind a company proxy, you have to set the corresponding system properties for gradle, for example, via environment variable JAVA_TOOL_OPTIONS. You also have to configure the proxies for Maven. A sample configuration is given below:
Sample Configuration for Maven
Copy the following configuration for Maven into the ~/.m2/settings.xml file:
<settings>
  <proxies>
      <proxy>
        <id>http_proxy</id>
        <active>true</active>
        <protocol>http</protocol>
        <username>proxyuser</username>
        <password>proxypass</password>
        <host>{yourProxyIP}</host>
        <port>{yourProxyPort}</port>
        <nonProxyHosts>local.net|some.host.com</nonProxyHosts>
      </proxy>
      <proxy>
        <id>https_proxy</id>
        <active>true</active>
        <protocol>https</protocol>
        <username>proxyuser</username>
        <password>proxypass</password>
        <host>{yourProxyIP}</host>
        <port>{yourProxyPort}</port>
        <nonProxyHosts>local.net|some.host.com</nonProxyHosts>
      </proxy>
  </proxies>
</settings>
Adding Industrial IoT SDK as application dependencies
-
Download the Industrial IoT SDK for Java from the Siemens Industry Online Support (SIOS) Portal. The
jarandpomfiles of the core module and the service modules have the following structure:com\siemens\mindsphere\mindsphere-sdk-java-core\{x.y.z}\mindsphere-sdk-java-core-{x.y.z}.jar com\siemens\mindsphere\mindsphere-sdk-java-core\{x.y.z}\mindsphere-sdk-java-core-javadoc.jar com\siemens\mindsphere\mindsphere-sdk-java-core\{x.y.z}\mindsphere-sdk-java-core.pomcom\siemens\mindsphere\{service_name}-sdk\{x.y.z}\{service_name}-sdk-{x.y.z}.jar com\siemens\mindsphere\{service_name}-sdk\{x.y.z}\{service_name}-sdk-{x.y.z}-javadoc.jar com\siemens\mindsphere\{service_name}-sdk\{x.y.z}\{service_name}-sdk-{x.y.z}.pomNote
{x.y.z}is the version number of the Industrial IoT Core SDK for Java (e.g.2.0.0).The file{service_name}-sdk-{x.y.z}.pomis required for downloading the transitive dependencies of the Industrial IoT Core SDK for Java.{x.y}is the version number of the API Specification (e.g.3.0). The file{service_name}-sdk-{x.y}.pomis required for downloading the transitive dependencies of the Industrial IoT Service SDK for Java.
-
Create a folder
Repoto be marked as local Maven repository and copy the SDK artifacts to it.
Info
As SDKs are not available in maven repository, it is required to declare a local folder as maven repository and copy the SDK artifacts to it.
=== "Core Module"
    ``` header
    $PATH\com\siemens\mindsphere\mindsphere-sdk-java-core\{x.y.z}\mindsphere-sdk-java-core-{x.y.z}.jar
    $PATH\com\siemens\mindsphere\mindsphere-sdk-java-core\{x.y.z}\mindsphere-sdk-java-core-javadoc.jar
    $PATH\com\siemens\mindsphere\mindsphere-sdk-java-core\{x.y.z}\mindsphere-sdk-java-core.pom
    ```

=== "Service Modules"
    ``` header
    $PATH\com\siemens\mindsphere\{service_name}-sdk\{x.y.z}\{service_name}-sdk-{x.y.z}.jar
    $PATH\com\siemens\mindsphere\{service_name}-sdk\{x.y.z}\{service_name}-sdk-{x.y.z}-javadoc.jar
    $PATH\com\siemens\mindsphere\{service_name}-sdk\{x.y.z}\{service_name}-sdk-{x.y.z}.pom
    ```
-
Register the repository and include dependencies in the build config file of your project.
<!-- Modify the following sections of the pom.xml file -->
<!-- 1. Register the repository in the repositories section -->
<repositories>
      <repository>
          <id>maven-repository</id>
          <url>file:///{absolute_path_of_the_repository_folder}</url>
      </repository>
  </repositories>

<!-- 2. Add Core dependency in the dependencies section (optional) -->
<dependency>
    <groupId>com.siemens.mindsphere</groupId>
    <artifactId>mindsphere-sdk-java-core</artifactId>
    <version>{x.y.z}</version>
</dependency>

<!-- 3. Add Service dependency in the dependencies section -->
<dependency>
    <groupId>com.siemens.mindsphere</groupId>
    <artifactId>{service_name}-sdk</artifactId>
    <version>{x.y.z}</version>
</dependency>
// Modify the following sections of the build.gradle file // 1. Register the repository in the repositories section repositories { maven { url file('{Absolute_path_of_the_created_repository_folder}') } mavenLocal() mavenCentral() } // 2. Add Core dependency in the dependencies section (optional) compile 'com.siemens.mindsphere:mindsphere-sdk-java-core:{x.y.z}' // 3. Add Service dependency in the dependencies section compile 'com.siemens.mindsphere:{service_name}-sdk:{x.y.z}'
3. Generate the artifact for the application.
Code Sample:
For example, use the ListAssetsRequest model to list the assets.
// Construct the AssetsClient object
AssetsClient assetClient = AssetsClient.builder().build();

ListAssetsRequest requestObject = new ListAssetsRequest();
requestObject.setPage(<page>);
requestObject.setSize(<size>);

AssetListResource assets = null;
try{
    assets = assetClient.listAssets(requestObject);
} catch (MindsphereException e) {
    // Exception handling
}
Configuring the manifest file
Defining random routes and explicit routes
Cloud Foundry provides multiple ways for defining a route for applications. You can either use the CLI or the routes attribute in the Manifest to define the route for your application. The preferred way for defining routes is using random routes that are generated automatically from the application name.
Attention
The host, domain or route attributes in the manifest file are deprecated. Only routes or random-route is supported.
For example, below is the manifest file to configure UI application (frontenddemoapplication) and Backend application (backenddemoapplication) :
---
applications:
- name: frontenddemoapplication
  instances: 1
  path: ./DemoApp-UI/dist/
  memory: 1GB
  buildpack: staticfile_buildpack
  disk_quota: 1GB
  random-route: true
- name: backenddemoapplication
  instances: 1
  memory: 1GB
  path: ./DemoApp/demo-app-1.0.0-SNAPSHOT.jar
  buildpack: java_buildpack
  disk_quota: 1GB
  random-route: true

# To use Application Specific Service Credentials, uncomment below variables and add corresponding values
#MDSP_KEY_STORE_CLIENT_ID=
#MDSP_KEY_STORE_CLIENT_SECRET=
#MDSP_OS_VM_APP_NAME=
#MDSP_OS_VM_APP_VERSION=
#MDSP_HOST_TENANT=
#MDSP_USER_TENANT=

# To use Tenant Specific Service Credentials, uncomment below variables and add corresponding values
#MINDSPHERE_CLIENT_ID=
#MINDSPHERE_CLIENT_SECRET=
#MINDSPHERE_TENANT=
The generated routes are used to configure the components in Developer Cockpit.
Each component registration requires the following:
- a name, which must match the Cloud Foundry application name and
- a Cloud Foundry URL, which is the route.
Directory Structure
It is recommended to use a directory structure in which each application resides in a sub-directory. You can use the path attribute to point to the correct directory for each application. The example route configuration is shown below:
├───DemoApp
│   └── build
│      └── libs
│            └── demo-app-1.0.0-SNAPSHOT.jar
├───DemoApp-UI
│   └── dist
└───manifest.yml
Deploying and Registering an application
Prerequisites
The following prerequisites must be fulfilled when deploying applications to Cloud Foundry and Insights Hub:
- Insights Hub user account on a developer environment (tenant).
If you don't have one, contact your tenant admin. For instructions, they may refer to Providing Access for New Users. - Cloud Foundry Command Line Interface (CF CLI)
Download the latest version from https://github.com/cloudfoundry/cli and follow the installation instructions. - A Cloud Foundry role which allows to push applications, e.g.
SpaceDeveloper. - A Insights Hub developer role, either
mdsp:core:Developerormdsp:core:DeveloperAdmin.
Deploying the application in Cloud Foundry
- Copy the application artifacts into a folder. Prepare the manifest.yml file and add it to the created folder.
-
Configure the proxy settings, if necessary.
Click here for detailed information on proxy settings
If you are in a company network behind a proxy, you may have to set the proxies to reach the Cloud Foundry endpoints. Contact your administrator, if you face any timeouts or connectivity problems.
Set the proxies for the Cloud Foundry CLI as shown below:
  set http_proxy=http://PROXY_IP:PROXY_PORT
  set https_proxy=http://PROXY_IP:PROXY_PORT
export http_proxy=http://PROXY_IP:PROXY_PORT export https_proxy=http://PROXY_IP:PROXY_PORT -
Log in to CF using CF CLI. Enter
cf login -a https://api.cf.{region}.{mindsphere-domain} --sso. - Open the URL printed by the CLI and log in using your WebKey credentials to get a One Time Code.
- Enter the One Time Code in the CLI.
-
Select your Cloud Foundry org and space using the following command:
cf target -o {org_name} -s {space_name} -
Push the application to your Cloud Foundry space using the following command:
cf push
The UI and Backend application will be uploaded as two separate components.
- Verify if the applications have been uploaded to your Cloud Foundry space using the following command:
cf apps
Registering an Application in Developer Cockpit
Components
An application on {{ whitelabel.IOTtoolName }} may consist of multiple Cloud Foundry apps with multiple endpoints. For clear distinction, Cloud Foundry apps are referred to as component.
Info
Adhere to the Restrictions mentioned in Gateway when making requests to either own registered applications or Industrial IoT APIs.
Follow these steps to register the application in Developer Cockpit:
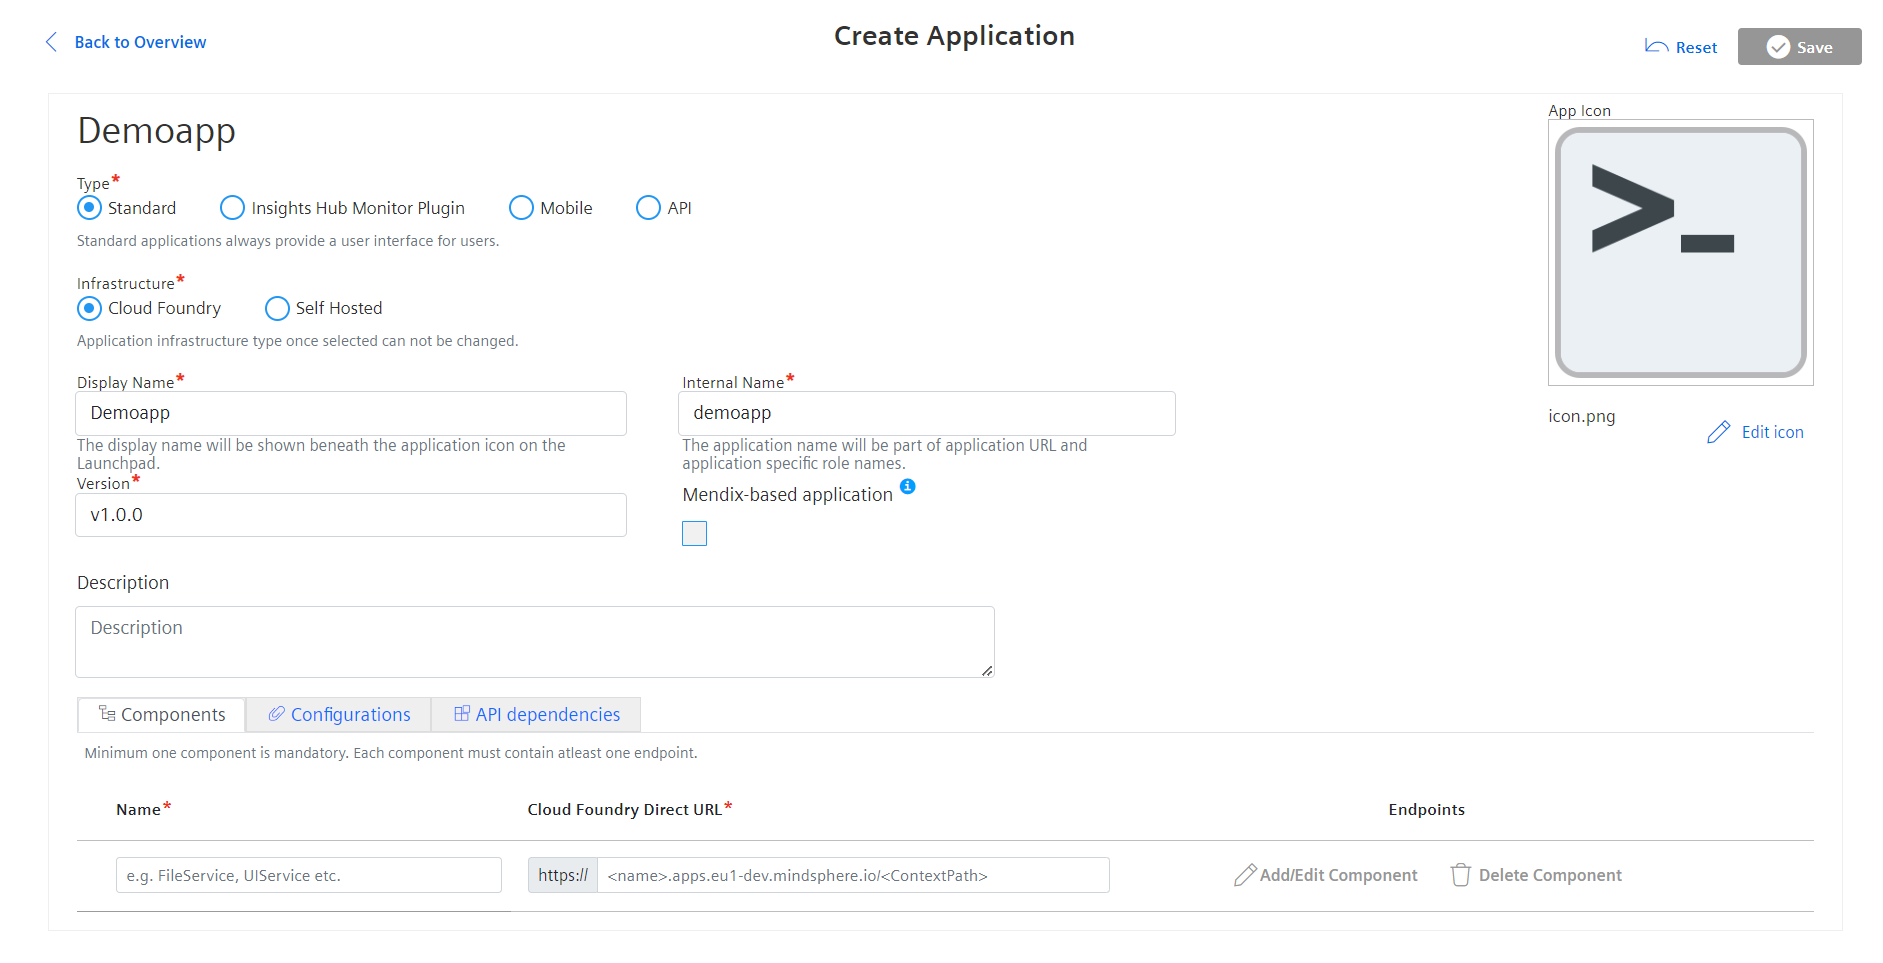
- Open Developer Cockpit from Launchpad and select the Dashboard tab.
- Click on Create new application.
- Select Type as Standard and Infrastructure as Cloud Foundry.
-
Enter an arbitrary Display Name and an Internal Name which will be part of the application URL. The Internal Name cannot be changed after initial creation.
-
Set the content-security-policy according to the examples:
default-src 'self' *.eu1.mindsphere.io; style-src * 'unsafe-inline'; script-src 'self' 'unsafe-inline' *.eu1.mindsphere.io; img-src * data:;
=== "China 1"
    ```header
    default-src 'self' static.cn1.mindsphere-in.cn *.amap.com *.is.autonavi.com; style-src * 'unsafe-inline'; script-src 'self' 'unsafe-inline' 'unsafe-eval' static.cn1.mindsphere-in.cn *.amap.com *.is.autonavi.com; worker-src blob:; img-src * data:;
    ```
6.Enter the version number and upload an icon for the application. 7.Enter the component name and Cloud Foundry URL for frontend component and backend component.
!!! note
    While registering endpoints for components, it is ideal to configure specific path for Backend component and generic path for UI component.

Component names must match the names of the Cloud Foundry applications in the `manifest.yml`.
Enter the Cloud Foundry URL of your application. Use `cf app {app_name}` to get the URL for your deployed application.
8.Enter the endpoints for frontend and backend components.
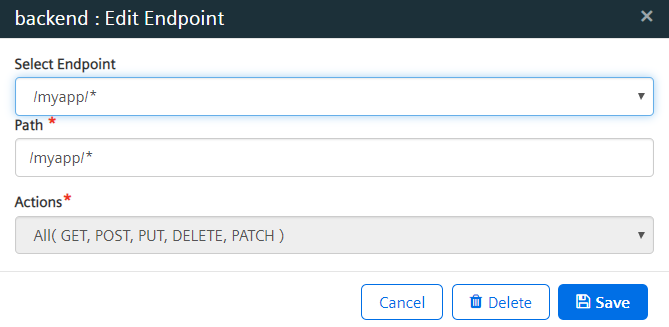
 <br/>
9.Click "Save".
10.Configure the application roles and scopes. For more information, refer to Configure the Application Roles and Scopes for detailed information on assigning roles and scopes to the application.
11.The application is in the In-Development state and is ready for registration in Industrial IoT Gateway. For more information, refer to Register the Application for detailed information on registering the application.
12.Assign the Application Roles to users. For more information, refer to Assign the Application Roles for detailed information.
The application is now available in user's Launchpad.
Prepare the Application for Release
Prerequisites
- The application fulfills the requirements to publish.
- You have the role
mdsp:core:DeveloperAdmin.
Preparations for Applications Hosted on Cloud Foundry
- Open the details view of the application on the Dashboard of Developer Cockpit.
- Click on "Manage Uploads".
- Upload a .zip archive with the application binaries and a
manifest.yml. -
Fill in the description.
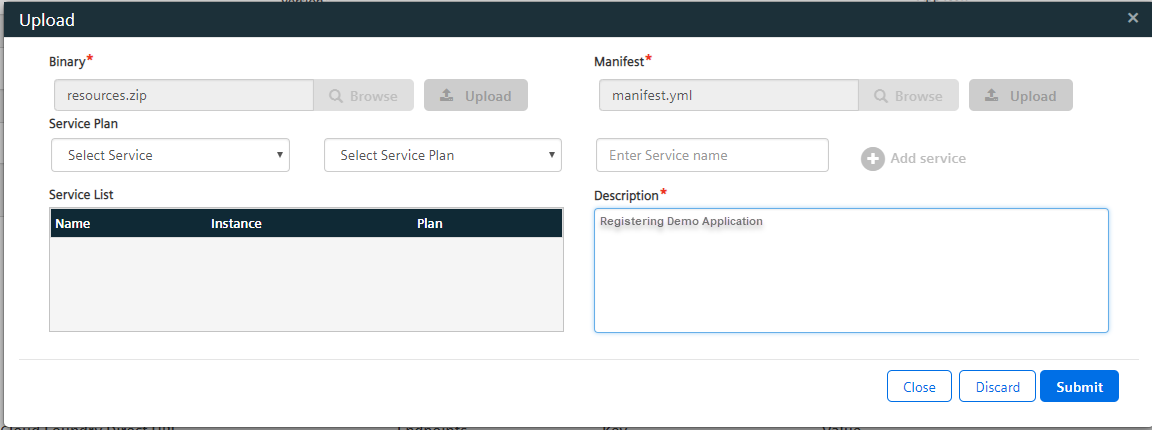
-
Click on "Submit".
The status of the application changes to READY-TO-UPLOAD.
Handover the Application to the Operator environment (Tenant)
- Open the details view of the application on the Dashboard of Developer Cockpit.
- Click on "Approve Upload".
- Enter the e-mail address of the substitute.
- Read and accept the IMPORTANT NOTICE information.
- Click Approve.
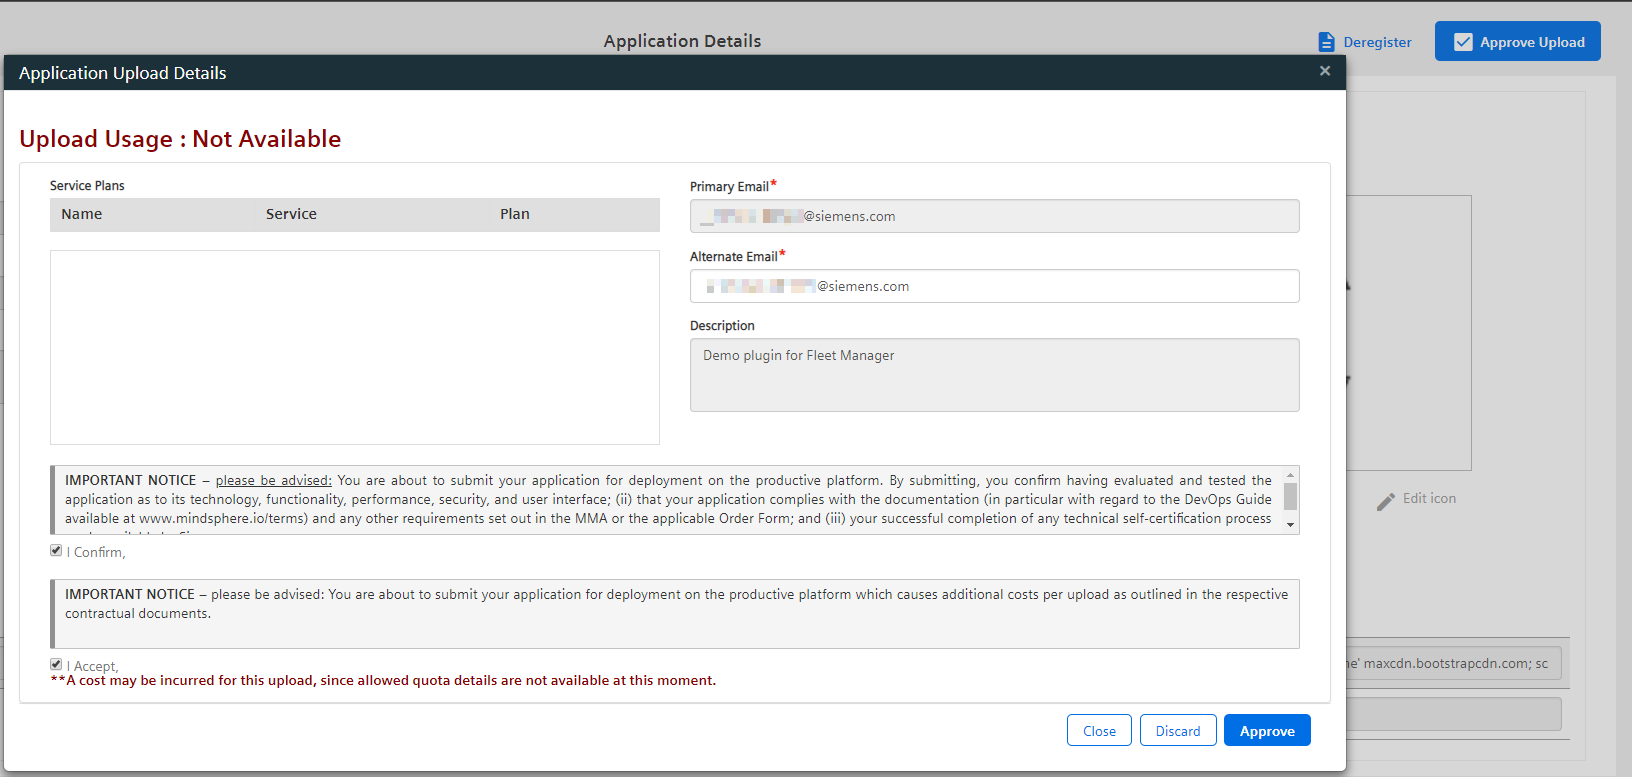
The status of the application changes to UPLOAD-IN-PROGRESS and it has been successfully submitted to the application repository. You will be notified once the application is ready for assignment. It may take upto 24hours.
Assign the Operator
- Open the detail view of the application in the Promoted Apps of Developer Cockpit.
- Enter the operator details.
- Click "Add Assignment".
- Wait for the operator to accept the plugin.
- Click "Grant". The operator can now deploy and publish the application.
Except where otherwise noted, content on this site is licensed under the Development License Agreement.