Deploy and register Mendix Apps
This documentation is meant for developers who want to deploy, register and run a Mendix app on Insights Hub.
Code Blocks
Code blocks with line numbers provide an easy copy functionality. Use it by hovering the cursor over the code block and clicking on the copy icon at its top right.
Prerequisites
- A tenant including the Developer Cockpit
- A User with assigned developer role: either
mdsp:core:Developerormdsp:core:DeveloperAdmin- these are already granted on Insights Hub Start for Free tenants. - Mendix Studio Pro
The following are also required if you want to deploy and run the Mendix app on Cloud Foundry:
- Cloud Foundry Command Line Interface (CF CLI)
- A Cloud Foundry role which allows you to push apps, such as
SpaceDeveloper
Preparing the Mendix App for Insights Hub
Option A: Using the Insights Hub Starter App
Existing Apps
If you want to deploy an already existing app to Insights Hub, skip this step and jump to Integrating the Insights Hub Theme Pack and Modules.
Use the Insights Hub Starter App when developing a new Mendix app for Insights Hub. This contains all building blocks required for deploying and run apps on Insights Hub.
- Open the Mendix Studio Pro.
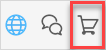
-
Click on the icon at the top-right of the menu bar to open the Mendix App Store.
-
Enter "Insights Hub Starter Application" and press enter.
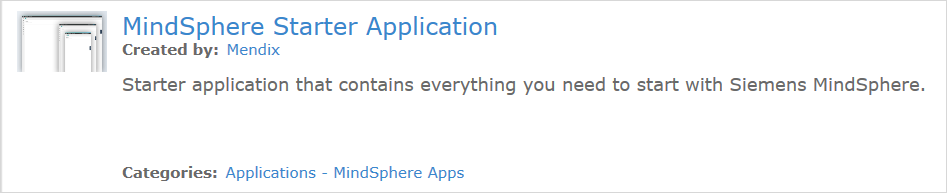
-
Select the Insights Hub Starter Application from the search results.
-
Click Download to create a new app project using this app.
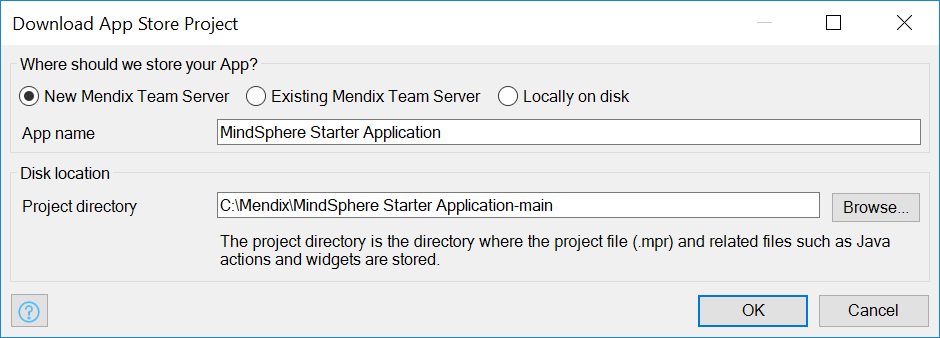
-
Select where to store the app and enter an app name and the project directory. Then click OK.
App name
If you want to keep your app name on Mendix and on Insights Hub consistent, use an app name that will be accepted by the Developer Cockpit.
Option B: Integrating the Insights Hub Theme Pack and Modules
Insights Hub Starter App
If you are using the Insights Hub Starter App, skip this step and jump to Configuring the Modules.
Mendix apps have to integrate the Insights Hub Theme Pack, the Single Sign-On module and the Insights Hub Bar Connector. Download these mandatory elements using following links to integrate them a posteriori into existing Mendix apps.
- Insights Hub Theme Pack in the Mendix App Store
This theme pack adjusts the styling of Mendix apps and includes a general patch to run Mendix applications on Insights Hub as well as changes to the index.html required for the Insights Hub modules. For detailed information about the theme pack, refer to the Mendix documentation. - Insights Hub Single Sign-On module in the Mendix App Store
This module enables Mendix apps to use Insights Hub Single Sign-On which allows logged in Insights Hub users to access the app without another login. In addition, it enables developers to test their app locally. For detailed information about the module, refer to the Mendix documentation. -
Insights Hub Bar module in the Mendix App Store
This module integrates the OS Bar, which is mandatory for every Insights Hub app. It connects all Insights Hub apps on a UI level, displays app information as shown below, routes back to the Launchpad, and logs the user out of Insights Hub. For detailed information about the module, refer to the Mendix documentation.
Insights Hub Bar download location
The Insights Hub Bar will be downloaded by default from EU1. If you are working on EU2 or any other platform, you can change this in the Insights Hub Bar module or just use the Insights Hub Bar from EU1. The bar provided on EU1 is compatible to all other target platforms.
Configuring the Modules
Configuring the Insights Hub Single Sign-On
-
Double click on the
CockpitApplicationNameconstant.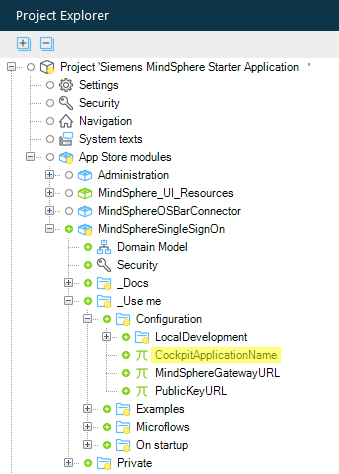
-
Replace the Default value
Change mein the Value section by the name you will use for configuring your app using the Developer Cockpit.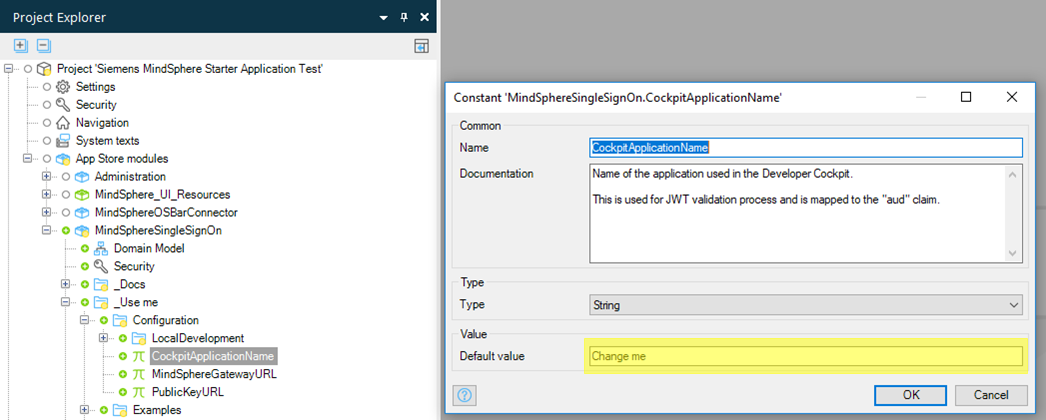
Info
Do not change the
Namefield at the top of this dialogue.The following constraints apply for app names when registering apps in Insights Hub:
-
If your tenant is not in region Europe 1 e.g. Insights Hub on Azure, also adjust the
MindSphereGatewayURLand thePublicKeyURLconstants.- The
MindSphereGatewayURLspecifies the base URL for all requests to Industrial IoT APIs. - The
PublicKeyURLdefines the location of the public key, which is used for token validation during the login process.
- The
Click here if you don't use the Insights Hub starter or example app!
The RegisterSingleSignOn must be configured as After startup microflow if you don't use the Insights Hub starter or example app:
- Open the project settings by double-clicking on the Project > Settings of the Project Explorer.
- Switch to the Runtime tab.
- Select the
RegisterSingleSignOnas the After startup microflow. Alternatively, add it to your existing After startup microflow.
Configuring the App Information (optional)
The app information is displayed if the user clicks on the app name in the OS Bar. Configure the app information by following the instructions below. 
- Double-click the string constant
Configof the MindSphereOSBarConfig module. -
Enter the app information as a JSON object into the Default value field:
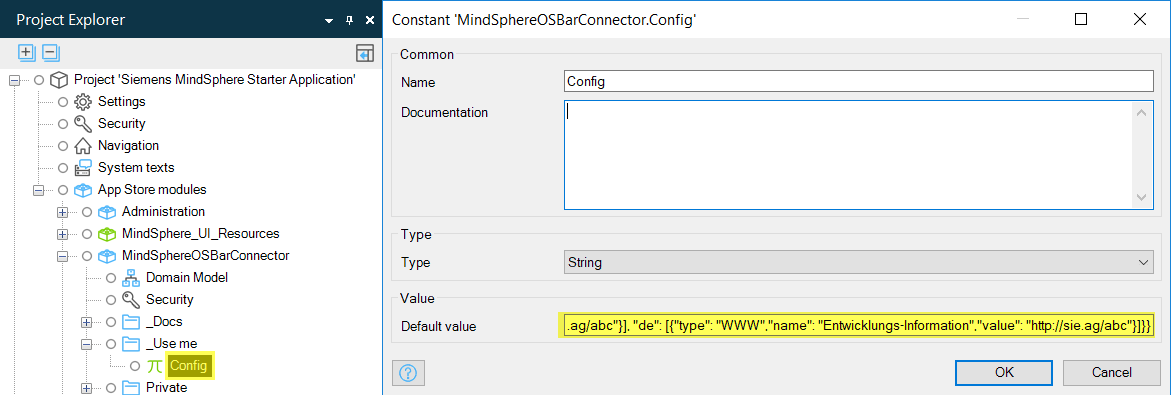
For a description of the available configuration parameters and a sample JSON object, refer to the OS Bar.
Deploying the Mendix App
A Mendix based application for Insights Hub can be deployed to Mendix or to Insights Hub. Deploying to Mendix is quite easy and is the preferred option as you can then use the Auto Registration process. Note that the Auto Registration process is only available on region Europe 1.
Option A: Deploy with Mendix Studio to the Mendix Cloud
Click the Run Button in Mendix Studio Pro.

Once your app is deployed, you can automatically register the app in your Insights Hub tenant.
Option B: Creating a Mendix Deployment Package and deploy it to Cloud Foundry
Commit Changes
If you are working on a Project hosted on the Mendix TeamServer, you will need to commit your changes first before creating the deployment package. For more information refer Developing Mendix Apps for Insights Hub.
- Open the app in the Mendix Studio Pro.
-
Select Project > Create Deployment Package....
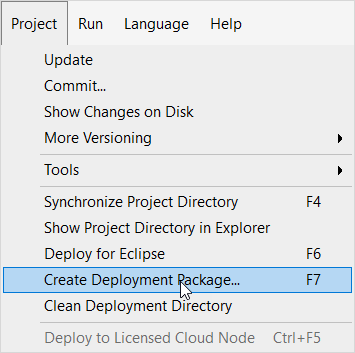
-
Select the desired Development line and Revision and set the version number.
- (Optional) Add a description and adjust the path for the deployment package if desired. By default, the deployment package is created in the releases folder of your project.
- Click OK.
The location of the new deployment package will be displayed in an information window.
Deploying the App to Cloud Foundry via CF CLI
- Open a command line interface (CLI) inside the folder with the deployment package.
-
Select your Cloud Foundry org and space using the following command:
cf target -o {org_name} -s {space_name}No Cloud Foundry Orgs displayed
If you do not see any Cloud Foundry orgs, you need to be added to your org. Refer to the How Tos for Cloud Foundry.
-
Create a PostgreSQL Service instance. Note that it takes some time until the instance is up and running.
``` bash tab="Template" cf create-service {service_plan} {instance_name}
``` bash tab="Example"
cf create-service postgresql10 postgresql-xs my-postgreSQL
Attention
Each mendix app needs its own database. Do not bind more than one mendix app to a database. Create a new database instance instead.
Service plans
With the command
cf marketplaceyou can checkout which version of the postgres service is available e.g. postgresql94 or postgresql10 -
Check if your service instance is running using the following command:
cf services -
Create a
manifest.ymlfile inside the folder with the deployment package with at least the following content:```yml tab="Template" applications: - name: {app_name} disk_quota: {required_quota} memory: {required_memory} services: - {instance_name}
```yml tab="Example"
applications:
- name: my-app
  disk_quota: 512M
  memory: 512M
  services:
  - my-postgreSQL
Info
Mendix apps require at least
512Mof memory and disk quota.
For more information on the configuration of manifest files, refer to the documentation on Manifest Files.Attention
Each mendix app needs its own database. Do not bind more than one mendix app to a database instance. Create a new database instance instead.
-
Push the application to your Cloud Foundry space using:
cf push -p "{deployment_package_name}"
Configuring the Mendix App in Insights Hub
Option A: Use the Auto Registration process - recommended if your app is deployed to the Mendix Cloud
To start the Auto Registration process, click the View Button in Mendix Studio Pro once your app is deployed to the Mendix Cloud. Your default browser will open and your app will start the process.
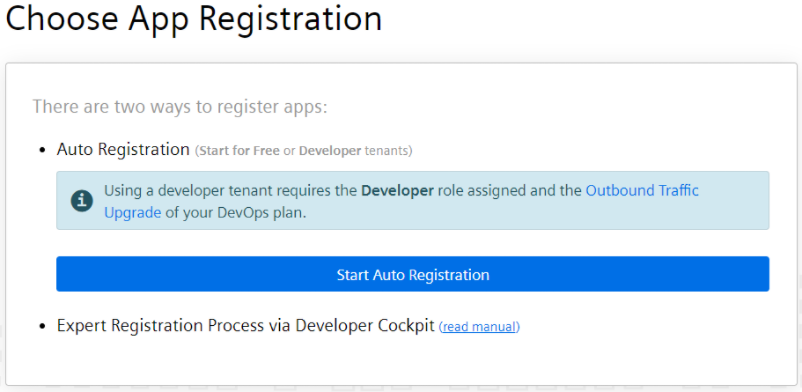
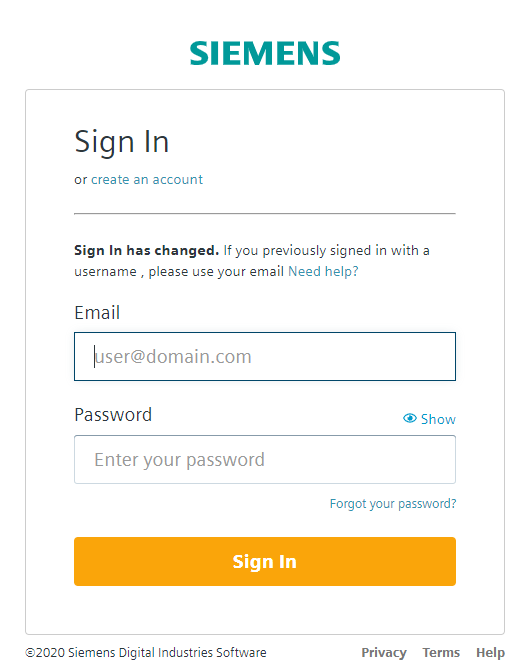
Click the Start Auto Registration button. The process now tries to figure out on which tenant your app should be registered. Therefore you have to log in:
Multiple Tenants
If you have more then one tenant on Insights Hub, you will get a list of tenants. Choose the tenant where you want to register your app.
If you have only one tenant on Insights Hub, the process will automatically select this tenant for you.
Specify a name, internal name, and optionally, a description in order to register your app.

If you are on a Developer tenant, you also have to select at least one application role which will be assigned to your account automatically.
On a Insights Hub Start for Free tenant, the admin role will be assigned automatically to your account.
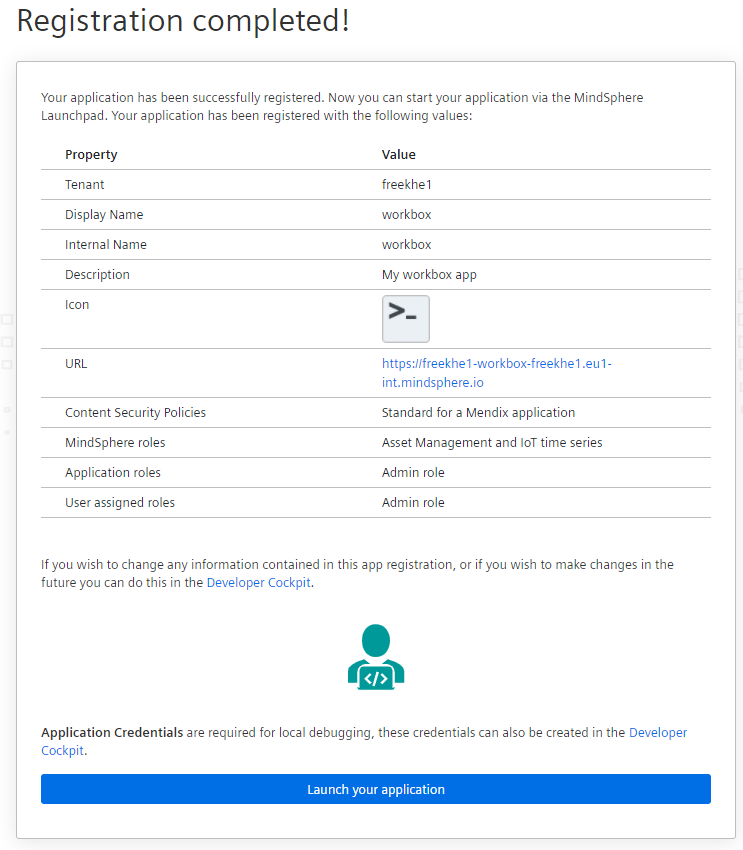
Click Register to start the registration process on your tenant. After a few seconds, a summary page is shown and you are able to navigate directly to your app.
Roles and Scopes
The Auto Registration process creates application roles and scopes for your app automatically.
If you are on a Insights Hub Start for Free tenant, additional Industrial IoT API roles are assigned and your user is granted admin access to your app.
If you are on a Developer tenant, no additional Industrial IoT API roles are assigned. The granted access to your app is shown in the registration summary page.
For further configuration of your registration, e.g. CSPs or additional roles, use the Developer Cockpit.
Versioning not supported via Auto Registration but can be done via Developer Cockpit
Within Developer Cockpit, it is possible to have multiple versions of your app, for example, versions with different roles & scopes or configuration. Note, that the deployment registered via the Auto Registration process is always mapped to the very same version created during the process. If you want to create additional versions of your app, you can do this by manually creating a new version within the Developer Cockpit.
Option B: Configuring the Mendix App in the Developer Cockpit
{!./howto/text-modules/upload-ms.txt!}
!!! hint "Internal Name"
The **Internal Name** must be equal to the `CockpitApplicationName` configured in the [Single Sign-On module](#configuring-the-mindsphere-single-sign-on).

{!./howto/text-modules/upload-ms.2.txt!}
!!! hint "Component Names"
    Component names must match the names of the Cloud Foundry applications in the `manifest.yml`. Otherwise, the automatic registration in the production system will fail.
-
Add an endpoint for your component and use
/**to match all of your application paths as shown below.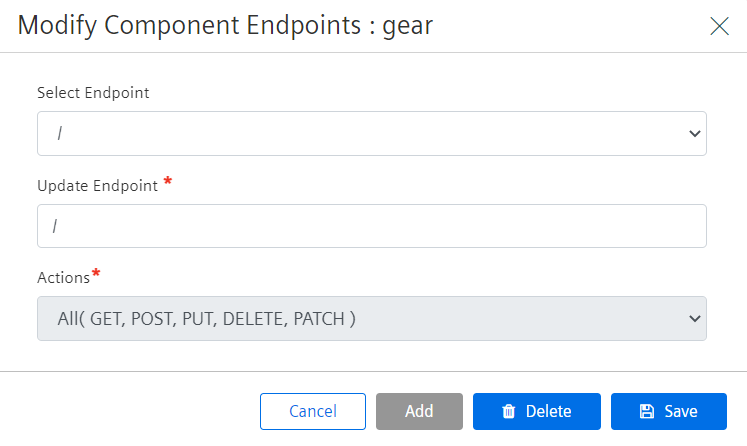
Info
For more details refer to Running a Cloud Foundry Application.
-
Enter the Cloud Foundry URL of your application.
- Use
cf app {app_name}to get the URL for your deployed application and prefix it withhttps://.
- Use
-
Set the following content security policy to ensure that the Insights Hub Bar and the Mendix Feedback widget (use at least version 7.0.6) are loaded correctly:
yml tab="Europe 1" default-src 'self' 'unsafe-inline' 'unsafe-eval' static.eu1.mindsphere.io feedback-static.mendix.com home.mendix.com; font-src 'self' static.eu1.mindsphere.io fonts.gstatic.com; script-src 'self' 'unsafe-inline' 'unsafe-eval' static.eu1.mindsphere.io feedback-static.mendix.com home.mendix.com; style-src 'self' 'unsafe-inline' static.eu1.mindsphere.io feedback-static.mendix.com home.mendix.com fonts.googleapis.com; img-src * data:; connect-src 'self' 'unsafe-inline' *;
!!! info
    These content security policy settings are needed to ensure that the Insights Hub Bar and the Mendix Feedback Widget are loaded correctly. You may need to set additional CSP settings if you make additional calls to other domains (for example, if you use Google maps from `maps.googleapi.com`).
4.Click Save.
You are redirected to the application details. Your application is in the In-Development state and is ready for registration.
Configuring the Mendix App Roles & Scopes
{!./howto/text-modules/roles-scopes.1.txt!}
-
Create an application scope and select which Insights Hub roles it is assigned to.
Info
The application scope must be named so that it can be mapped to a Mendix user role via case-insensitive comparison of the names. For detailed information refer to the roles and scopes information for developing Mendix apps.
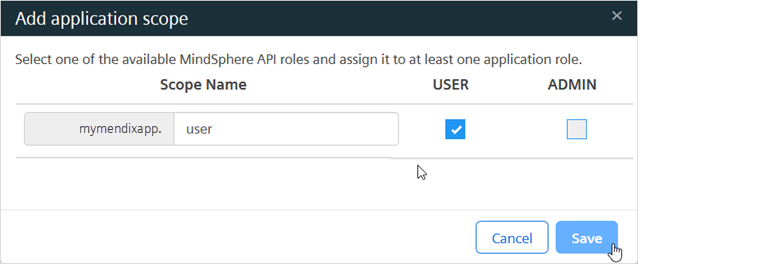 If you are using the starter app, create a user scope and an admin scope as shown below:
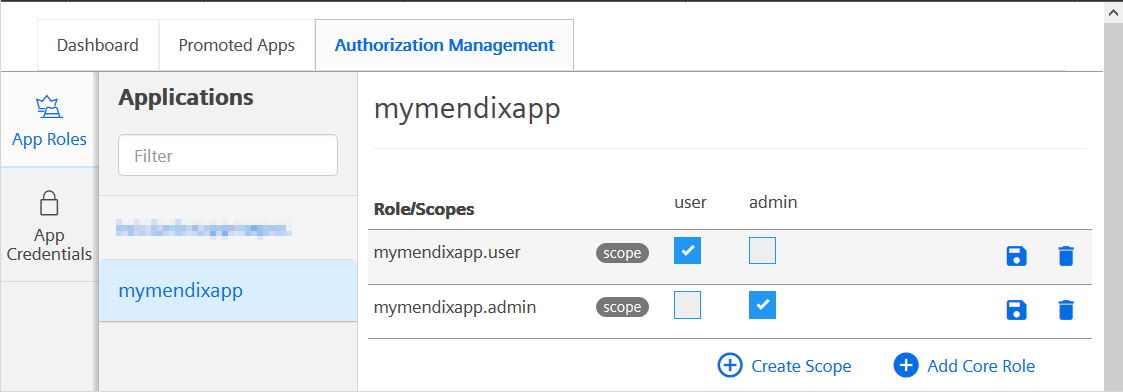
Registering the Mendix App
An application must be registered at the Industrial IoT Gateway to access it from the Launchpad. This enables the route from the tenant-specific Insights Hub URL to your internal Cloud Foundry application. The registration process follows a positive security concept, which requires every endpoint of the application to be explicitly registered.
- Switch to the Dashboard tab.
- Open the application details.
- Click on Register.
The applications are registered using the following scheme: {tenant_name}-{app_name}-{tenant_name}.{region}.mindsphere.io
For more information regarding the registration scheme, refer Gateway-URL-schemas
Assigning the Mendix App Roles
{!./howto/text-modules/app-roles.txt!}
Related Links
Except where otherwise noted, content on this site is licensed under the Development License Agreement.