Creating a new policy
Pre-requisites
For creating a policy, ensure that you have tenantadmin role assigned.
Creating a new policy
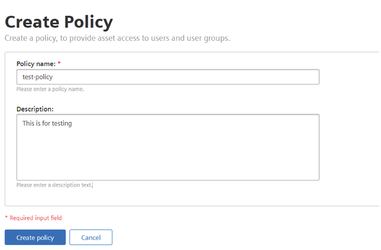
To create a policy, proceed with the following steps:
- In the "Settings" application, click "Policies" tab in the left navigation.
- Click "Create Policy".
- Enter the policy name and description.
- Click "Create policy".
Assigning users or user groups to the policy
To assign users or user group to the created policy, proceed with the following steps:
- In the "Policies" screen, select the policy for which you want to assign users or user groups.
- To add users, click "Add users" and to add user groups, click "Add user groups".
- In the "Edit assignment" window, select the users/user groups to be assigned to this policy and click "Next".
- Click "Save".
- To activate the policy, click
 .
.
The selected users/ user groups are successfully added to the policy.
Adding rules to the policy
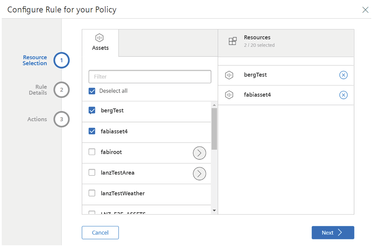
To add rules to the policy, proceed with the following steps:
- In the "Policies" screen, select the policy for which you want to add rule.
- Click "Add rule".
- In the "Resource selection" step, select Assets, IDL Folders or Resource groups and click "Next".
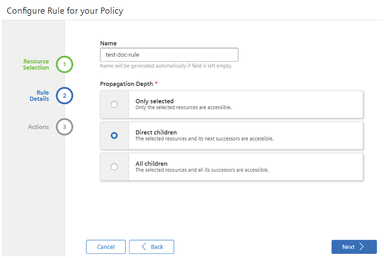
- In the "Rule Details" step, select the propagation depth and click "Next". The available options are: "Only selected", "Direct children" and "All children".
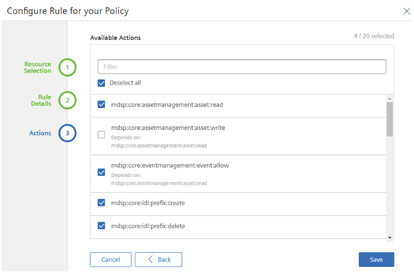
- In the "Actions" step, select the required actions that needs to be enabled for the assigned users/user groups.
- Click "Save".
The policy needs to be activated for it to be available for the assigned users/user groups with the configured rules. For steps to activate the policy, refer Activating or deactivating a policy.
It is possible to edit or delete the policy by clicking "Edit" and "Delete" button respectively.
For more information on policies, please refer to Resource Access Management.
Last update: January 22, 2024