Working with Devices
Adding Devices to an existing Organization
Prerequisites
- An Insights Hub user with Insights Hub Role
rsv2 serviceownerorrsv2 orguseris required. - An organization must already exist.
- The user must have the Remote Services role Organization Admin granted with access to this organization.
- There is at least one Site defined in the Organization.
- There is at least one Product defined in the Organization. By default, this can be the top level Product ALL.
Procedure
To add Devices to an organization, follow these steps:
- Log into tenant as one of the users mentioned above.
- Open the "Remote Services" app.
- From the "Home" screen, select the required organization from the "Organizations" drop-down list and from the "RS Roles" drop-down select the Organization Admin role.
- Click on the "Organization" icon. The Organization and Devices page opens where there is also a hierarchical view of the Nodes and Sites.
- Select the desired Site in the hierarchical view. The "Site Info" page is displayed.
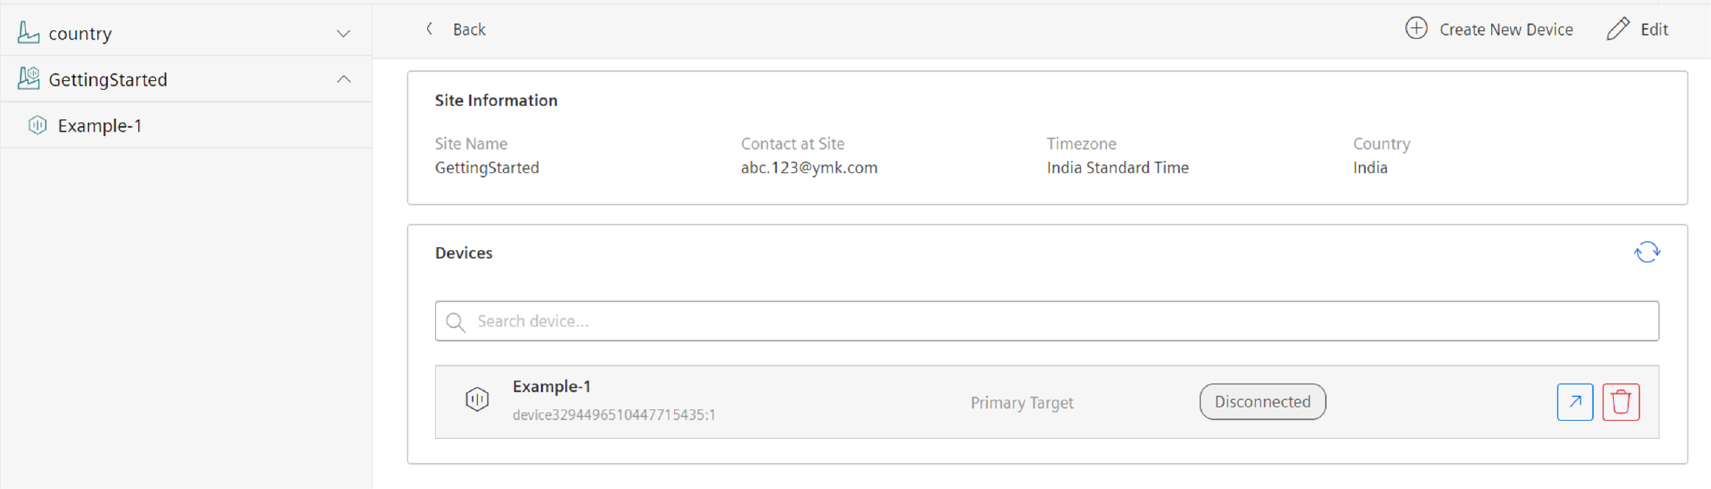
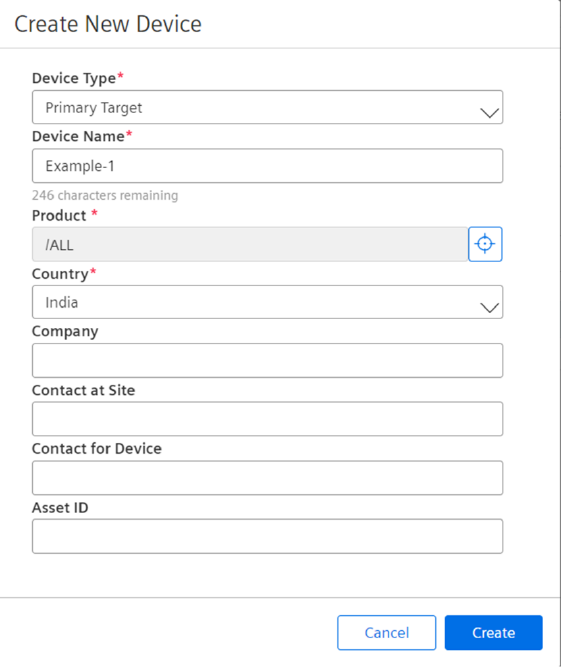
- Click "Create New Device". The "Create New Device" pop-up window is displayed.
- Select the "Device Type" from the drop-down, either "Primary Target" or "Gateway".
- Enter the "Device Name". Select the "Product" and "Country" from the drop-down.
- Enter the "Company" name and "Contact" details for the Device and Site.
- If the device is an Insights Hub Agent where the activation of Device Endpoint is controlled through Insights Hub Agent UI, enter the "Agent's AssetID" which can be read from the Insights Hub application "Asset Manager".
If Primary Devices is selected as the device type, then the new device with the entered details will be created. If Gateway was selected as Device Type, it is possible to add Secondary Devices that shall be reachable through this gateway. Follow the below steps:
- Select the "Gateway Device" in the hierarchy.
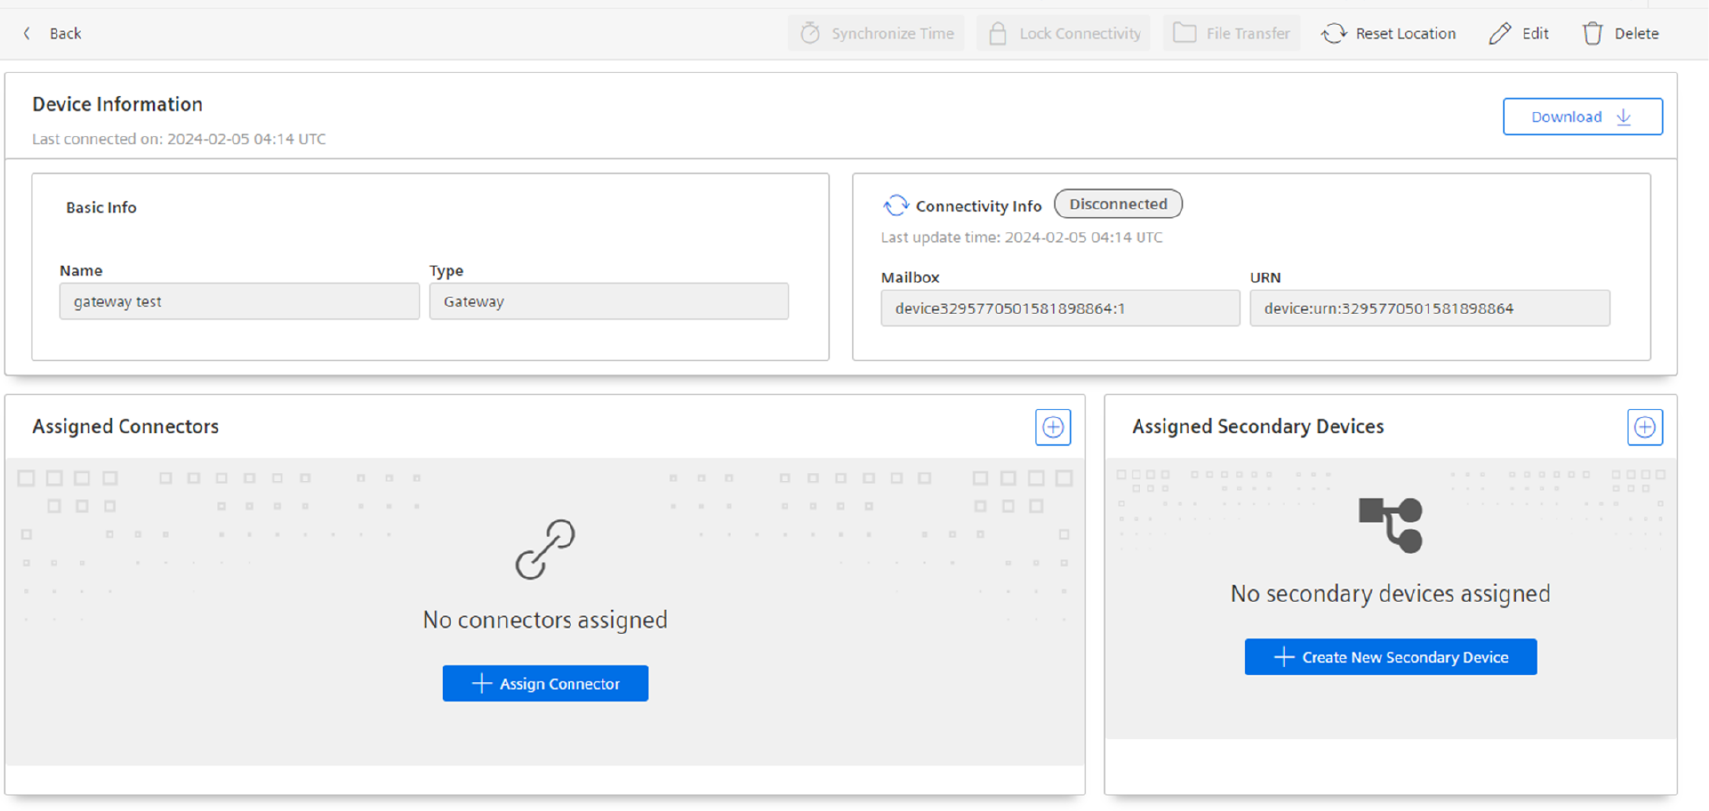
The "Device Information" screen is displayed. - Click the "Add" icon in the "Assigned Secondary Device" section. The "Create Secondary Device" screen is displayed.
- Enter the mandatory information.
The "IP Address/Hostname" is the Secondary Devices's IP address within the Gateway's network.
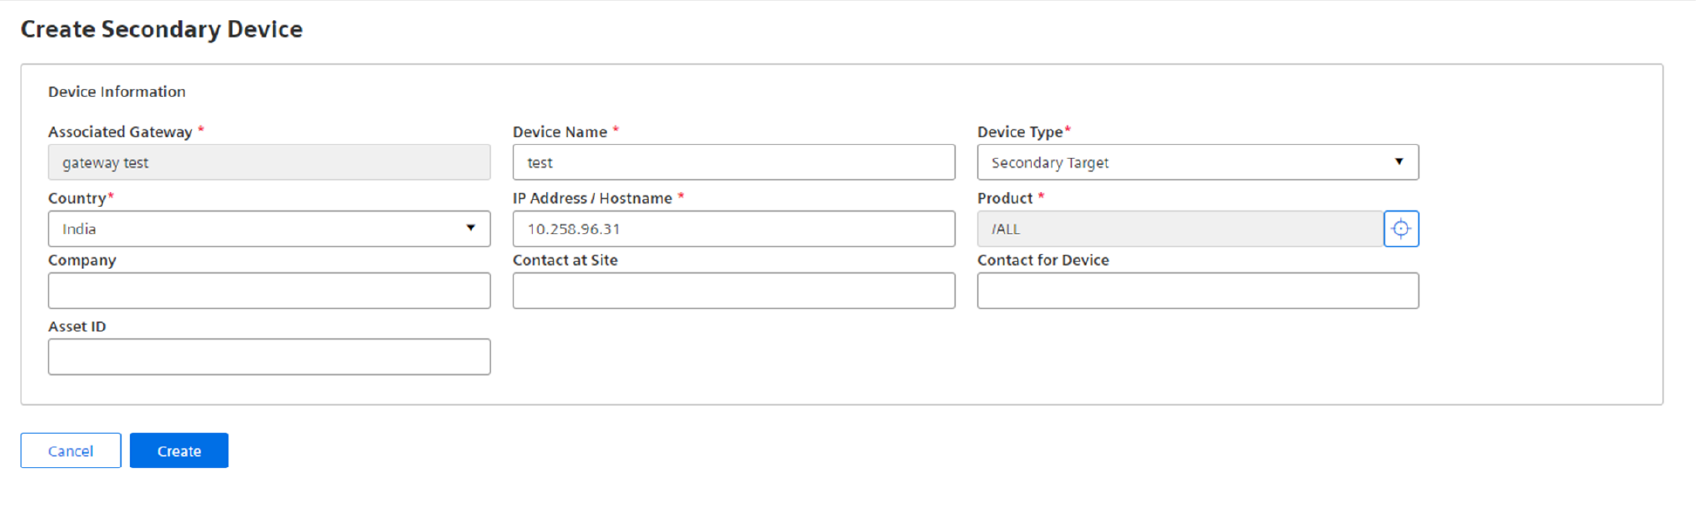
Alternatively, it is possible to use the hostname of the device, but only if the gateway is able to translate this hostname into an IP address. - Click "Create".
- The Secondary Device is now displayed in the "Assigned Devices" section, in the "Device Information" screen opens again.
Result
- The new device is now available in the organization and is visible in the Node/Site hierarchy under the selected site.
Download the Device Endpoint
Every device that shall be reachable through the Remote Services needs to have a Device Endpoint installed.
This Device Endpoint can be downloaded from through the Remote Services UI. The download package not only contains the executable of the endpoint but also a device specific authentication key which identifies the Device and authenticates it to communicate within the given tenant.
Prerequisites
- An Insights Hub user with Insights Hub Role
rsv2 serviceownerorrsv2 orguseris required. - An organization must already exist
- The Device must exists in the organization.
- The user must have the Remote Services role Organization Admin granted with access to this Organization, the Site and the Product of the Device.
- The user must log in from an IP address which is in the country that is given in his user details because per Terms-and-Conditions downloads are only allowed from countries which are not blacklisted as embargo countries.
Procedure
To download the Device Endpoint for the desired Device follow these steps:
- Log into tenant as one of the users mentioned above.
- Open the "Remote Services" app.
- From the "Home" screen select the desired organization from the "Organizations" drop-down list and from the "RS Roles" drop-down select the Organization Admin role.
- Click on the "Organization" icon.
- The Organization and Devices page is displayed, where there is also a hierarchical view of the Nodes and Sites.
- In the hierarchical view, select the required Site.
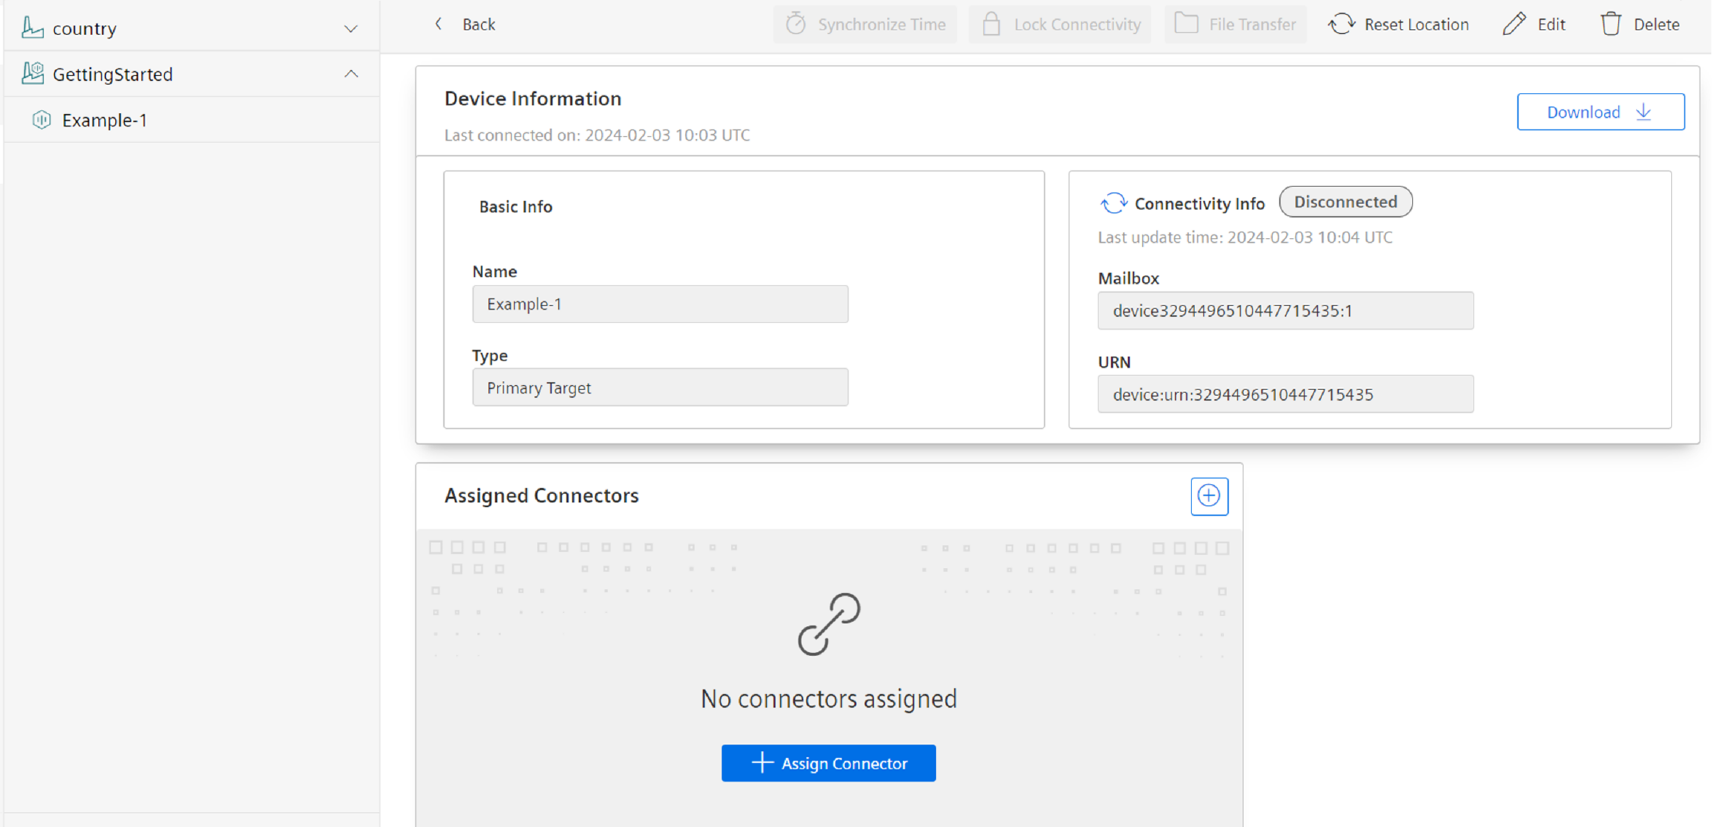
- In the hierarchical view, select the Device and click the "Download" button.
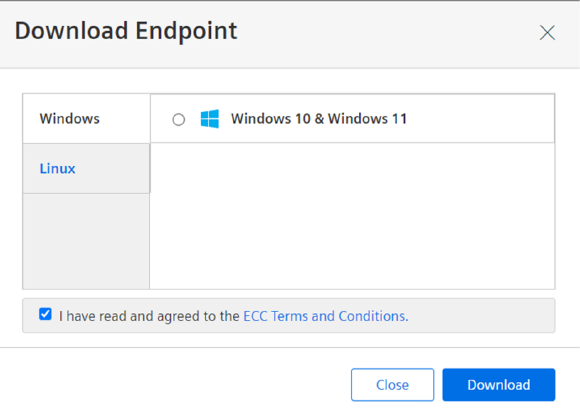
- The "Download Endpoint" dialog is displayed. Read "ECC Terms and Conditions" and confirm the acceptance.
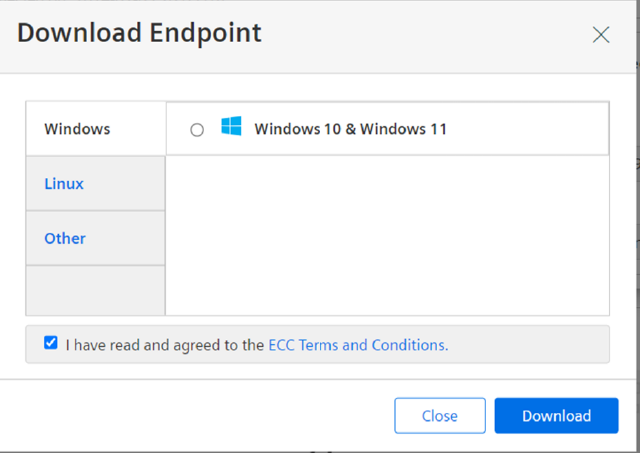
- Select the installation package that is applicable for your target operating system and click "Download".
Result
The required device endpoint is downloaded.
Installing and starting the Device Endpoint
In order to make a system A which resides in a Factory Network accessible to a system B in a Service Network, a Device Endpoint must be installed and executed on the system A.
The Linux versions require root privileges to execute the Device Endpoint.
Prerequisites
- The Device Endpoint must already downloaded as described in the chapter Download the device endpoint.
Procedure
- Copy the Device Endpoint archive package to the system that needs to be made accessible through the Device Endpoint.
- Extract the archive. A folder structure will be created.
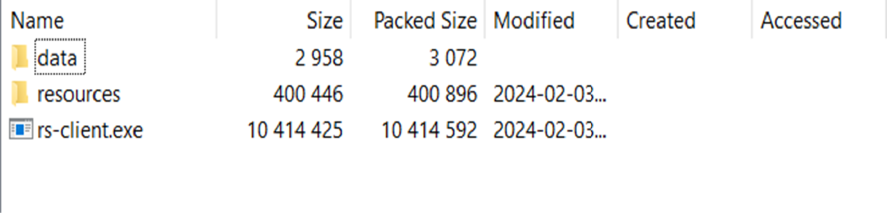
The name of the executable file depends on the target operating system, rs-client.exe - Windows or rs-client - Linux. - Start the executable file either manually or by using the autostart mechanisms of the target operating system.
Result
The Device Endpoint is connected to the Remote Services. The Device is shown as Connected in the "Device Information" screen.
Download the Service Endpoint
Any user who wants to connect to Devices through Remote Services needs to have a single Service Endpoint installed on their system.
The network where this system resides is considered as the Service Network. The network where the Device is located is considerered as a Factory Network.
A typical use case would be a user's Engineering Tool (e.g. TIA Portal) on the laptop in the home office that is used to remotely configure a PLC in a Factory Network at a customer site.
This Service Endpoint acts as a proxy on the user's system through which user's applications can reach through a secure tunnel to Devices in the Factory Network.
This Service Endpoint can be downloaded through the Remote Services UI. The download package not only contains the executable of the endpoint, but also a user specific authentication key which identifies the user and authenticates him to communicate within the given tenant.
The same package can be installed on multiple systems because it is only user specific. However, it cannot be used simultaneously on multiple systems.
Transparent Proxy
For Windows Systems, the download package also contains the installer for the Transparent Proxy which is required to use Proxy Unaware Connector.
Prerequisites
- An Insights Hub user with Insights Hub Role
rsv2 serviceownerorrsv2 orguser. - The user must have one of the Remote Services roles
Remote User,Organization AdminorOrganization Owner. - The user must log in from an IP address which is in the country that is entered in their user details because, as per Terms-and-Conditions, the downloads are only allowed from countries which are not blacklisted as embargo countries.
Procedure
To download the Service Endpoint, perform the following steps:
- Log into tenant as one of the users mentioned above.
- Open the "Remote Services" app.
- From the "Home" screen, click on the "Download" button in the "Service Endpoint" section.
- The "Download Endpoint" dialog appears. Read the "ECC Terms and Conditions" and confirm the acceptance.
- Select the installation package that is suitable for your target operating system and click "Download".
Result
The required Service Endpoint is stored in the download folder of the user.
Installing and starting the Service Endpoint
In order to make a system A which resides in a Factory Network accessible to a system B in a Service Network, a Service Endpoint must be installed and executed on the system B.
The Linux versions require root privileges to execute the service Endpoint.
Prerequisites
The Service Endpoint for the operating system of the system to be used must have been downloaded as described in chapter Download the service endpoint.
Procedure
- Copy the Service Endpoint archive package to the system which shall be used in the Service Network.
- Extract the archive. A folder structure will be created.
The executable name depends on the target operating system, rs-client.exe - Windows or rs-client - Linux. - On Windows, install the
RSTransparentProxy.msiwhich provides the Transparent Proxy. - At the first time, the Service Endpoint shall be used on a given system. Log in from that system into Remote Services Tenant as a user you want. Later, use it for Remote Connection and click on "Reset Location" in the "Service Endpoint" section. This will register the system with the RS backend and ensure that only a single instance of the endpoint is in use.
- Start the executable either manually or by using the autostart mechanisms of the target operating system.
Result
The Service Endpoint is connected to the Remote Services. The Device is shown as "Connected" in the "Device Information" screen.
File transfer from Device to Service Network and vice versa
With Remote Services, it is possible to transfer files which reside on a Device to the location where the Service Endpoint is installed and vice versa.
Besides the direct transfer between the Endpoints, it is also possible to transfer the files temporarily to the Remote Services backend so that they can later be transferred in case the target endpoint is currently not active.
Prerequisites
- An Insights Hub user with Insights Hub Role
rsv2 serviceownerorrsv2 orguser. - An organization must already exist.
- The Device must exist in the organization.
- The user must have the Remote Services role Remote User granted with access to this Organization, the Site and the Product of the Device.
- The user must have a Service Enpoint installed and started.
- A Device Endpoint must have been installed on the Device and started.
Procedure
To add Devices to an organization, perform the following steps:
- Log into tenant as one of the users mentioned above.
- Open the "Remote Services" app.
- From the "Home" screen, select the required organization from the "Organizations" drop-down list and from the "RS Roles" drop-down, select the Remote User role.
- Click on the "Organization" icon. The "Organization Overview" is displayed, where there is also a hierarchical view of the Nodes and Sites.
- In the hierarchical view, select the desired Site and expand it so that the Devices become visible.
- Select the required Device. The "Device Information" screen appears.
- Verify that the Device is shown as "Connected".
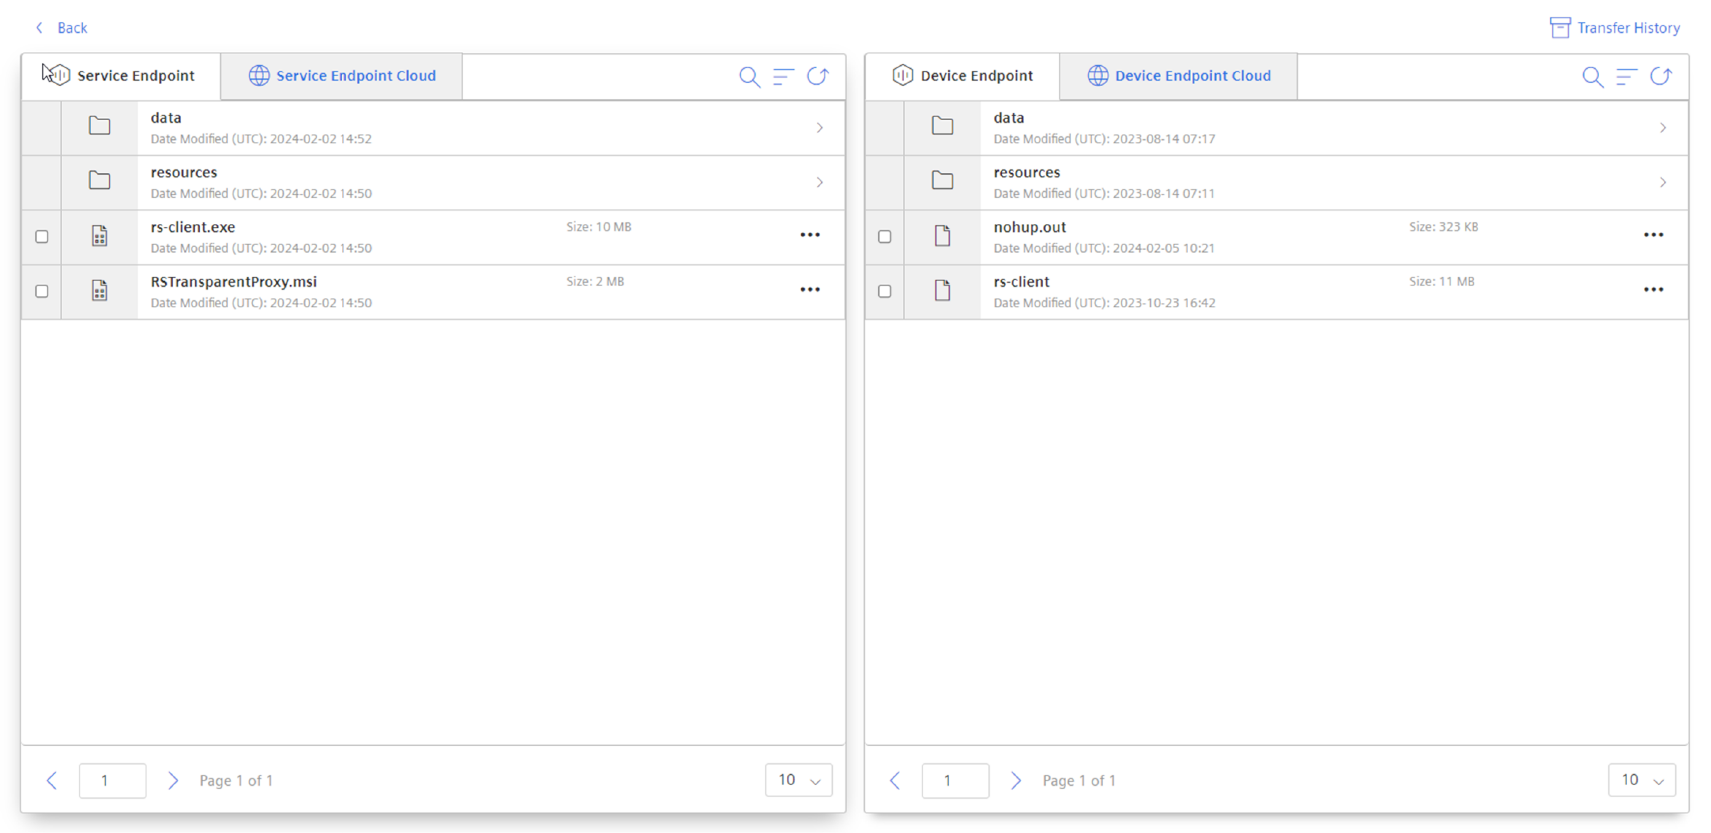
- Click on the "File Transfer" icon in top region of the screen. The "File Transfer" screen appears.

This screen shows two file browsers. On the left, the files at the location of the Service Endpoint executable and below. On the right, the files on the Device Endpoint exectuable and below. - Select one or more files in one of the file browsers and click the 3 dots which indicate more options and select the desired transfer target.
- Either the opposite endpoint for direct transfer between the endpoints.
- Or, Cloud for temporary storage of the file for later transfer to an Endpoint.
Result
- The selected file is transferred to the desired target destination. The selected file will not be deleted from the source location.
- The file is visible in the file browser of the target destination.
MindConnect Elements with preinstalled Device Endpoint
The following MindConnect Elements have a preinstalled Device Endpoint:
- MindConnect Nano
- MindConnect IoT2050
- MindConnect IoT2040
To use these elements as a Gateway in a Factory Network, it is required to define them as Device of type Gateway as described in this procedure. In that case, the AssetID needs to be read from the Asset Manager according to the following procedure and entered in the "Create Device" screen.
Read AssetId from Asset Manager
Prerequisites
- The MindConnect Element must be created in Asset Manager.
- An Insights Hub user with access to Asset Manager is required.
Procedure
To read the AssetId of the MindConnect Element that shall be created as Gateway Device in Remote Services, perform the following steps:
- Log into tenant as the user mentioned above.
- Open the "Asset Manager" app.
- Find the Asset by its name.
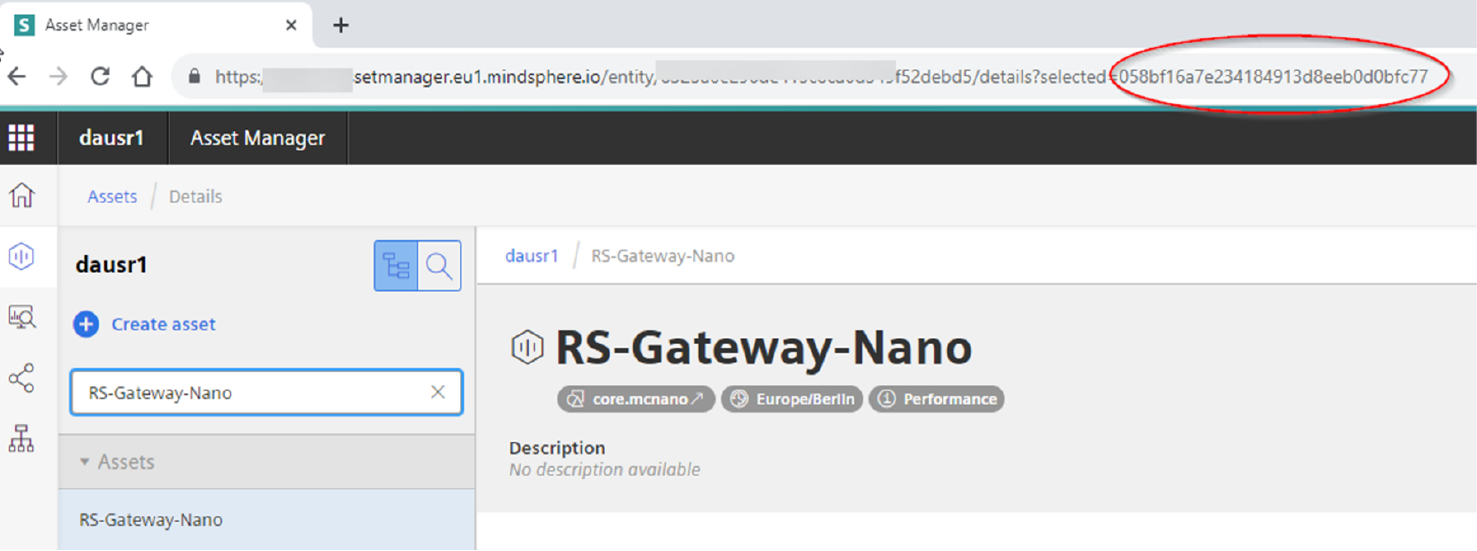
- From the browsers's address bar note the highlighted number which is the AssetID.
Result
The AssetId is identified and can be used to create a Gateway Device according to this procedure.
Enable pre-installed Device Endpoint
The pre-installed Device Endpoint on the MindConnect Element is by default disabled and must be explicitly enabled in the Asset Manager. It is also possible to disable it again later again in the Asset Manager.
Prerequisites
- The MindConnect Element must be created in "Asset Manager".
- The MindConnect Element must be onboarded.
- A Gateway Device must have been created according to this procedure using the
AssetIdof the MindConnect Element. - An Insights Hub user with access to Asset Manager is required.
Procedure
- Log into tenant as the user mentioned above.
- Open the "Asset Manager" app.
- Find the Asset by its name.
- Open the MindConnect Element plugin as shown in "Asset Manager".
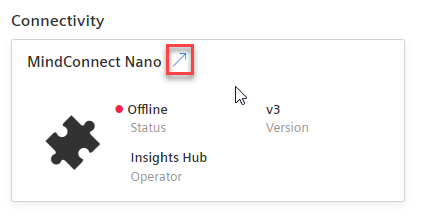
- Click

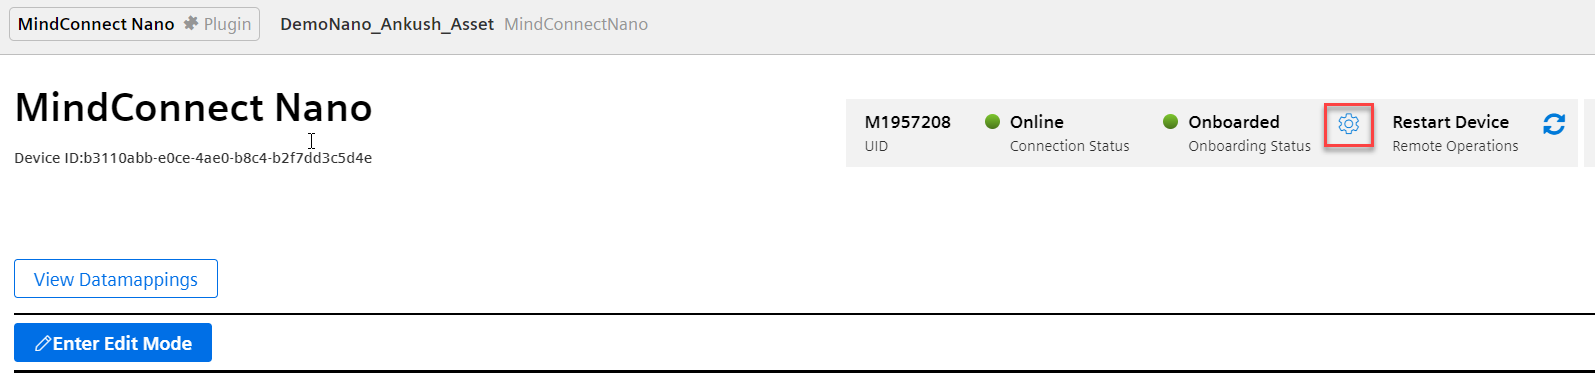
- In the Remote Services section, enable MRS toggle.

Result
- The preinstalled Device Endpoint on the MindConnect Element is activated and the Gateway Device connects to Remote Services.
Except where otherwise noted, content on this site is licensed under the Development License Agreement.