Remote Services Getting Started
This chapter explains the usage of Remote Services. To simplify the setup, the Service Provider Organization which was automatically created when the Remote Services have been provisioned to the tenant will be used.
The goal is to connect two Windows machines with a Remote Desktop Protocol (RDP):
- Machine A acts as an RDP client in a Service Network.
- Machine B acts as a Device in a Factory Network and hosts an RDP server.
All interactions with Insights Hub and the Remote Services application shall be performed from machine A.
Prerequisites
- An Insights Hub user with Insights Hub Role
rsv2 serviceowner. - Machine A has an RDP client installed.
- Machine B has an RDP server installed and enabled.
Procedure
Log in
- From machine A, log into the tenant as a user with
rsv2 serviceowerrole. - Open the "Remote Services" app.
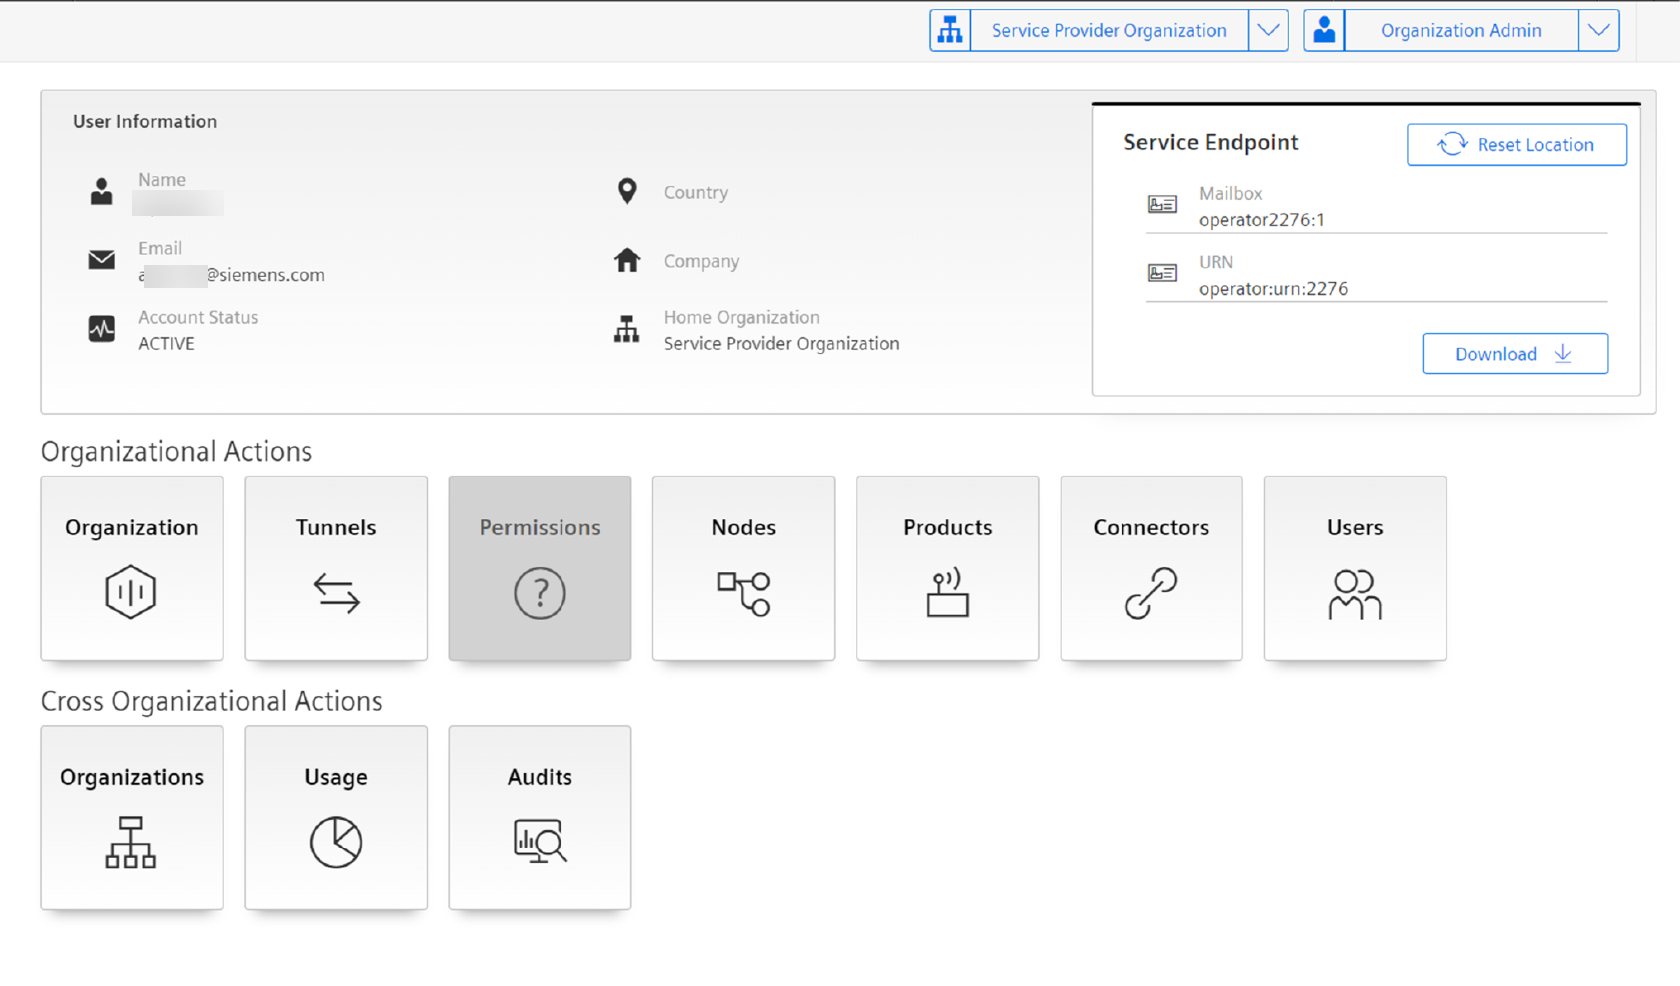
- From the "Home" screen of the app, select the Service Provider Organization from the Organization drop-down menu and select the Organization Admin role from the role drop-down menu.
Update user information
Now, the user needs to update the user information:
- Click on the "Users" icon in the "Organizational Actions" section. The "Users" screen is displayed which displays the list of all the existing users within the organization.
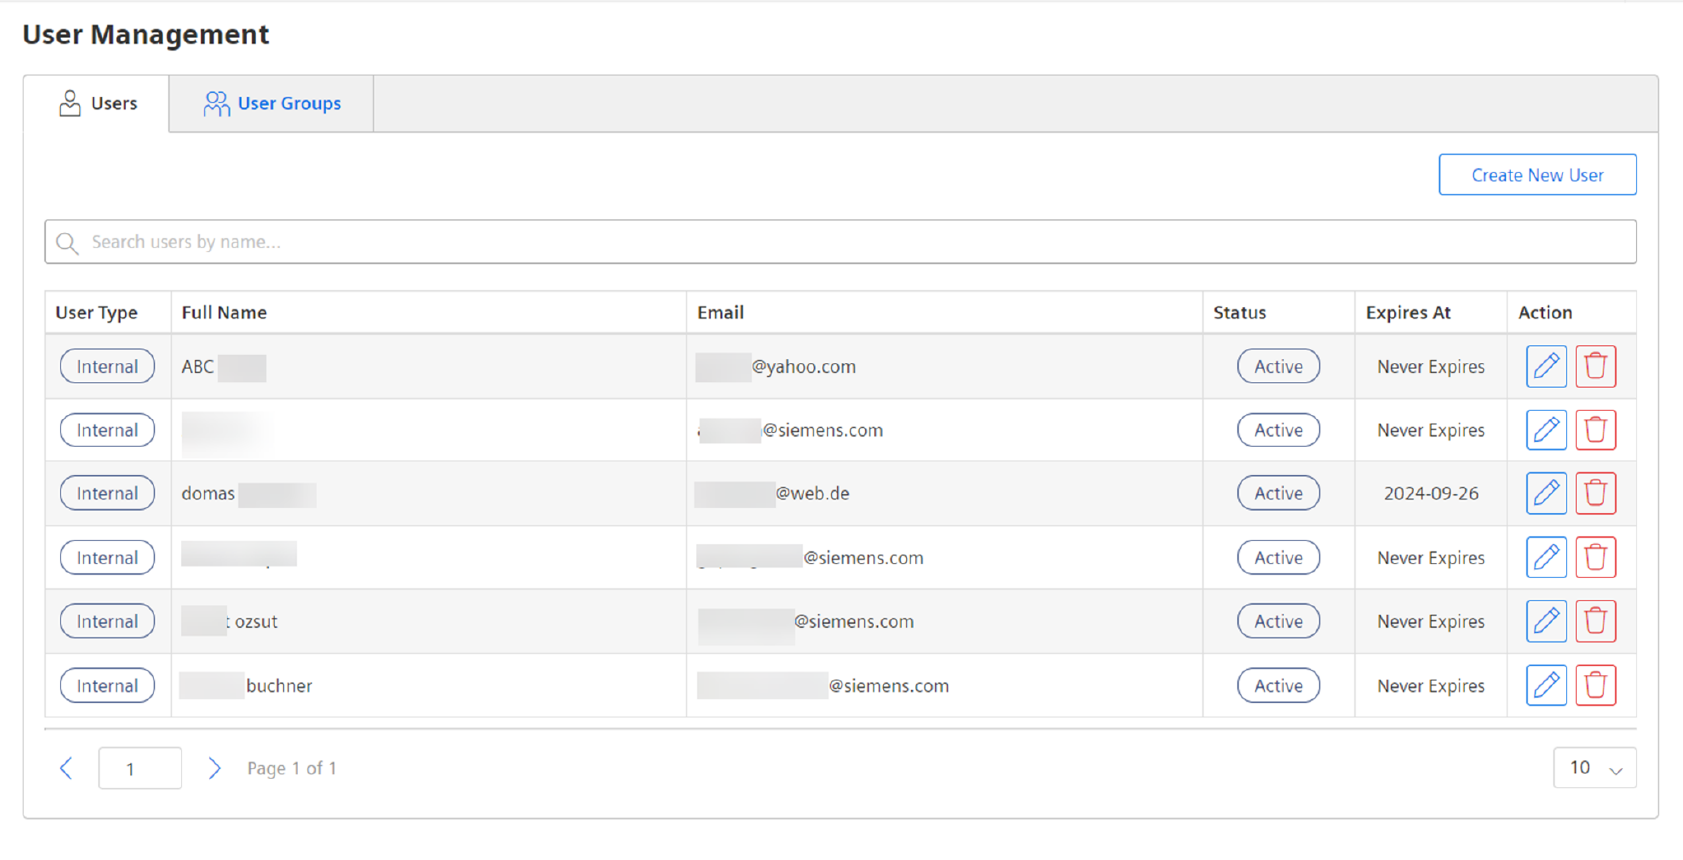
- Search for the current user and click on the "Edit" icon in "Action" column. The "User Information" page opens.
- Click "Update User Information".
- Enter the required information and click "Update".
It is important to enter the Country information as this value is checked against the IP address when Service and/or Device Endpoints shall be downloaded.
For more information, refer the chapter Setting up users and access.
Acquire the additional role Remote User
Now, the user needs to acquire the additional role Remote User, as described in chapter Setup users and access.
- In the "Users" screen, click the "Grants" tab. The "Grants" screen displays all the grants, including roles of the current user.
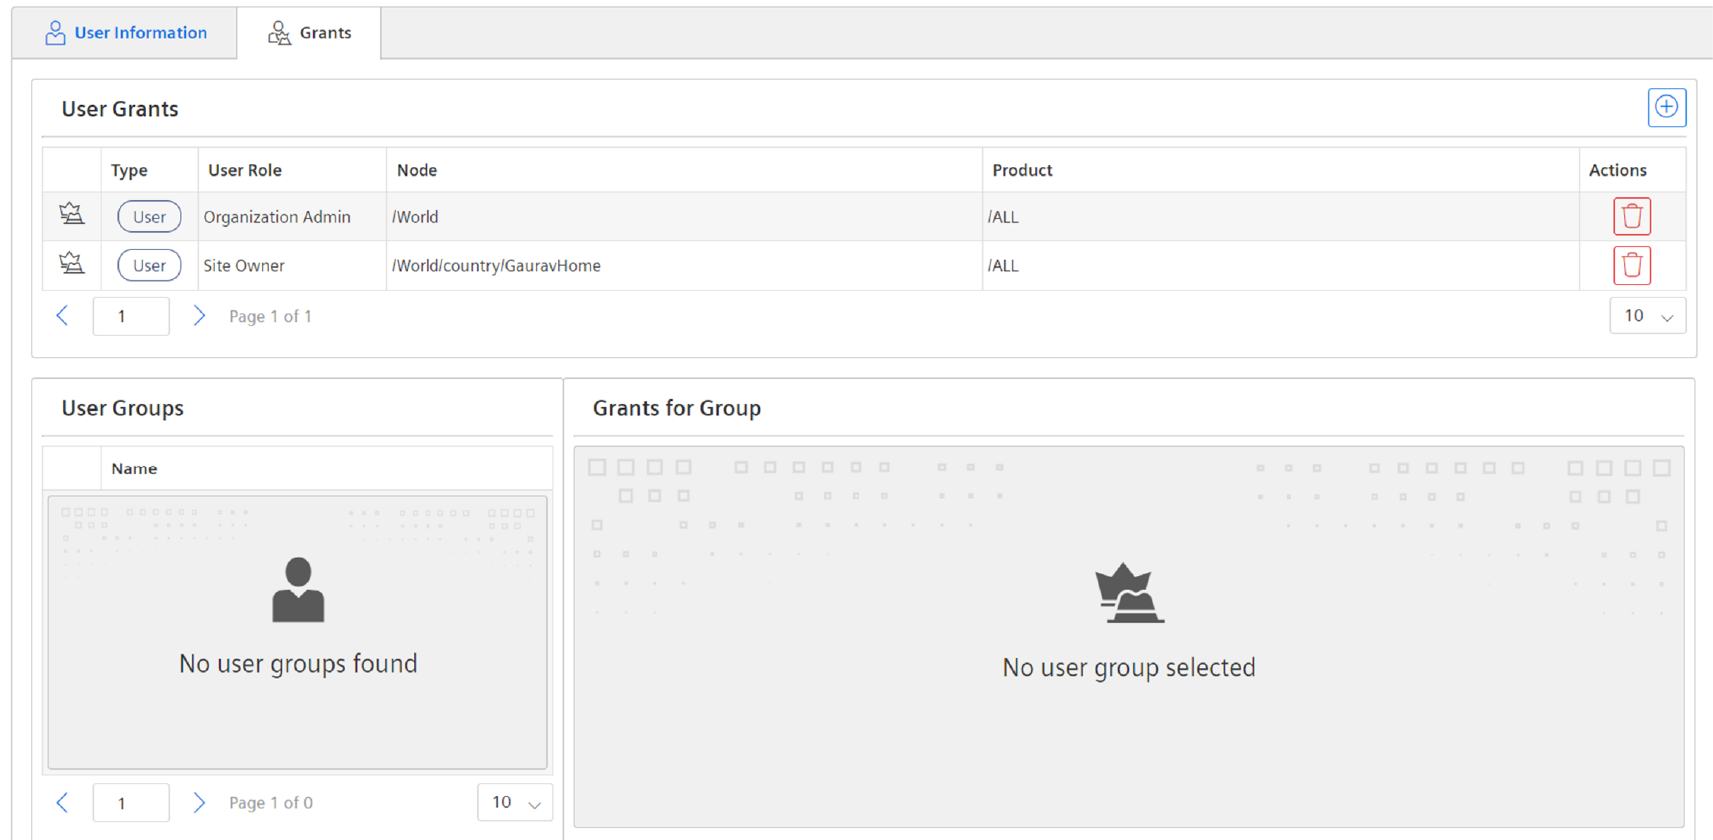
- Click on the "Create" icon. The "Create New Grant" pop-up window appears.

- From the "Role" drop-down menu, select "Remote User".
- Click on the "Search" icon in the "Node" field.
- Select "World" which grants access to all Nodes and Sites in that Organization.
- Click on the "Search" icon in the "Product" field.
- Select "All" which grants access to all Product in that Organization.
- Click "Add Grant".
Add Site to the Organization which will host the Devices
Now, a Site needs to be added to the Organization which will host the Devices, as described in the chapter Creating a structure hierarchy.
- Click on the "Home" icon of the "Remote Services" application.
- Click "Nodes" in the "Organizational Actions" section.
- Click "Create New Site under Root". The "Create New Site" pop-up window appears.
- Enter the required information. For name, use
GettingStartedand click "Create".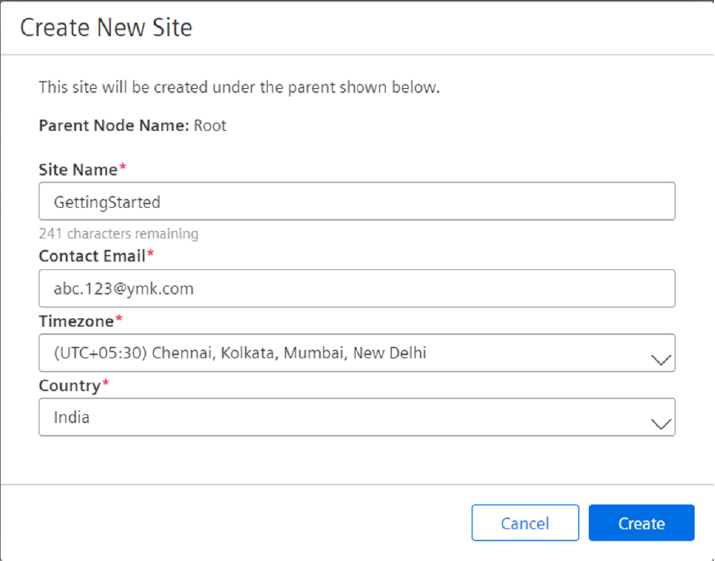
Add Device to the Site
Now, a Device shall be added to the Site that was created, Adding Devices to an existing organization.
- Click on the "Home" icon of the "Remote Services" application.
- Click on "Organization" icon in the "Organizational Actions" section.
- In the "Node and Site hierarchy", navigate to the site
GettingStarted. - In the "Site Information" section, click "Create Device". The "Create New Device" pop-up window appears.

- From the "Device Type" drop-down, select "Primary Target". For "Product", select "All" from the drop-down and enter all the other mandatory information. For the "Device Name", use
Example-1and click "Create".
Create Device and download Device Endpoint
Now, the Device is created and the Device Endpoint needs to be downloaded, as described in the chapter Download the device endpoint.
- Click on the "Home" icon of the "Remote Services" application.
- Click on "Organization" icon in the "Organizational Actions" section.
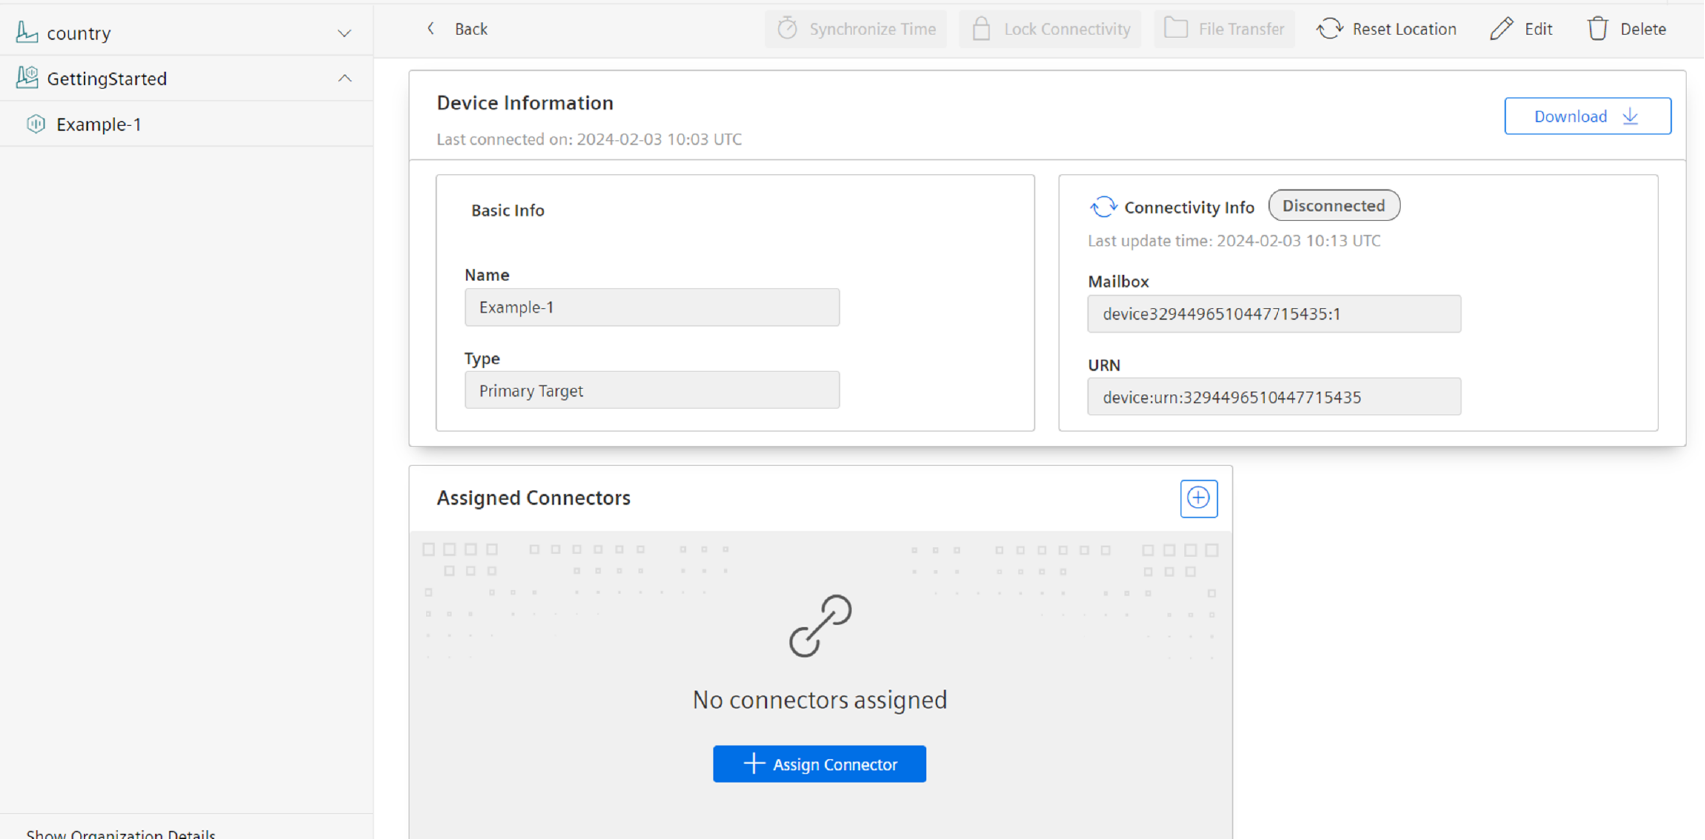
- In the "Node and Site hierarchy", click on
Example-1. The "Device Information" screen forExample-1is displayed. - Click on the "Download" button.
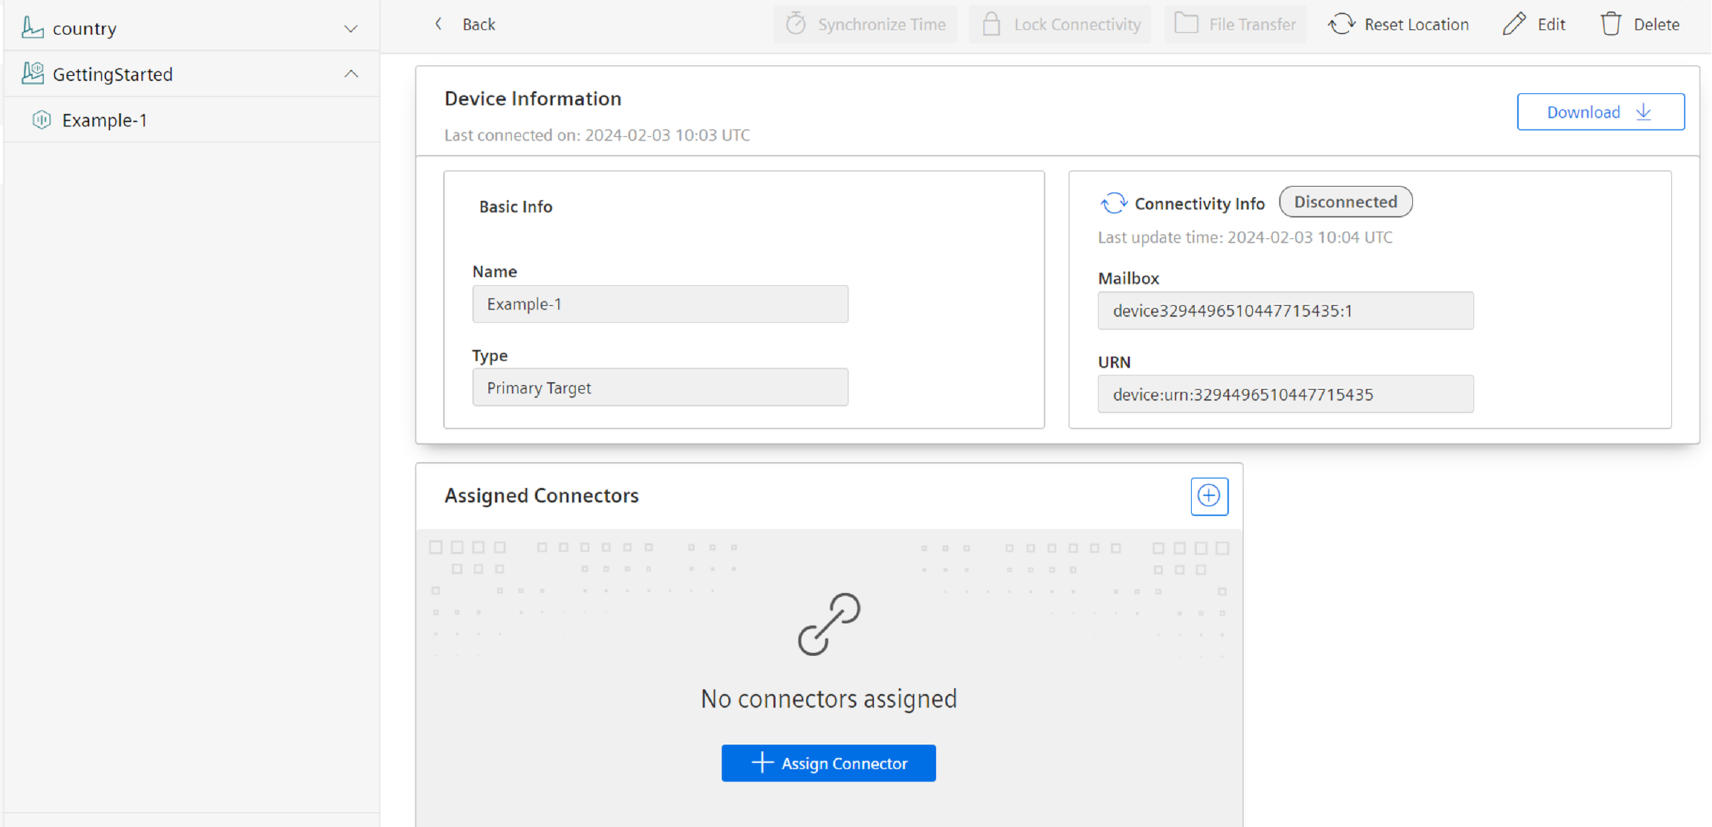
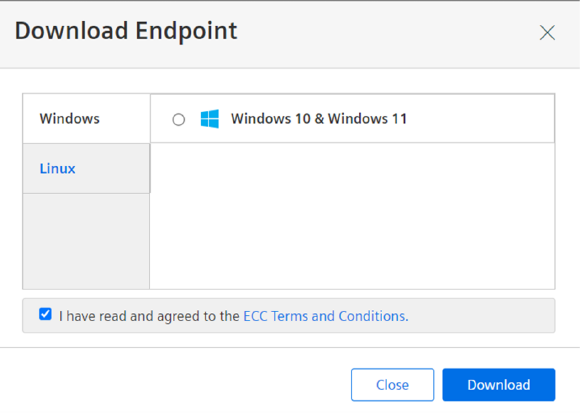
- The "Download Endpoint" pop-up appears which offers various versions of Device Endpoints.
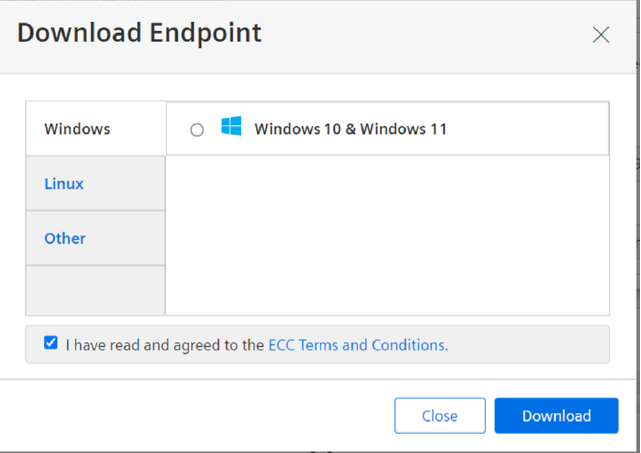
- Accept the ECC terms and conditions by checking the checkbox next to it.
- In this example, let us assume the Device is a Windows 10/11 machine. Select "Windows 10 & Windows 11" and click "Download".
- An archive is downloaded which not only contains the Device Endpoint executable, but also the device and tenant specific authentication information.

Define RDP Connector in the Organization
Now, a Connector needs to be defined in the Organization so that it can be later assigned to the Device, as described in chapter Adding a connector.
- Click on the "Home" icon of the "Remote Services" application.
- Click on "Connectors" icon in the "Organizational Actions" section. The "Connectors Overview" screen appears.
- Click "Create New Connector". The "Create Connector" screen with a selection of protocols is displayed.
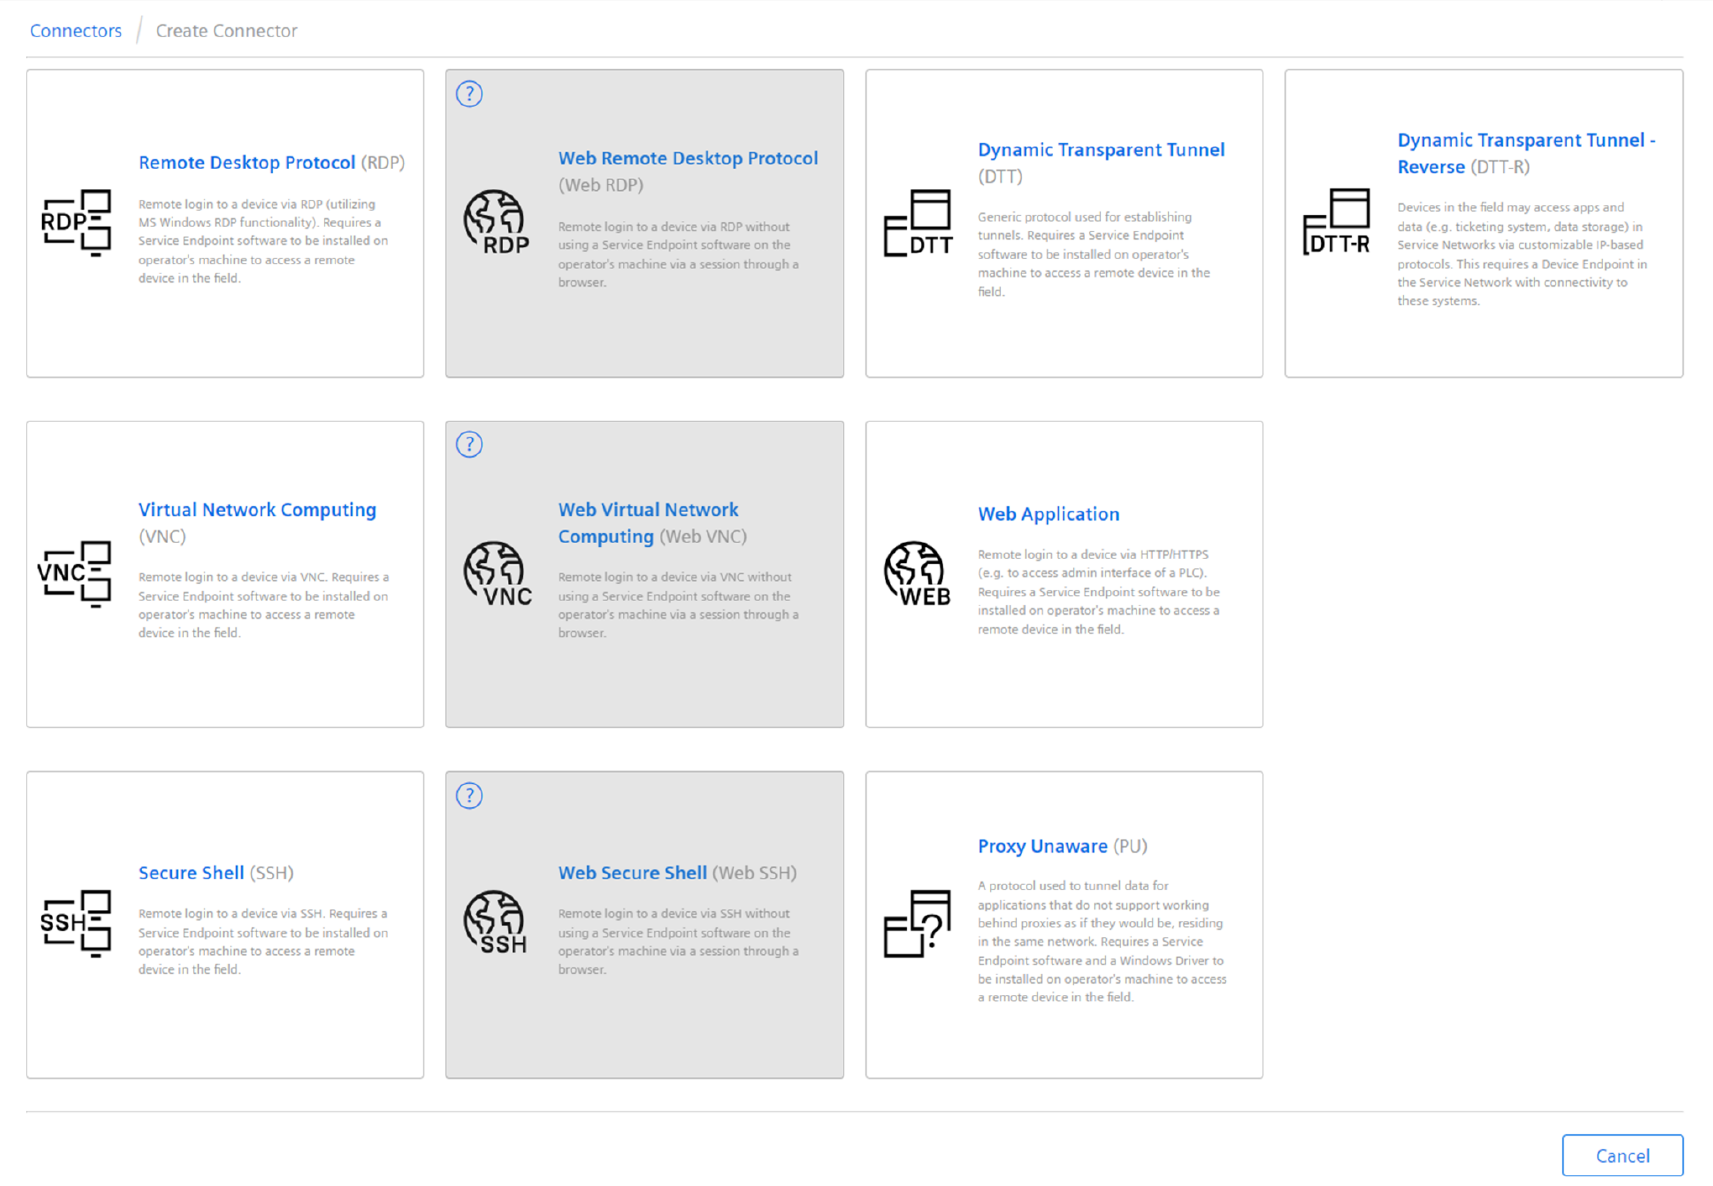
- Click on "Remote Desktop Protocol" as described in chapter Create RDP Connector.
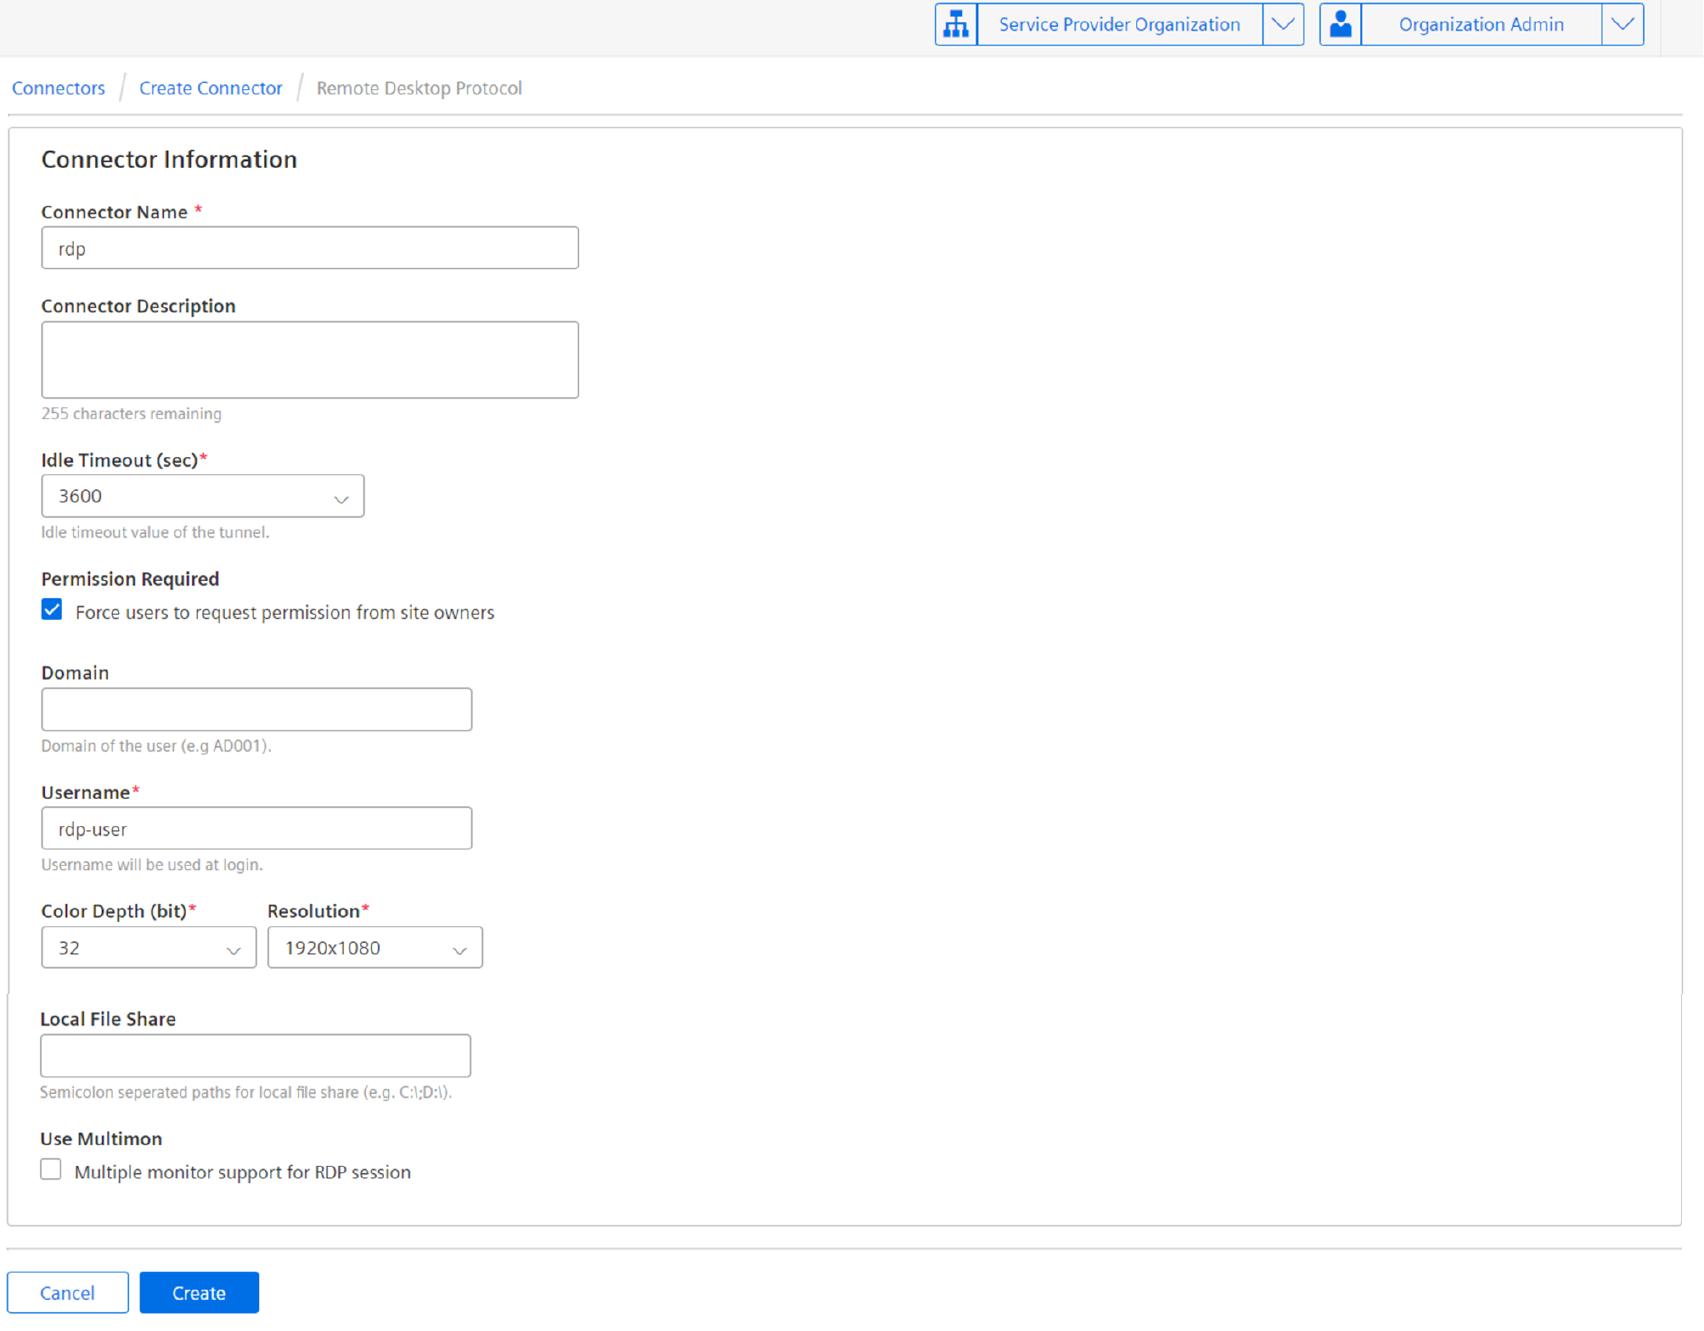
- A screen to configure the RDP connection is displayed.
- Enter the required values and click "Create".
Assign RDP Connector to the Device
Now, the configured RDP Connector needs to be assigned to the Device, as described in chapter Assign Connectors
- Click on the "Home" icon of the "Remote Services" application.
- Click on "Organization" icon in the "Organizational Actions" section.
- In the "Node and Site hierarchy", click on
Example-1. The "Device Information" screen forExample-1is displayed. - Click on the "Assign Connector" button.
- The "Available Connectors" screen for the Organization and
Example-1is displayed. - Select the entry for the RDP Connector in the section "Available Connectors" and click on
>button to add it to the "Assigned Connectors" section.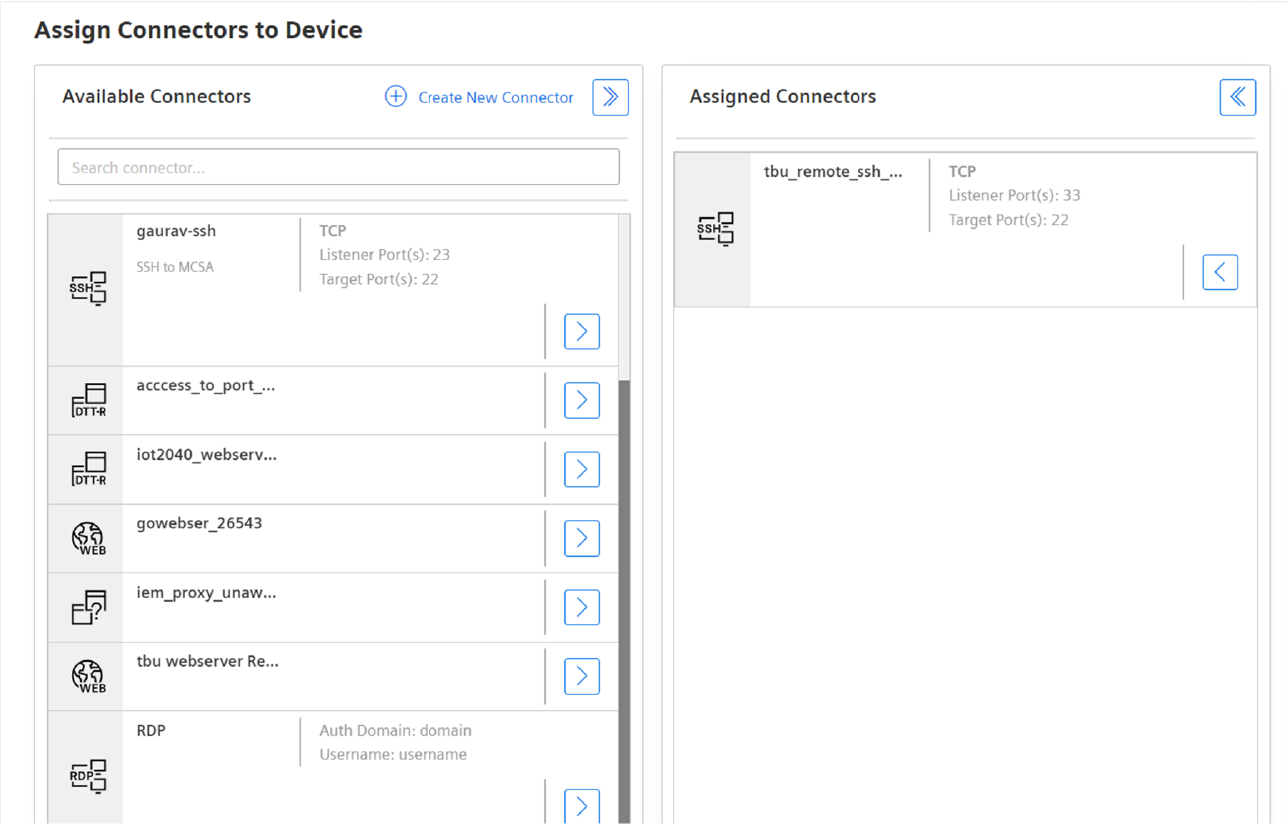
- Click "Save".
Install Device Endpoint on machine B
Now, the Device Endpoint needs to be installed on machine B, as described in chapter 4.3. This can be done by anyone who has access to machine B and does not require a user in Insights Hub.
- Copy the archive to machine B which shall be used as Device.
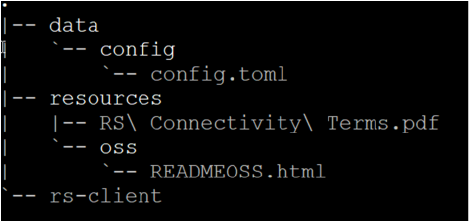
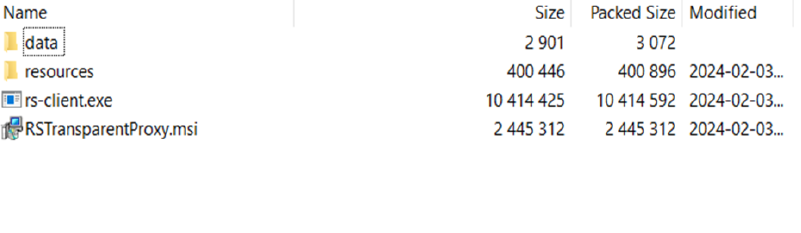
- On that Device, extract the archive. A folder structure will be created which contains the executable
rs-client.exeat the top level.
- Click on
rs-client.exeto start the Device Endpoint. If required, you can use Windows auto-start capabilities to start the Device Endpoint whenever the user logs into machine B.
Now, the Service Endpoint needs to be downloaded as described in chapter Download the service endpoint and installed as described in chapter Installing and Starting the Service Endpoint on machine A. This is done with the Role Remote User and needs to be done only once.
Download Service Endpoint
Now, the Service Endpoint needs to be installed on machine A. This is done with the Role Remote User and needs to be done only once.
- Click on the "Home" icon of the "Remote Services" application.
- Select the "Remote User" role in the "Roles" drop-down menu.
- In the "Service Endpoint" section, click on "Download".
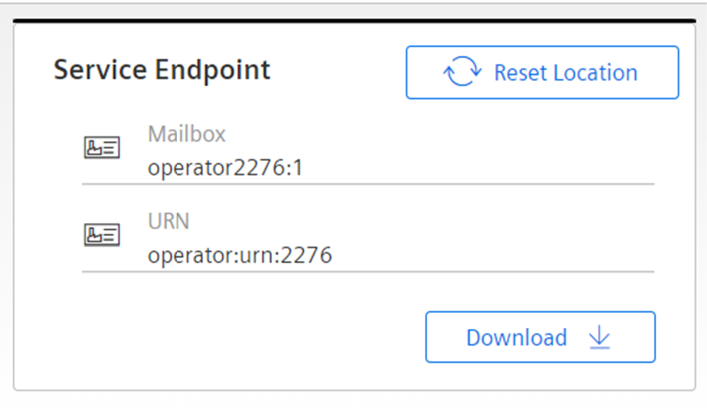
- The "Download Endpoint" pop-up is displayed.
- Check the acceptance of the ECC terms and conditions.
- Select the Windows version of the endpoint and click "Download".
- An archive is downloaded which not only contains the Service Endpoint executable but also the endpoint and tenant specific authentication information. The archive contains also an Windows installer for a transparent proxy which is only required for the Proxy Unaware Connector.
- Extract the archive. A folder structure will be created which contains the executable
rs-client.exeat top-level.
All the steps until now needs to be performed only once to set up the desired infrastructure for future use.
Create Remote Services tunnel between machines A and B
Now, the Remote Services tunnel can be created between machines A and B as described in chapter Establish Connections.
This is done with the Role Remote User and needs to be performed every time such a connection is required. This assumes that the Device Endpoint on machine B has been manually started by someone who has access to machine B or is automatically started by Windows.
- Navigate to the folder on machine A where the Service Endpoint was installed.
- Click on
rs-client.exeto start the Service Endpoint. - Click on the "Home" icon of the "Remote Services" application to come back to the "Home" screen.
- Select the
Remote Userrole in the "Roles" drop-down menu. - Click on the "Organization" icon in the "Organizational Actions" section.
- In the "Node and Site hierarchy", click on
Example-1. The "Device Information" screen forExample-1is displayed.
- In the "Assigned Connectors" section, search for the "RDP Connector".
- Click on the "Connect" icon.
The RDP Client application starts automatically.