Register or deregister self-hosted applications
Overview
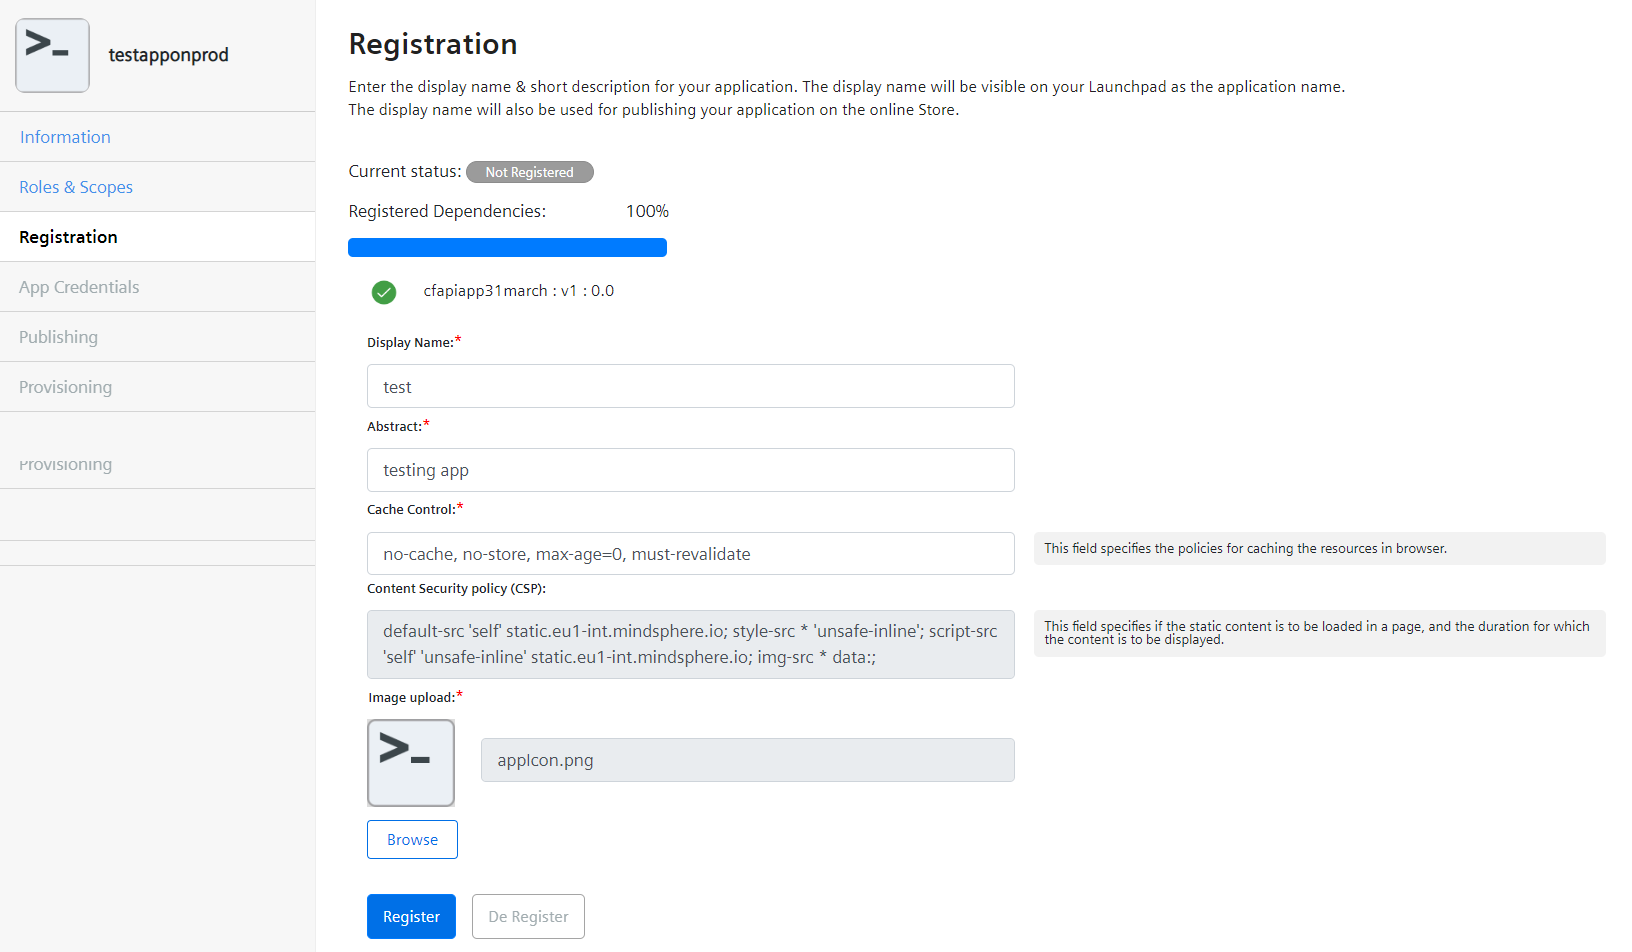
The "Registration" screen provides options for the user to register or deregister a self-hosted application. The display name, abstract and the application icon can also be edited before registering an application.
To view the "Registration" screen for a self-hosted application, click on "UI Apps" tab in the "My Applications" window. Click on any application that is in the "Deployed" state and navigate to the "Registration" tab.
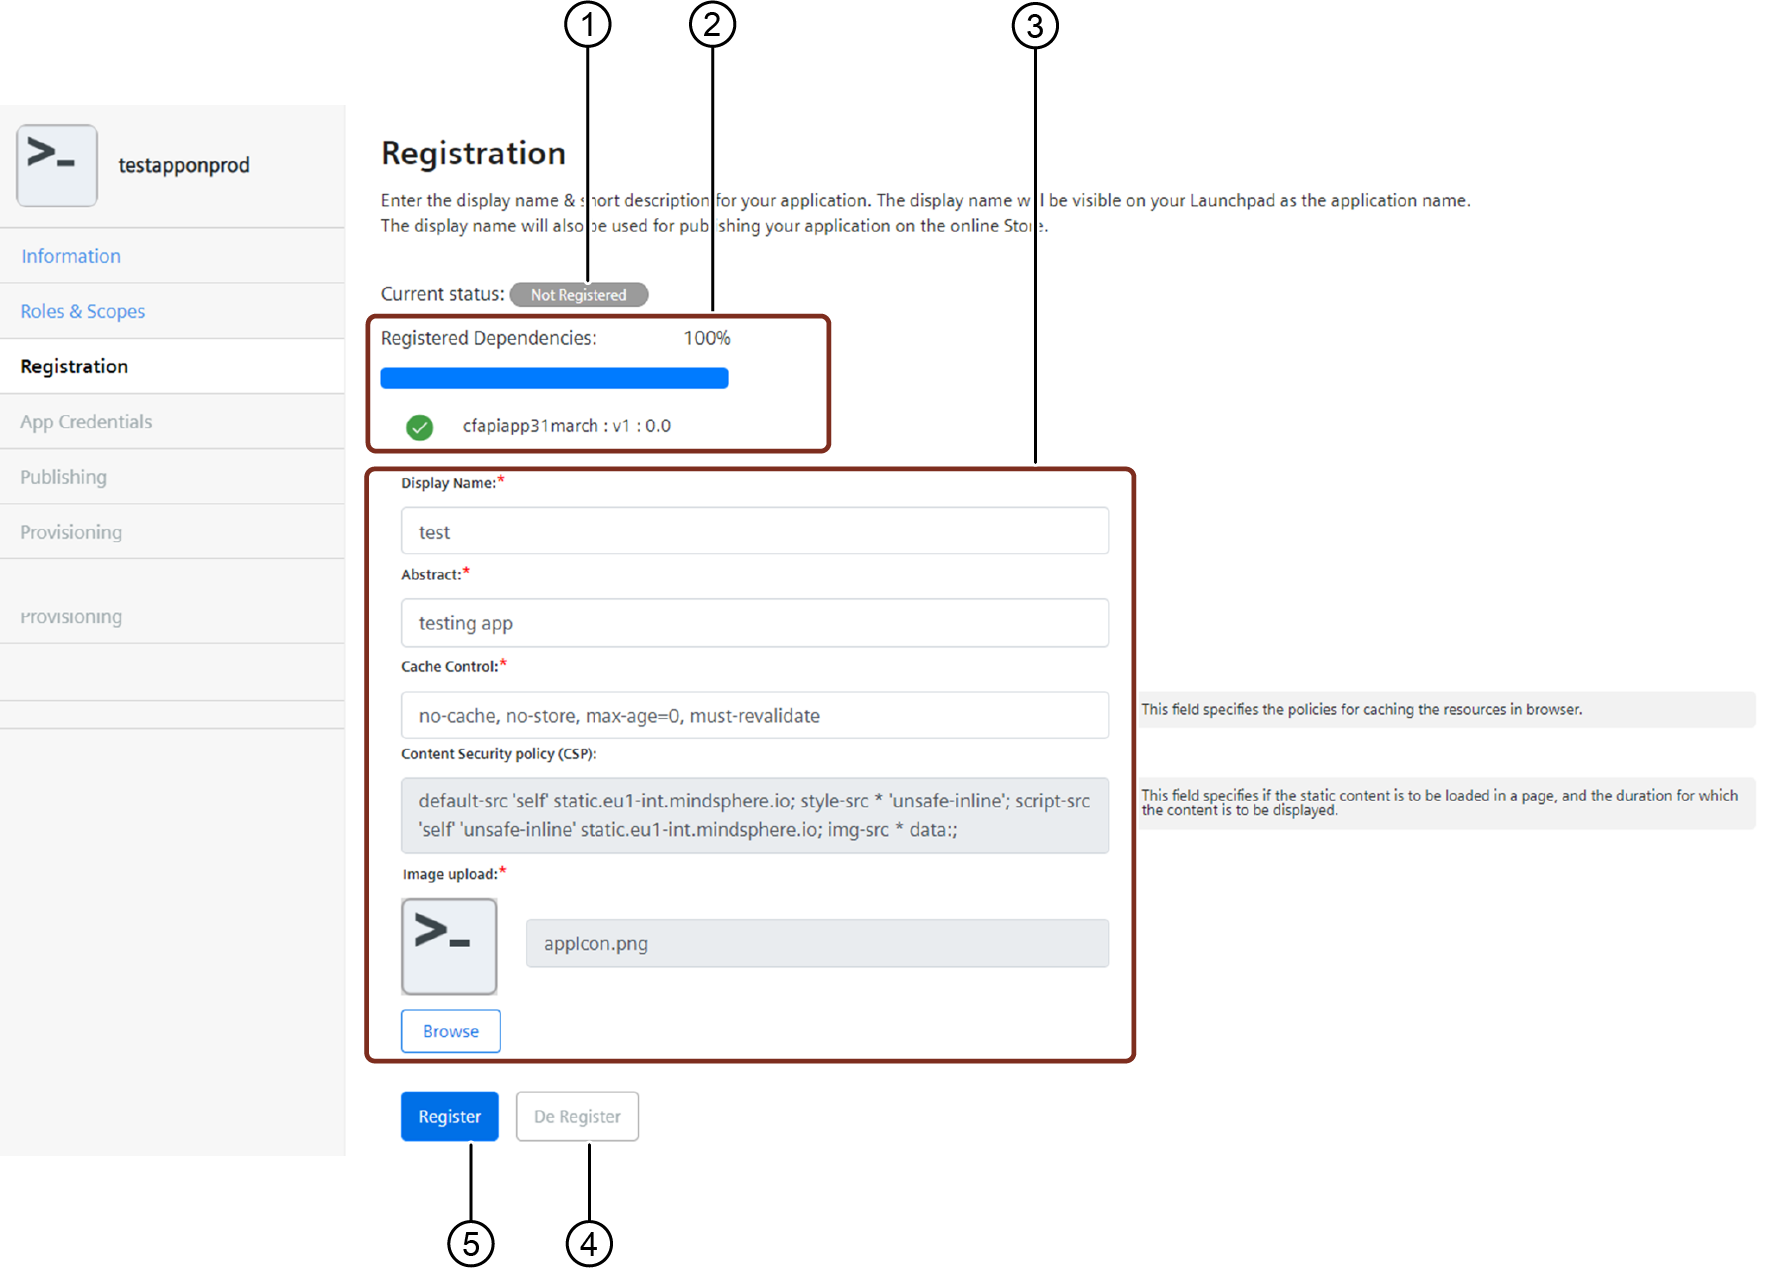
① Registration status of the application
② Registration status of the dependent application
③ Enter the details in the application fields:
④ Deregisters the application
⑤ Registers the application
Prerequisite
- All the dependent API applications have been registered and provisioned.
Register a self-hosted application
To register a self hosted application, proceed with the following steps:
- In the "My Applications" window, click on "UI Apps" tab. Then, click on a self-hosted application that needs to be registered, that is the application in the "Deployed" state, with a warning symbol.
-
Click on the "Registration" tab from the side navigation. Enter the required descriptions for the application.
-
Display name:The name entered in this field will be displayed in Launchpad
- Abstract: The short description of the application
- Cache control: The data displayed in this field is retrieved from Developer Cockpit and is editable. This field specifies the policies for caching the resources in browser.
- Content Security Policy (CSP): The data displayed in this field is retrieved from Developer Cockpit and is editable. This field specifies if the static content is to be loaded in a page, and the duration for which the content is to be displayed. You can also change the application icon by clicking on the "Browse" button.
- For Mendix applications: Configure the "License ID" and "License Key" in the application runtime environment.
- Click the "Register" button. The status of registration can be viewed in "Registration" screen.
- To provision the application to dedicated user, refer to the chapter "Provisioning self-hosted applications".
- To publish the application in the Industrial IoT Store, refer to the chapter "Offer applications in the Industrial IoT Store".
Note
If two apps with the same appname are assigned to the same operator tenant, and one of these apps is already registered, then you will not be able to register the other app. To register the app, you must deregister the previously registered app. Example: Two developers "DevA" and "DevB" have created apps "app1" with version 1.0.0 and "app1" with version 2.0.0 respectively and have assigned the apps to the same operator "Oper1". Consider that "app1" with version 1.0.0 is already in the registered state. Now, if you want to register "app1" 2.0.0, then you must first deregister "app1" 1.0.0.
Deregister self-hosted application
To deregister a self-hosted application, proceed with the following steps:
- In the "My Applications" window, click on the "UI Apps" tab. Then, click on any application that you want to deregister.
- Click on the "Provisioning" tab. If there are any customers provisioned for that application, then you need to de-provision them. To de-provision, select the customer and click "Remove from customer".
- Navigate to the "Registration" tab in the side navigation. If necessary, you can edit the application details by clicking on the "Edit" button, and then save the changes by clicking on the "Save Changes" button. If you do not want to edit the application details, you can directly proceed with the deregistration by clicking on the "De-Register" button.
You can also view the status of deregistration in the "Registration" screen.