Manual deployment of an application
Example scenario
An application "robotcontrol" has been developed by a developer. This application has been assigned to the operator and needs to be deployed manually.
Prerequisite
The application has already been assigned by the operator.
Manual deployment
In order to deploy an application manually, it is required to first download the application.
To download and deploy an assigned application, proceed as follows:
- Click on the "Apps" icon and select an application in the "Assigned" state that you want to deploy. The "Application Details" menu opens.
- Click on the menu button "Deployment".
- Choose Deployment type: Under "Deployment type", select "Deployment via CF CLI" and click "Start deployment".
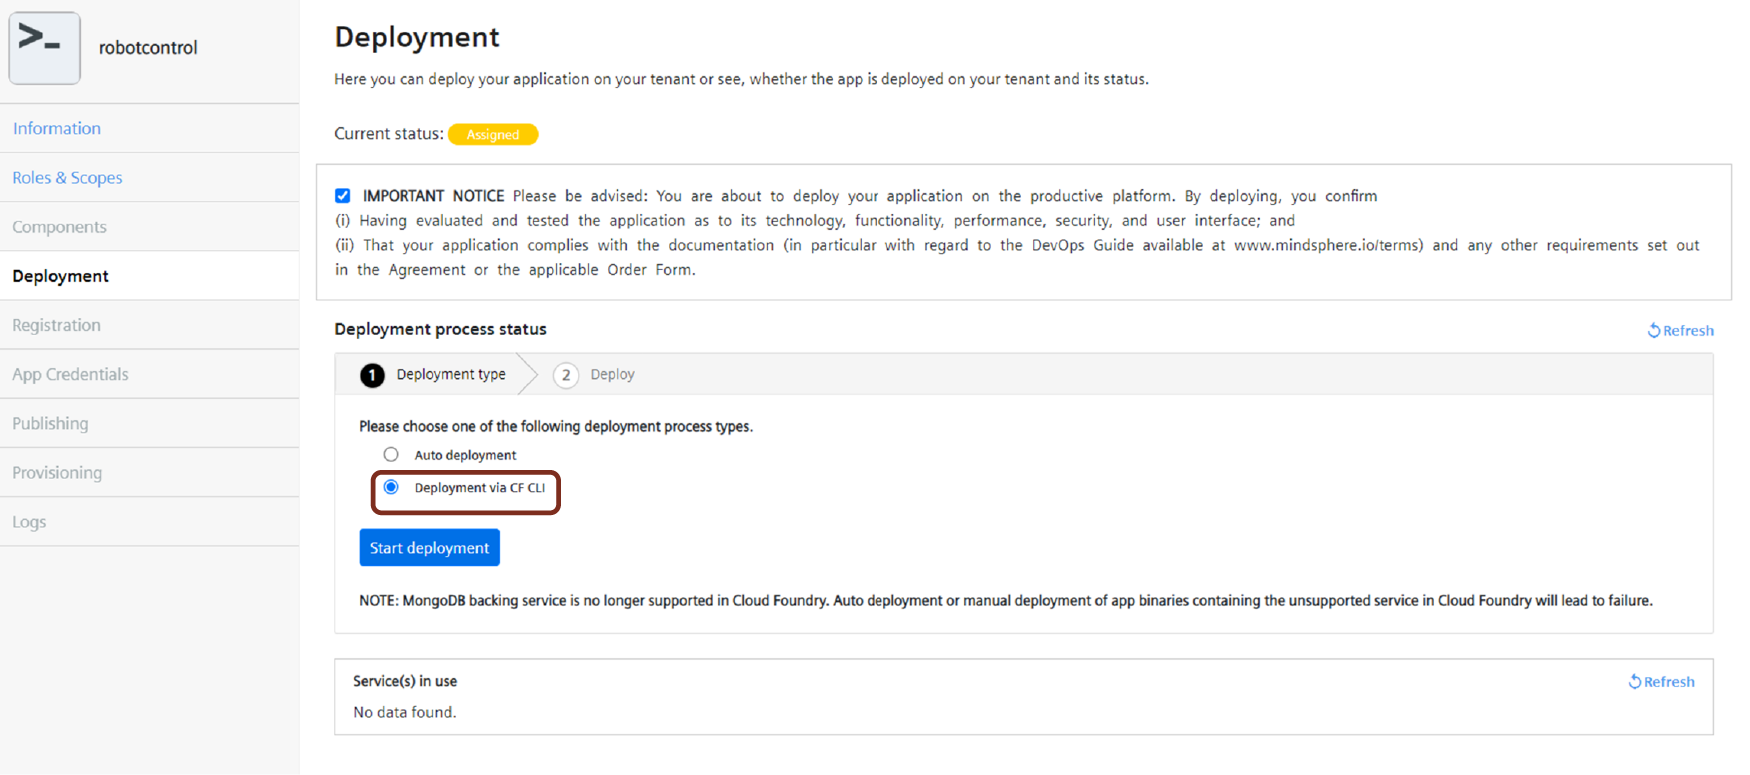
- Deploy the application: Under "Deploy", follow the onscreen procedure to deploy the application manually.
Note
A warning message will be displayed in the "Deployment" window, if the application components have not passed the validation criteria. In such a scenario, you need to re-deploy the application.
5.Click "Download Application".
6.Unzip the "Appbinary.zip" file.
"Appbinary.zip" includes the components of your CF application, which you target later using "cf push".
Ensure that Appbinary is extracted as a separate folder containing only the service components and does not include the icon or metadata files.
7.Open Cloud Foundry Command Line Interface (CF CLI).
You can use e.g. Power Shell or Command prompt.
Note
It is recommended to use CF CLI version 6 to push an application manually.
8.Log in to your Cloud Foundry using the command "cf login -a https://api.cf.eu1.mindsphere.io --sso".
9.Switch to your CF Organization using the command "cf target - o organization-name".
10.Run the command "cf create-space <space-name>".
Note
- Use the format "cf create-space
<space-name>"for creating CF space for applications. If the format is not used correctly, then the further process for application deployment will be blocked. In such cases, you need to re-deploy the application with proper space names. - It is recommended to use appname as space-name.
- If the custom name is used as a space-name, select the created space-name as Space Location in the Information tab.
11.Switch to your created space using "cf target -s space-name" command.
12.Create Services for every service from the list "cf create-service serviceName servicePlan serviceInstanceName".
13.Switch to location of the unzipped "Appbinary" folder in your CF CLI.
14.Run the following command "cf push".
For more information, refer to Deployment and update of Cloud Foundry Applications, and Developer Documentation.