Settings in MindConnect Software Agent
You can change the log file upload settings and system time using “Settings” area in MindConnect Software Agent.
Settings area
In the navigation menu, click "Settings" tab to open the "Settings" area. It provides following features:
- Diagnosis
- System
Diagnosis settings
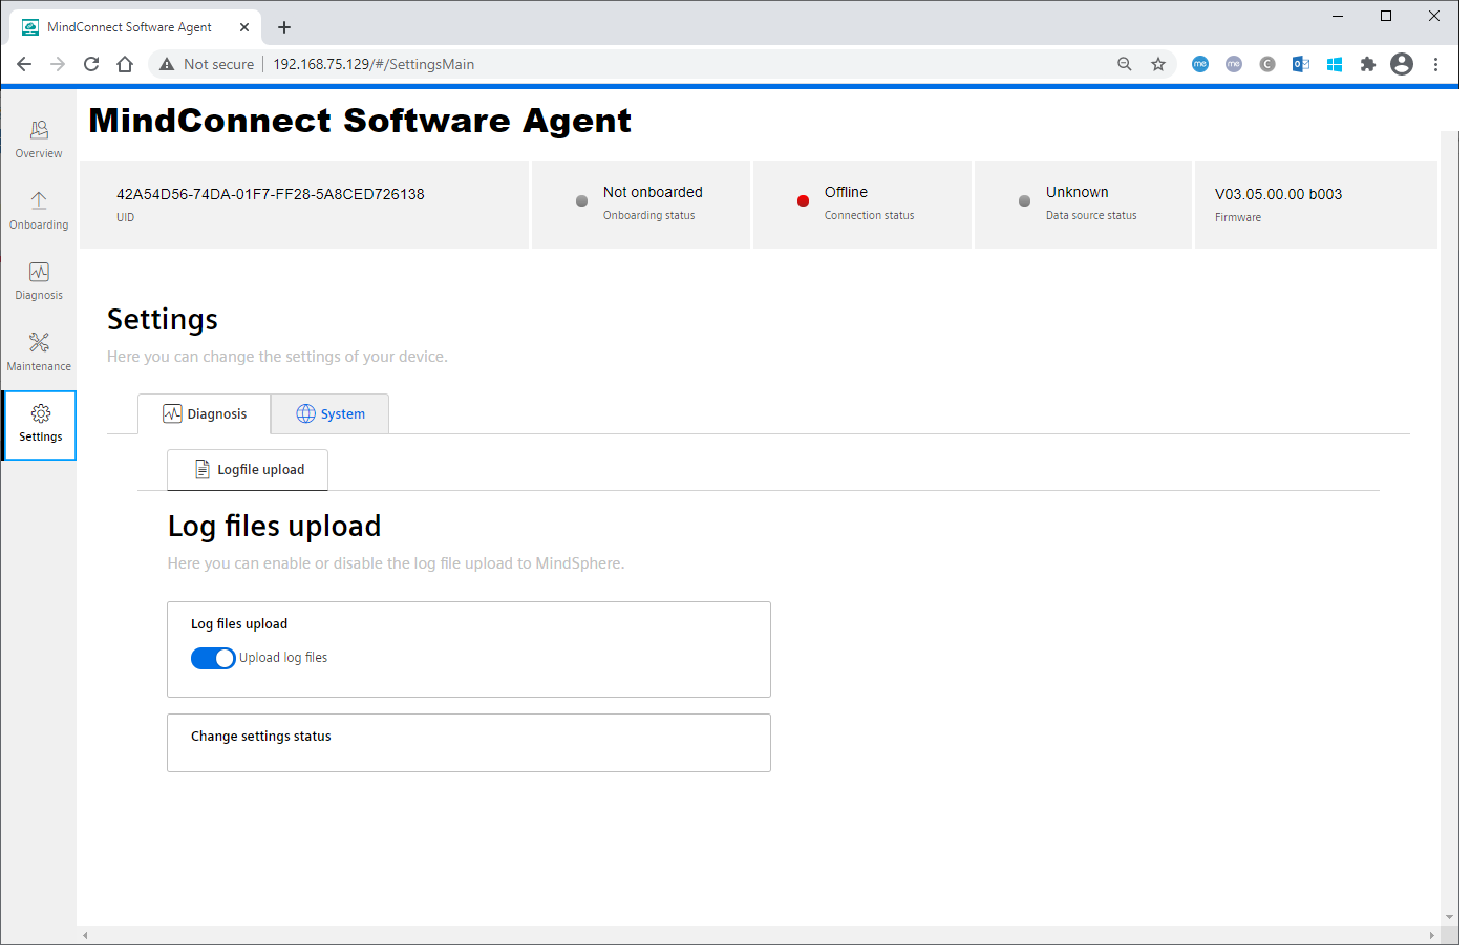
Log files upload
The log files upload section displays the current status log file upload setting. To enable or disable the log file upload functionality, click the "Upload log files" toggle button.
Note
While changing the log upload setting, it will overwrite the log upload settings of the asset’s device configuration. This change will not be synchronized with the asset’s device configuration.
Change settings status
The status of changing the log files upload settings process is displayed in the "Change settings status" section.
Diagnostic settings
This section has the configurations related with diagnostics setting such as level of logging.
Log Level
MindConnect Software Agent log level can be set from diagnostic configuration. The five different values of log levels are
- TRACE
- DEBUG
- INFO
- WARNING
- ERROR.
The behaviour of the logging on the device will be included to the selected level and the upper log levels only. The lower log levels will not be logged.
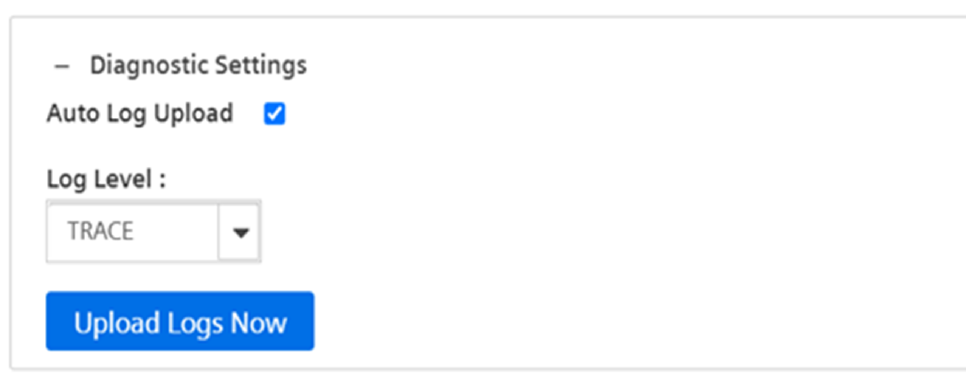
Log Upload
Log upload: It means, the device is going to upload logs generated to Insights Hub. The log upload on the device is enabled by default and it is possible to disable this feature. “Upload Logs Now” triggers the upload of the device log files immediately. This feature triggers the log upload regardless of the auto log upload status.
System settings
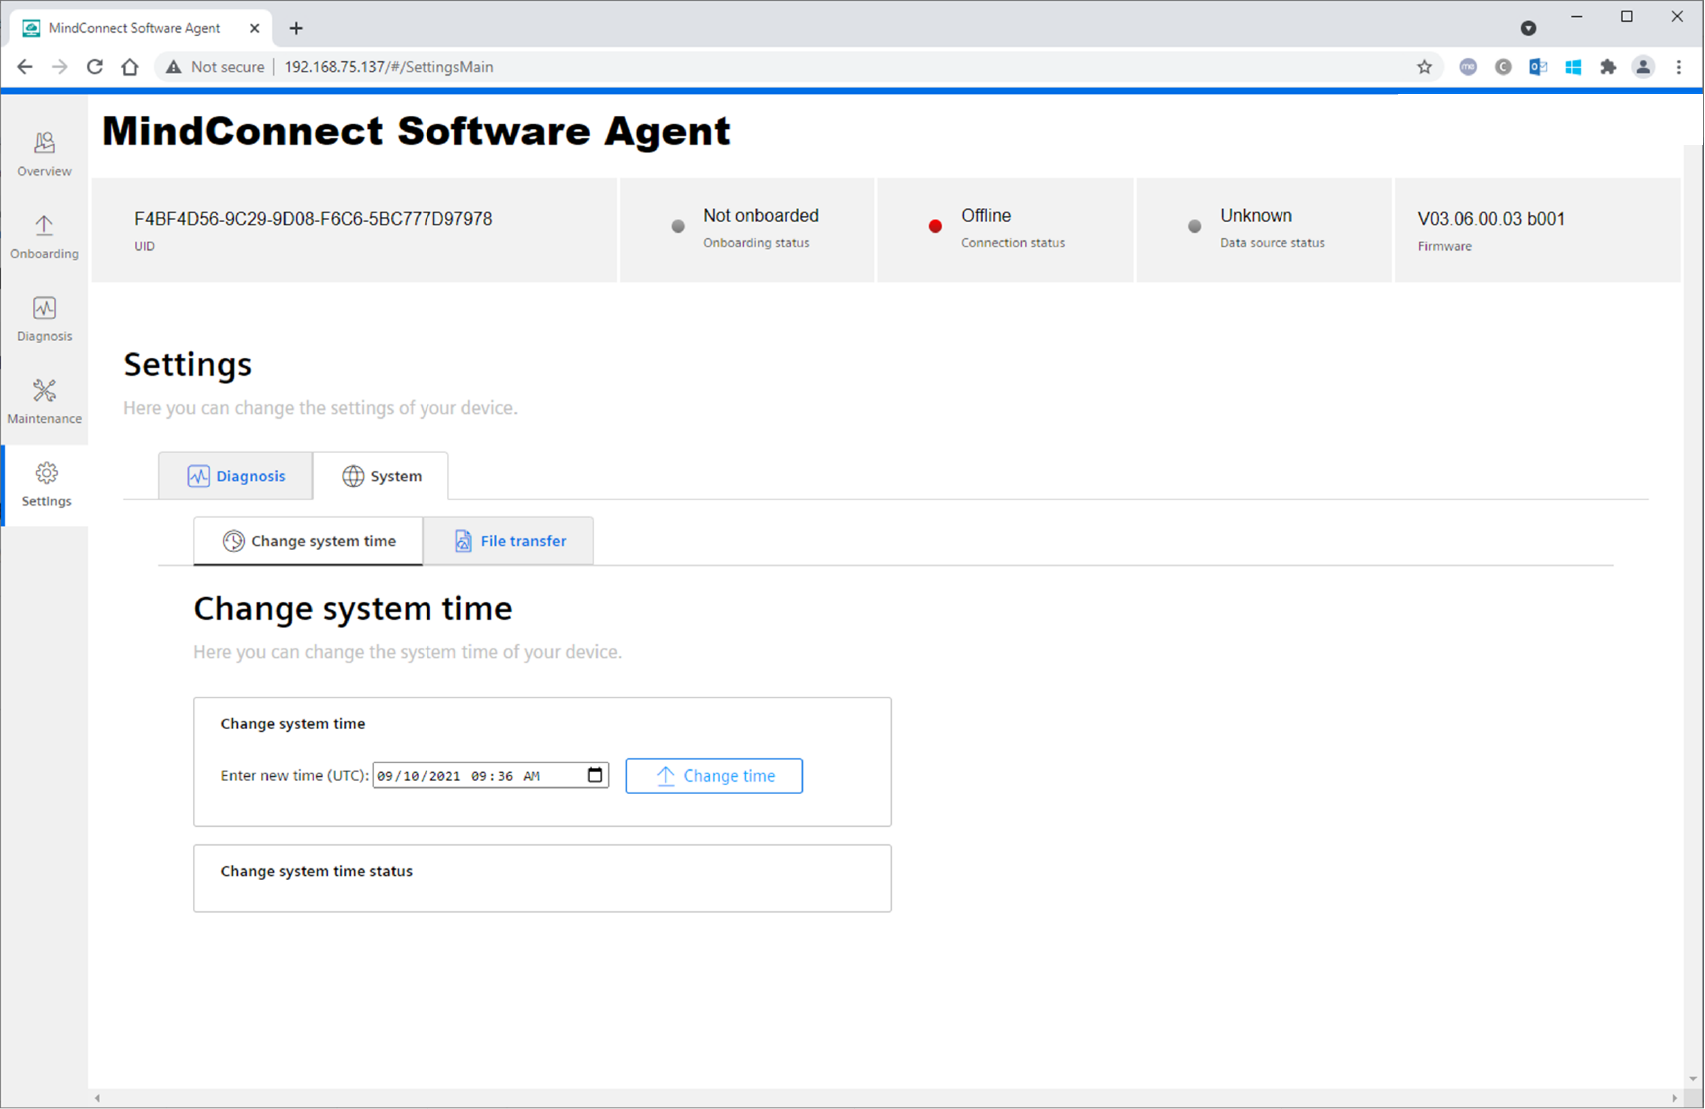
Change system time
In “Change system time” section, the current Windows host system time will be displayed in UTC format. A new system time can be updated using the time edit field.
To start the change system time process, click "Change time" button.
Note
- It is recommended to use Google Chrome for changing the system time, so that the new time can be updated by using date and time picker which is not supported by all browsers (e.g. Firefox).
- If you change the system time, this may lead to some abrupt behavior on the data ingested.
Change system time status
The status of changing the system time process is displayed in the "Change system time status" section.
Drop a file copy for File transfer
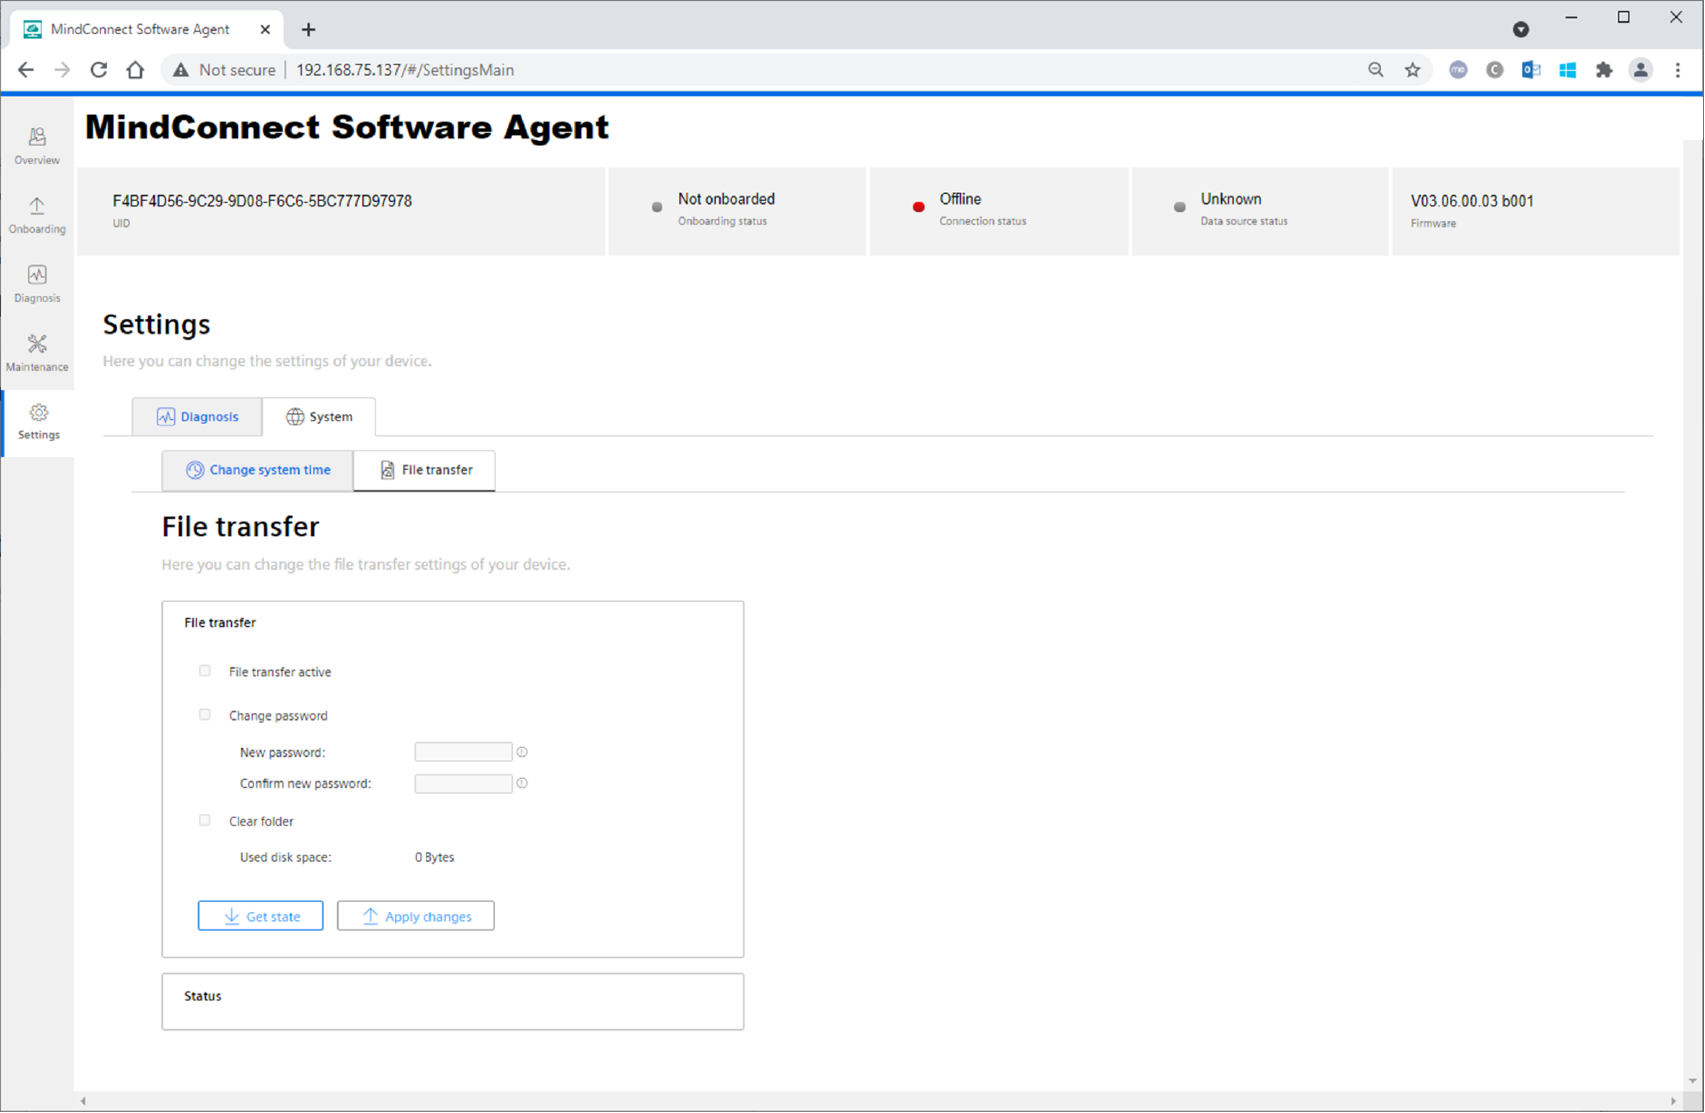
In "File transfer" section, click "Get state" button to get the current state of the file transfer service. In this section, following actions can be executed:
- Functionality to transfer files to Insights Hub can be enabled or disabled.
- Password can be changed.
- Shared "filetransfer" folder can be cleaned up manually.
Click "Apply changes" button to execute selected actions.
Note
File transfer functionality is available from the version MindConnect Software Agent V03.06.00.03 b001.
Service enablement
- File transfer service can be enabled or disabled by checking or unchecking the "File transfer active" check-box.
- By default, this feature is disabled and needs to be enabled first before it can be used.
- First enablement will take some time because further components will be installed on the system.
Note
- Before disabling the file transfer service, it is recommended to disconnect all network mappings to the shared "filetransfer" folder.
- File transfer service needs to be enabled and re-configured after the firmware update, if it had been configured before.
- It is recommended to drop a file to Integrated Data Lake(IDL) in case the agent is online.
Prerequisites
During first enablement of file transfer feature, it is necessary that following URLs can be accessed:
Changing password
To access MindConnect Software Agent shared folder, it is necessary to provide a password. Afterwards, the shared "filetransfer" folder can be mapped as a network drive. For example, using MindConnect Software Agent's IP address and the user "Insights Hub" and the provided password as credentials.
Example: \\192.168.0.47\filetransfer
Clean folder
If some files cannot be transferred to the upload folder, it is important to clean the shared "filetransfer" folder manually.
File transfer status
- While getting current file transfer state or changing file transfer configuration the current process and execution result will be shown in the file transfer status section.
- Furthermore, these execution results will also be available in the MCSA tab on the diagnosis messages pane.
Transferring files to Industrial IoT
After mapping the shared "File transfer" folder, you can copy the files from the local system to the mapped network drive. These files are required to be moved to internal upload folders immediately because the mapped network drive is not allowed to use as a file storage.
There will be two sub-folders in the shared "File transfer" folder so that the files can be uploaded to different targets on Industrial IoT starting from MCSA V03.06.00.13 b004:
- fs
- Files will be uploaded to file storage (fs).
- Maximum file size: 10MB
- idl
- Files will be uploaded to Integrated Data Lake(IDL).
- Maximum file size: 200MB
Note
- The shared "File transfer" folder size has a limit of 600MB (starting from MCSA V03.06.00.13 b004).
- The files are being automatically deleted to prevent the exceeding supported file size limit with unnecessary use of disk space in the shared "File transfer" sub-folder.
- Files directly located in the shared "File transfer" folder will not be uploaded or deleted automatically, but they can be deleted manually using “Clean folder" functionality mentioned above (starting from MCSA V03.06.00.13 b004 or later).
Drop a file copy to Integrated Data Lake (IDL)
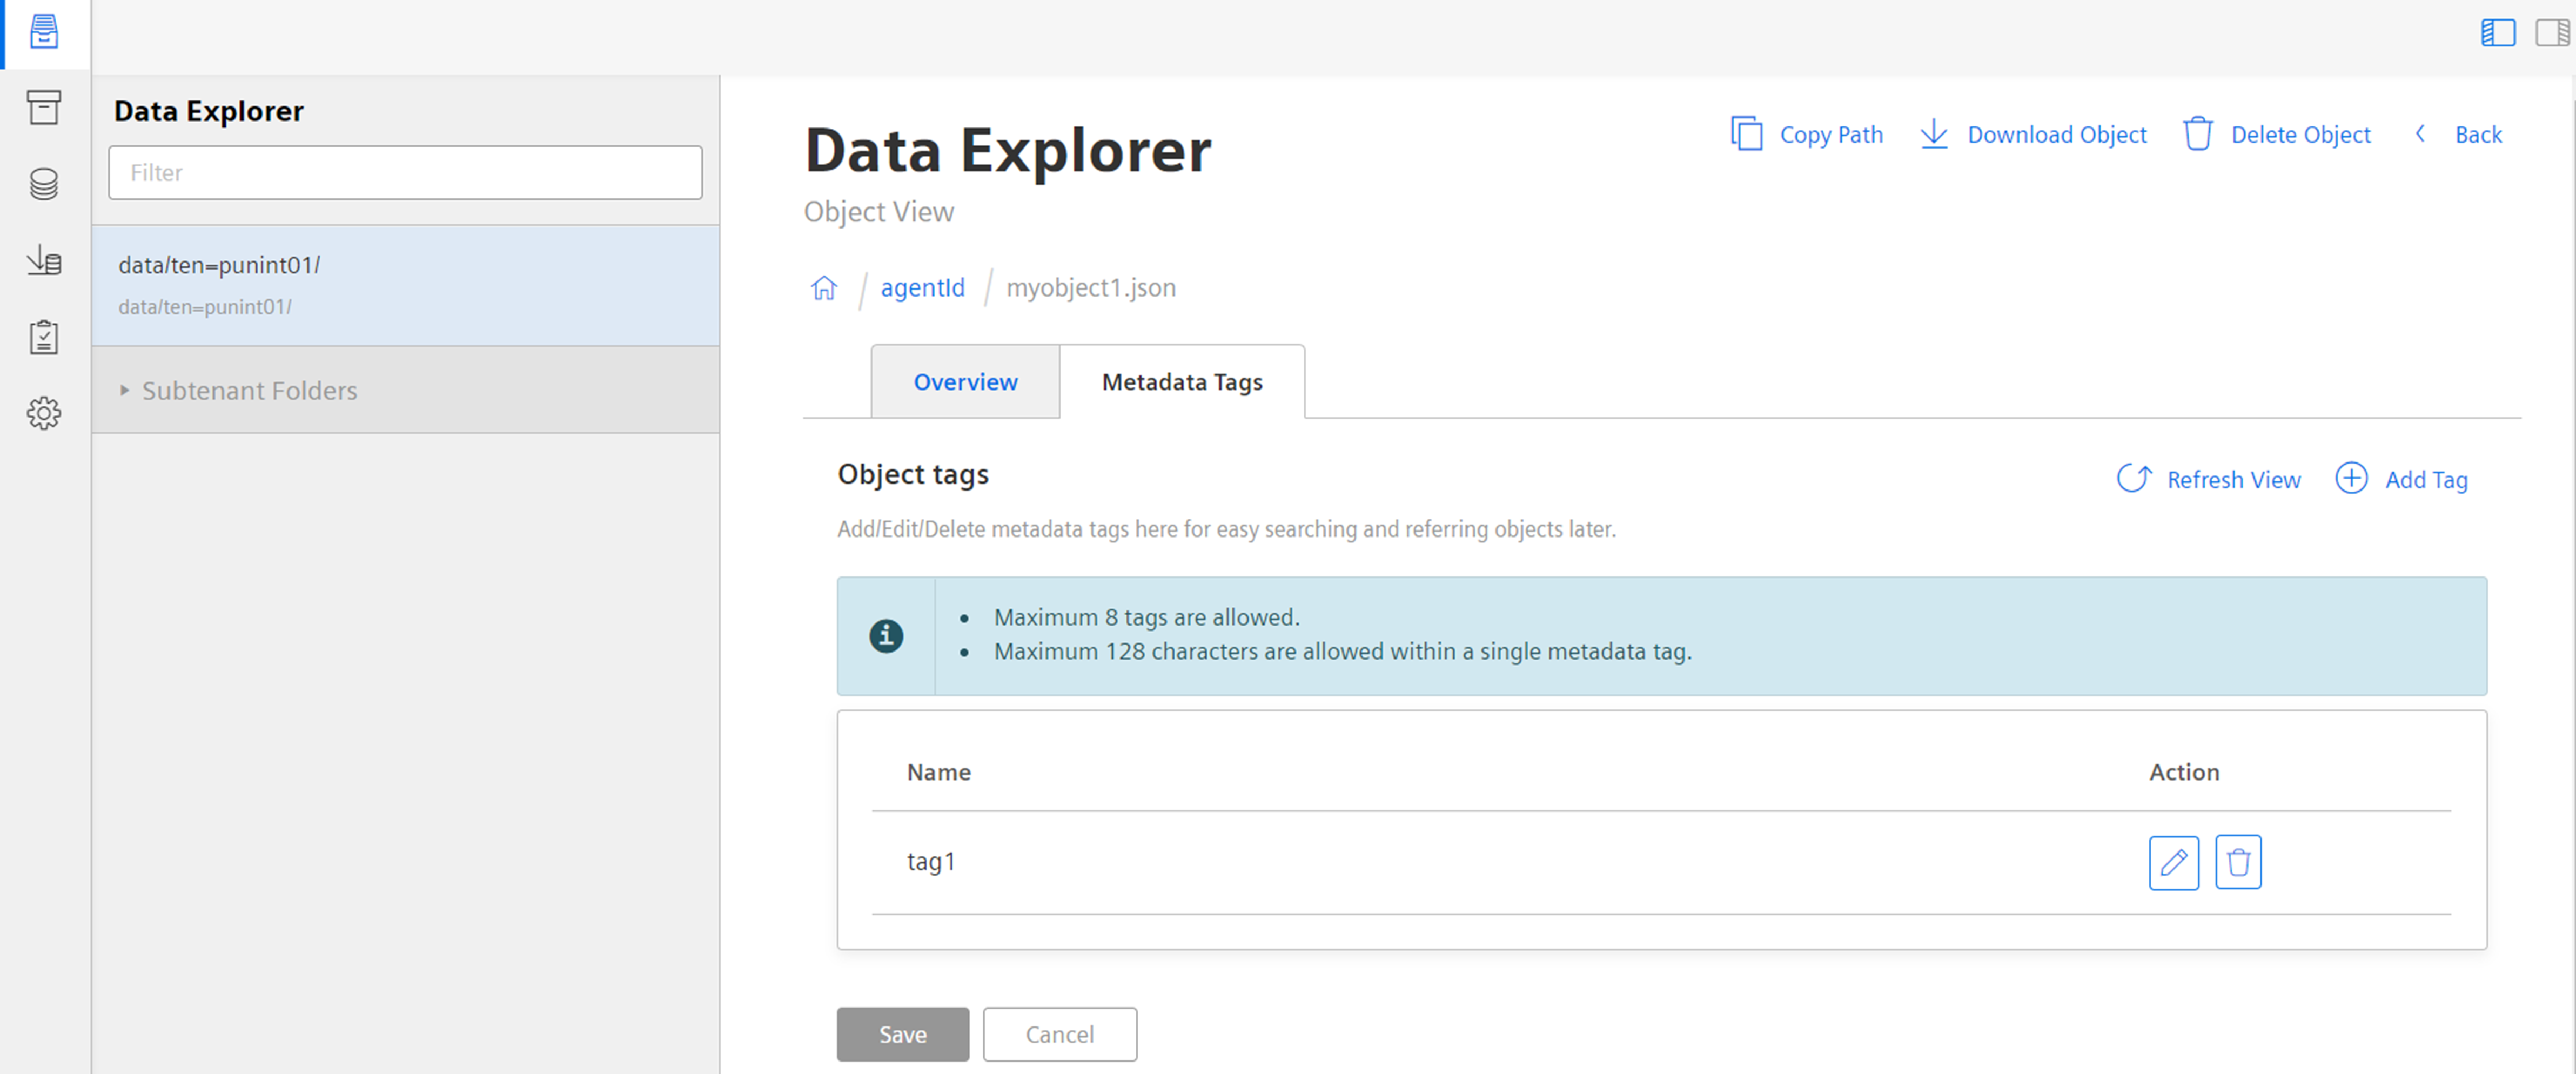
- In IDL, you can upload the files/objects and add the related metadata to the files/objects.
- IDL file names must be in the character set '[a-zA-Z0-9.!*'() _-/=]'. For more information about IDL, see Integrated Data Lake documentation.
- Metadata file name should contain metadata in lowercase prefix, for example
object_metadata.json. Metadata file extension should be.json. Metadata and JSON file needs to be uploaded together. - Metadata of the associated file/object is uploaded by the "objectName" field in the
.jsoncontent. If this field is missing, metadata of the file/object will not be uploaded. -
Example metadata format:
{ "tags": [ "tag1", "tag2", "tag3" ], "objectName": "object.objectext" } -
In IDL Manager UI, files/objects will be uploaded as
/agentId/objectName, so files can be uploaded under this folder. No other sub-folders will be created.
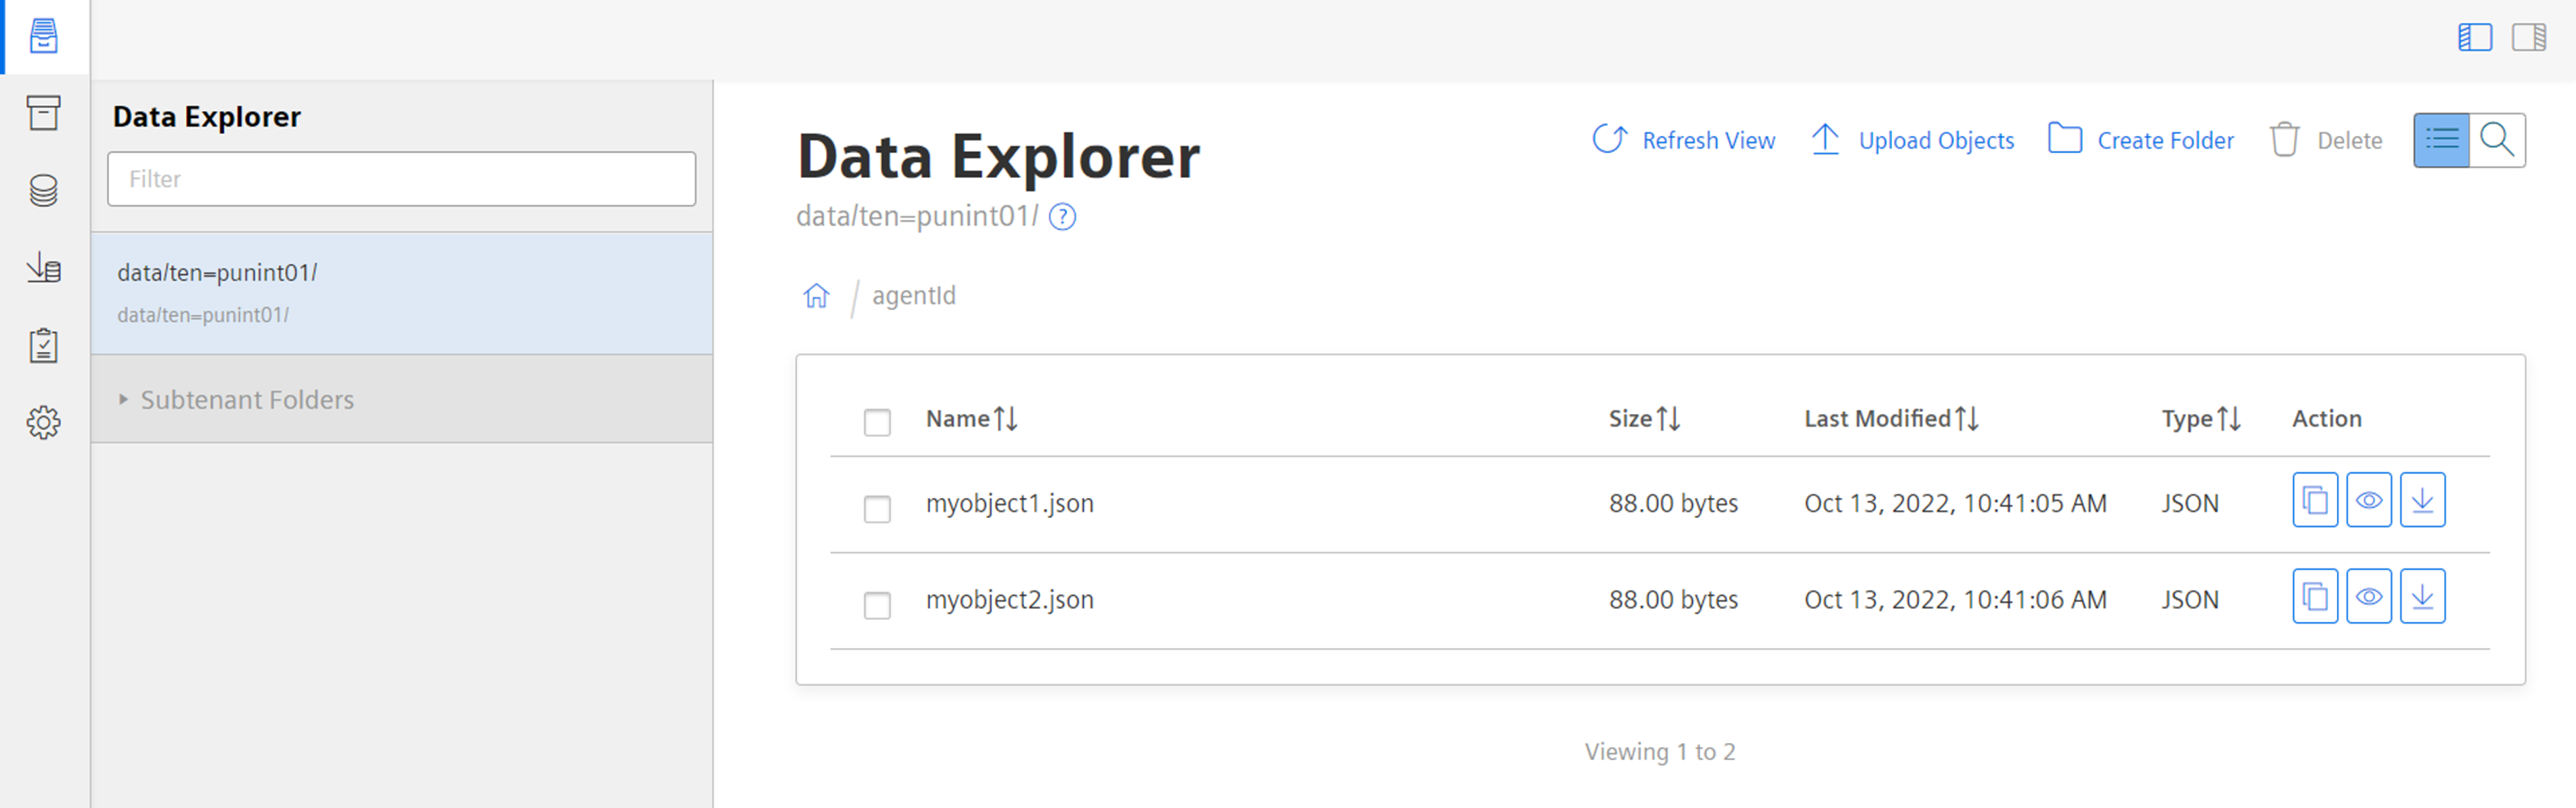
- Files/Objects with metadata will be uploaded to IDL as specified in the
.jsoncontent. Click to display the file/object details and added metadata.
- If a new file is uploaded with the same name that already exists in IDL, then it will overwrite the existing file.