Onboarding and installing MindConnect Software Agent in Windows
MindConnect Software Agent device is required to onboard using Asset Manager. For more information, see Asset Manager document.
Procedure to onboard
To onboard the device, you need to create an asset in the Asset Manager. To create an asset for your in Asset Manager, see Create Asset. Once the asset is created, open the UI plugin in Asset Manager to follow these steps:
-
Click "Asset Manger" from the Insights Hub Launchpad.
-
In Asset Manager, select the asset and click the MindConnect Software Agent plugin as shown in the image.
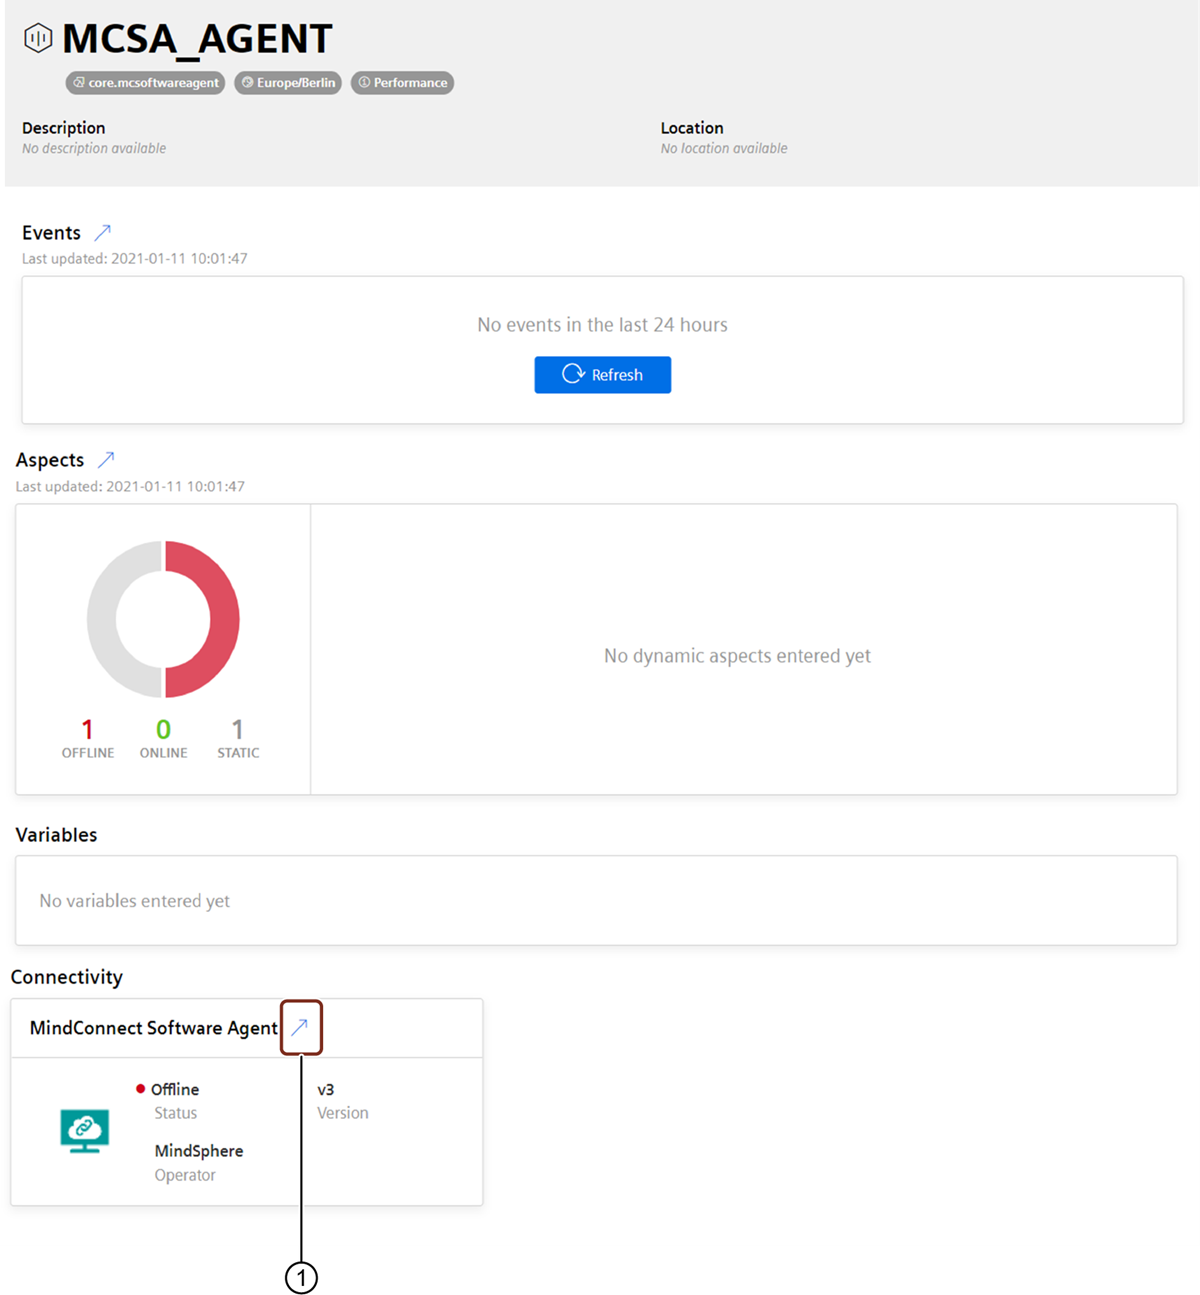
① Connects and onboards the MindConnect Software Agent
-
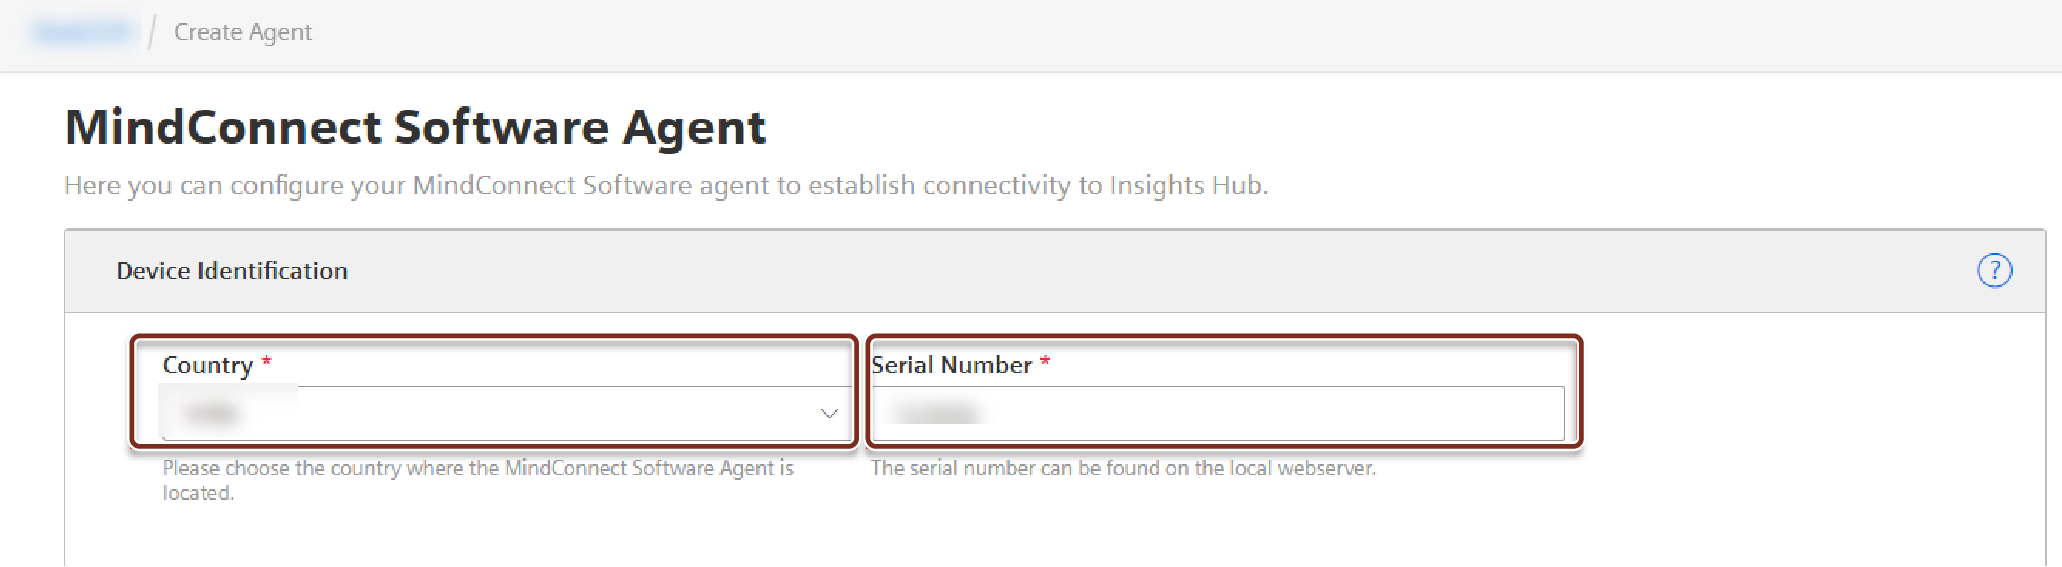
In MindConnect Software Agent plugin page, to identify the Asset choose the Country and enter the Serial number (serial number can be found in the local web server).
-
After the Asset is identified, "Download Setup and Installation" window is displayed as shown in the below image.

-
Accept "Terms and Conditions for this firmware version" and download the setup file based on the operating system.
-
After downloading the setup file install and run the MindConnect Software Agent firmware.
Installing MindConnect Software Agent
MindConnect Software Agent can be installed on Windows system and IPCs running a Windows 10 version that supports Hyper-V feature, for example Windows 10 Professional or Enterprise.
Note
HyperV has to be activated on the local host PC.
Procedure to install MindConnect Software Agent
To install MindConnect Software Agent, follow these steps:
-
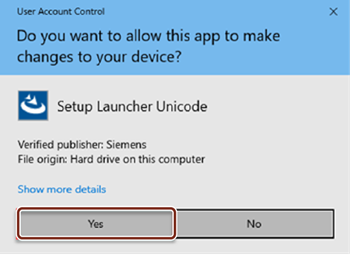
Double click "MindConnect Software Agent setup.exe".
-
Click "Yes" and click "Next".
-
Select the network interfaces for MindConnect Software Agent.
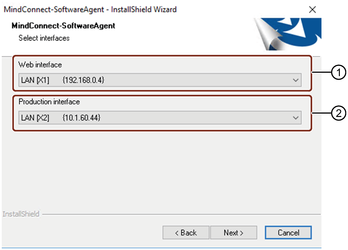
① Connects to Insights Hub
② Connects to the field devices like PLCs
Note
Ensure to use the correct adapter for each connection.
4.Select "Custom" setup type to install(recommended) and click "Next".
5.Configure the virtual machine settings and click "Next".
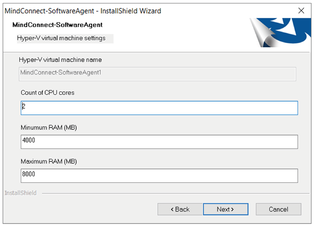
Note
Maximum RAM must be higher than the minimum RAM specification. Recommended is 8GB as maximum RAM and 4GB as minimum RAM.
6.Change "Destination Folder", if required and click "Next".
7.Review the settings and click "Next".
8.Click "Install".
Installation completed
After installing MindConnect Software Agent firmware, follow these steps:
- Restart your PC.
- Open Hyper-V Manager.
-
Click on virtual machine (MindConnect Software Agent) and click "Connect".
In VM console, information will be displayed (IP Address and Serial Number).
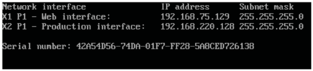
In this sample, MindConnect Software Agent's web server URL is
http://192.168.75.129/.For more information using Hyper-V Manager, see Using MindConnect Software Agent's Hyper-V VM.
Note
- Currently, http protocol is supported.
- At least one of the connected networks must provide DHCP support, so that the system will receive an IP address that can be used to open the local web UI in a browser.
- If a connected network does not provide DHCP support, the values for IP address and subnet mask will be empty and the device has to be onboarded first.
Procedure to uninstall MindConnect Software Agent
MindConnect Software Agent can be uninstalled either by executing MindConnect Software Agent's setup.exe file again, or via Windows Control Panel.
Note
To uninstall MindConnect Software Agent using Windows Control Panel is available from the version MCSA V03.05.00.01 b004.
Procedure to access the web server URL and onboard the device
To access the web server URL and onboard the device, follow these steps:
- In browser, open new tab and enter web server URL.
- In MindConnect Software Agent overview page, copy the "Serial Number (UID)".
- In MindConnect Software Agent plugin page, paste the "Serial Number" and click "Save" and then click
 to initiate the onboarding process.
 -
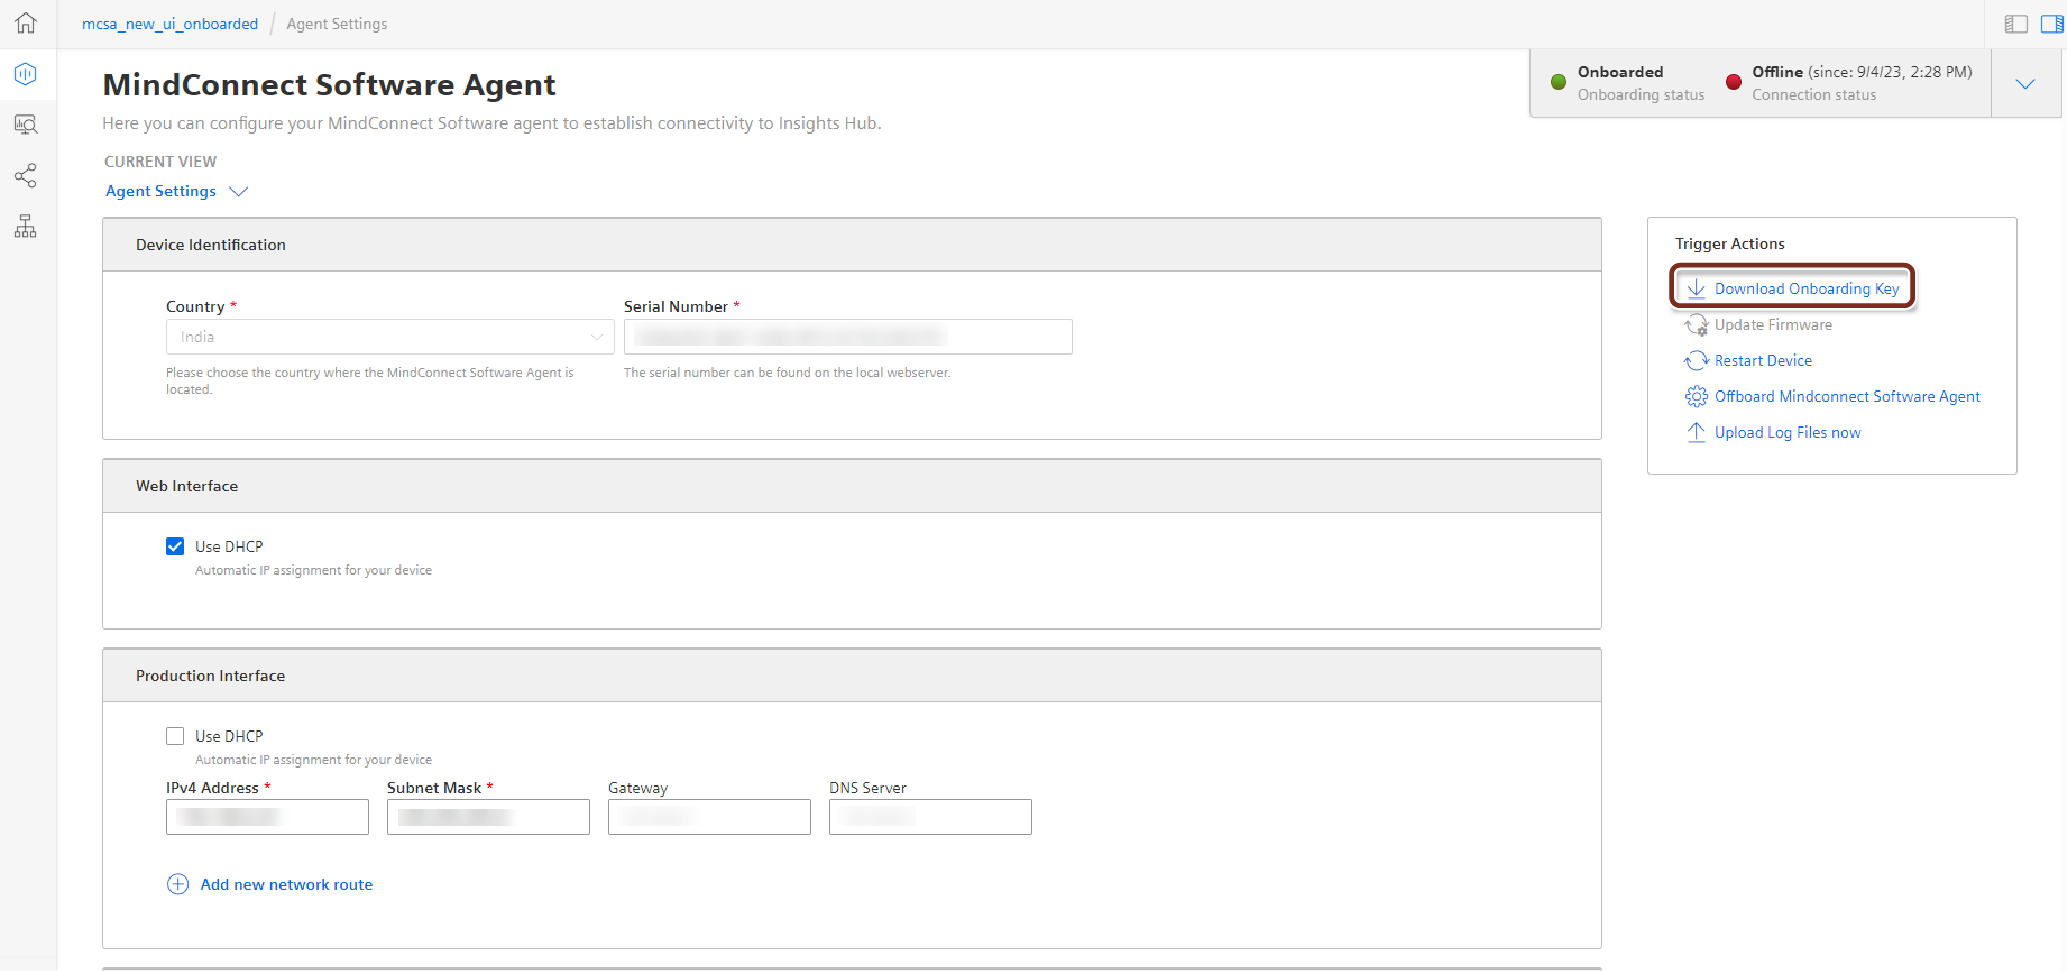
In the Agent settings view, check the settings and download the onboarding key file.
-
In MindConnect Software Agent's overview page, click "Onboard your device".
-
In MindConnect Software Agent onboarding page, follow the either step:
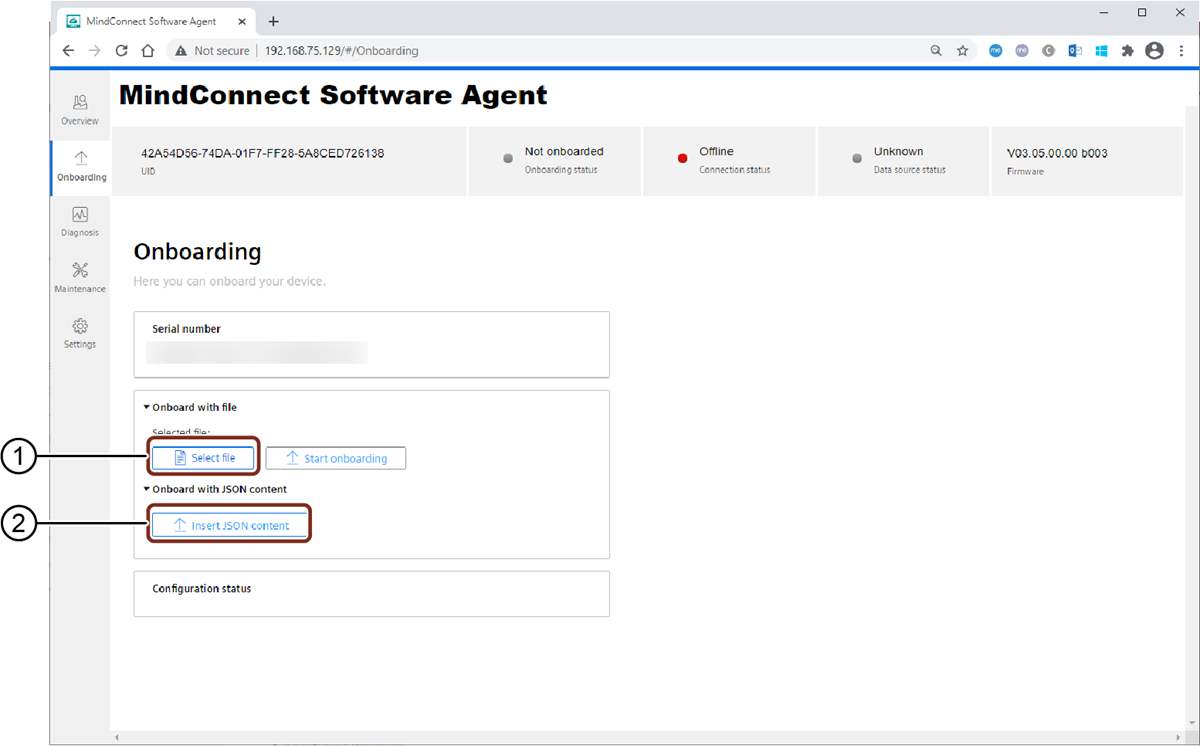
① Uploads the downloaded onboarding key file
② Inserts the JSON content from the onboarding key file
- Click "Select file" to upload the downloaded onboarding key file with the filename constructed form of serial number.
or
- Copy the text from the onboarding key file and click "Insert JSON content" to paste.
-
Click "Start onboarding".
- In Edit MindConnect page, click "Save" after the device is onboarded.
-
After the device is succesfully onboarded, you can add data sources and data point mapping.
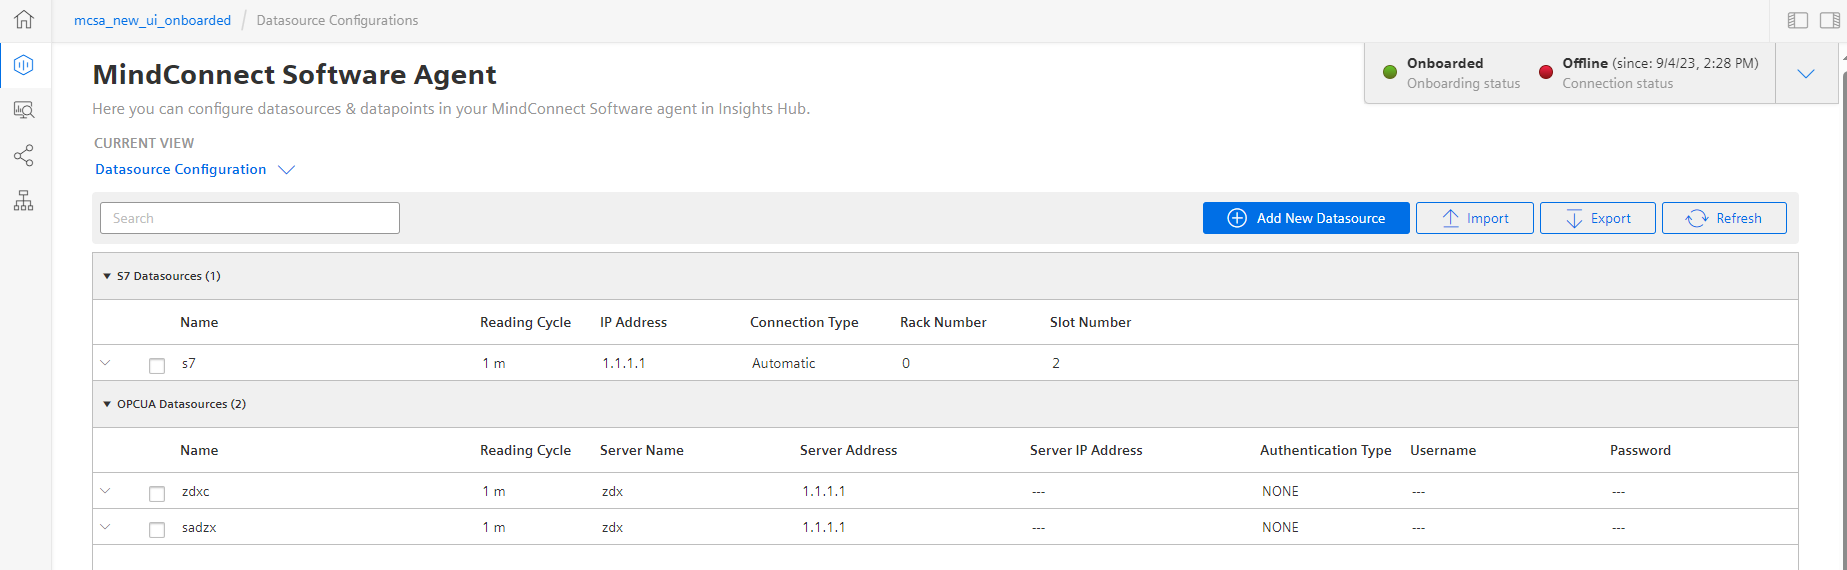
For more information on adding a data source and data points, see Adding a data source for MindConnect Software Agent.
To manage and maintain multiple virtual machines (VM's) in MindConnect Software Agent, see Managing or maintaining the virtual machines or instances in MindConnect Software Agent.
Serial number
The serial number section provides the serial number to copy and paste it to the serial number field during the asset configuration in asset manager.
Onboard with file
In “Onboarding” page, the exported configuration file from asset manager can be selected and click "Start onboarding" button to start onboarding.
Onboard with JSON content
It is also possible provide the configuration data directly as JSON input by clicking "Insert JSON input" and paste the JSON configuration data into the opened dialog. Thereafter, start the onboarding by clicking the "Start onboarding" button.
Configuration status
The status of the onboarding/configuration process is shown in the "Configuration status" section.
Note
If the network settings are changed by the new configuration data like a new IP address is updated, then the MindConnect Software Agent's web browser must be opened again by using the new IP address of the system. In that case, it might be possible that the diagnosis messages will be displayed twice in the diagnosis messages section. To resolve the issue, restart the virtual machine.