Mapping an aspect to a datasource for MindConnect Nano
Data mapping means matching variables of an aspect with the respective data points of a datasource.
- Variables of an aspect represent the Industrial IoT data.
- Data points of a datasource represent the data of the MindConnect Nano.
To use the data of your MindConnect Nano you have to map them to the respective variables of an aspect.
Requirement
You have created an asset based on your desired aspect and asset type.
Browser compatibility
Microsoft Edge browser do have some issues with the user interface (example: "Mapping"). Use another browser like, "Chrome" or "Firefox".
Data mapping can be done in following ways:
Map a variable to a datapoint by using in-cell mapping functionality
To map a variable to a datapoint by using in-cell mapping functionality, follow these steps:
- Select the asset in the "Assets" tab, for example: "Wind turbine1".
- Click the MindConnect Nano Plugin icon.
- Click "No mapping available" to map a variable in the Data configuration view for the datapoints added.
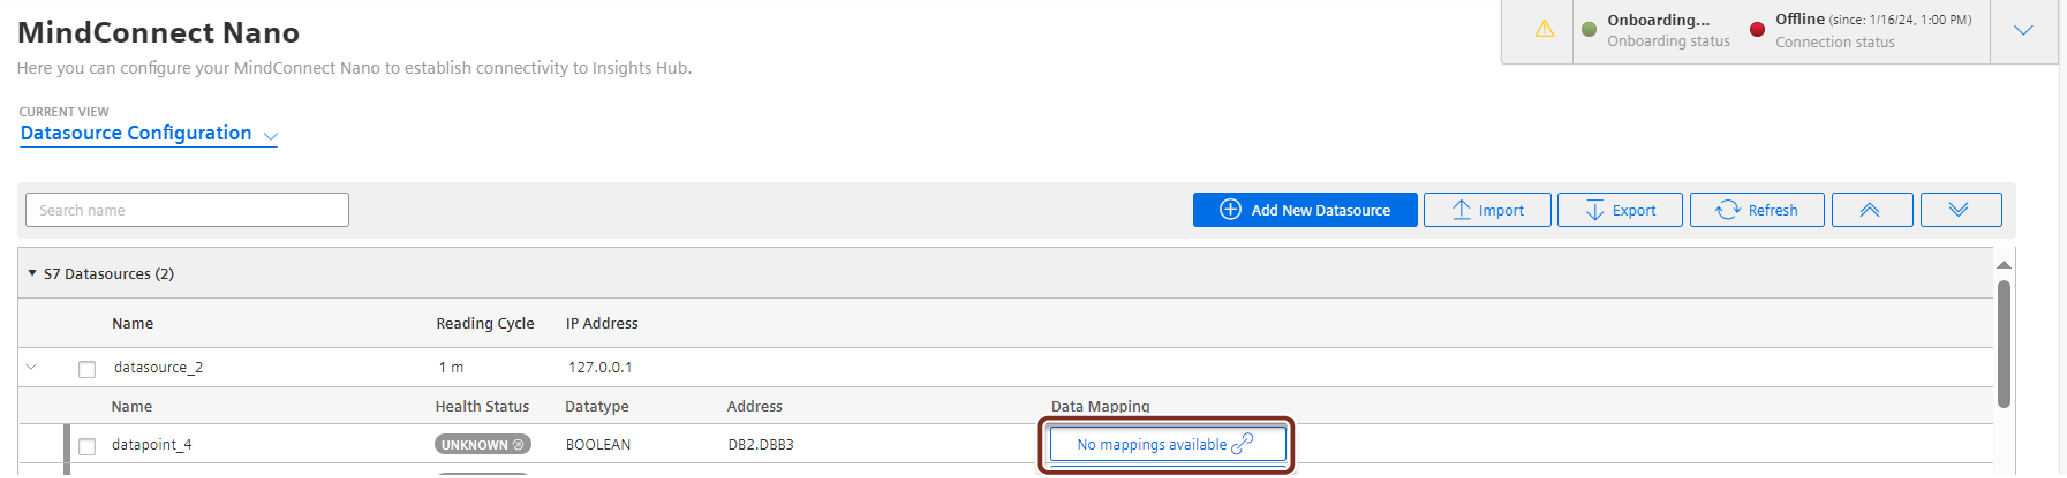
- Enter and select the variable to map the datapoint.
Note
Only data types that match exactly with the aspects and variables are available. If they are different, the aspect can’t be connected to the datapoint.
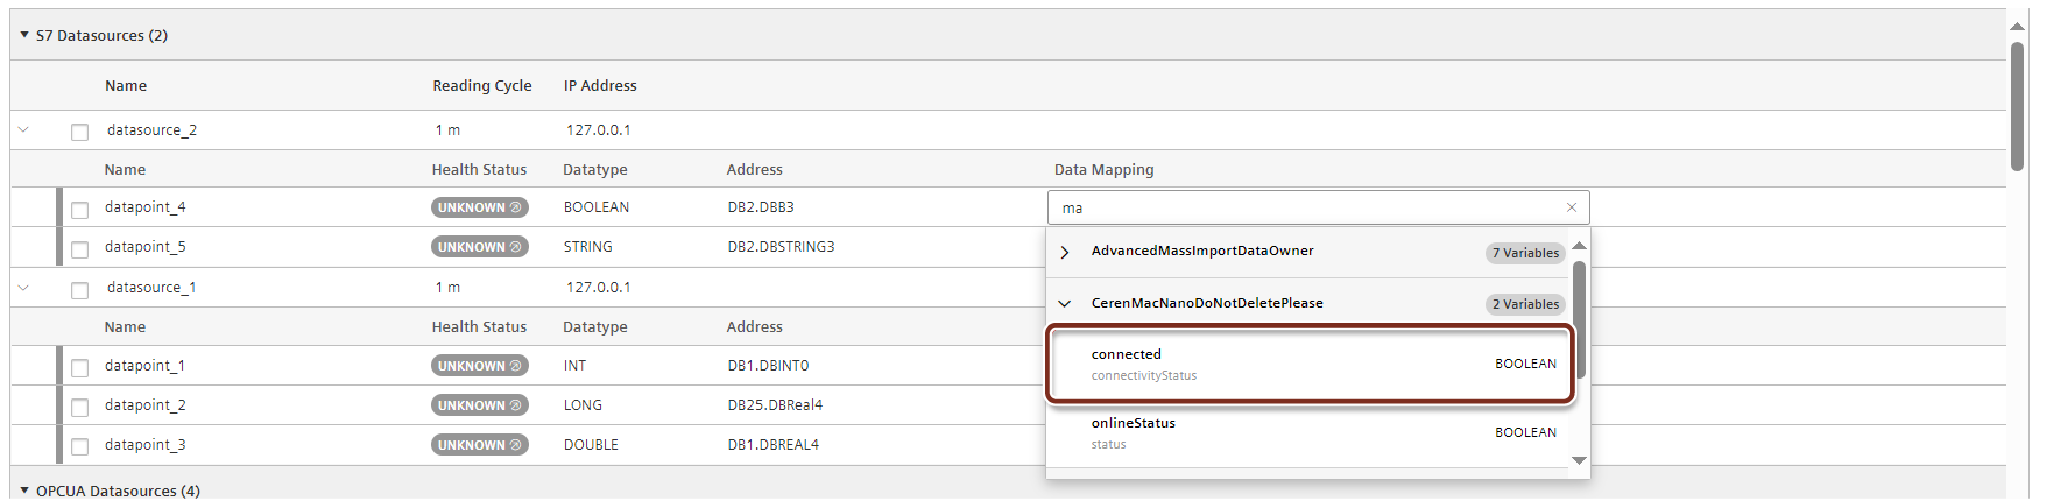
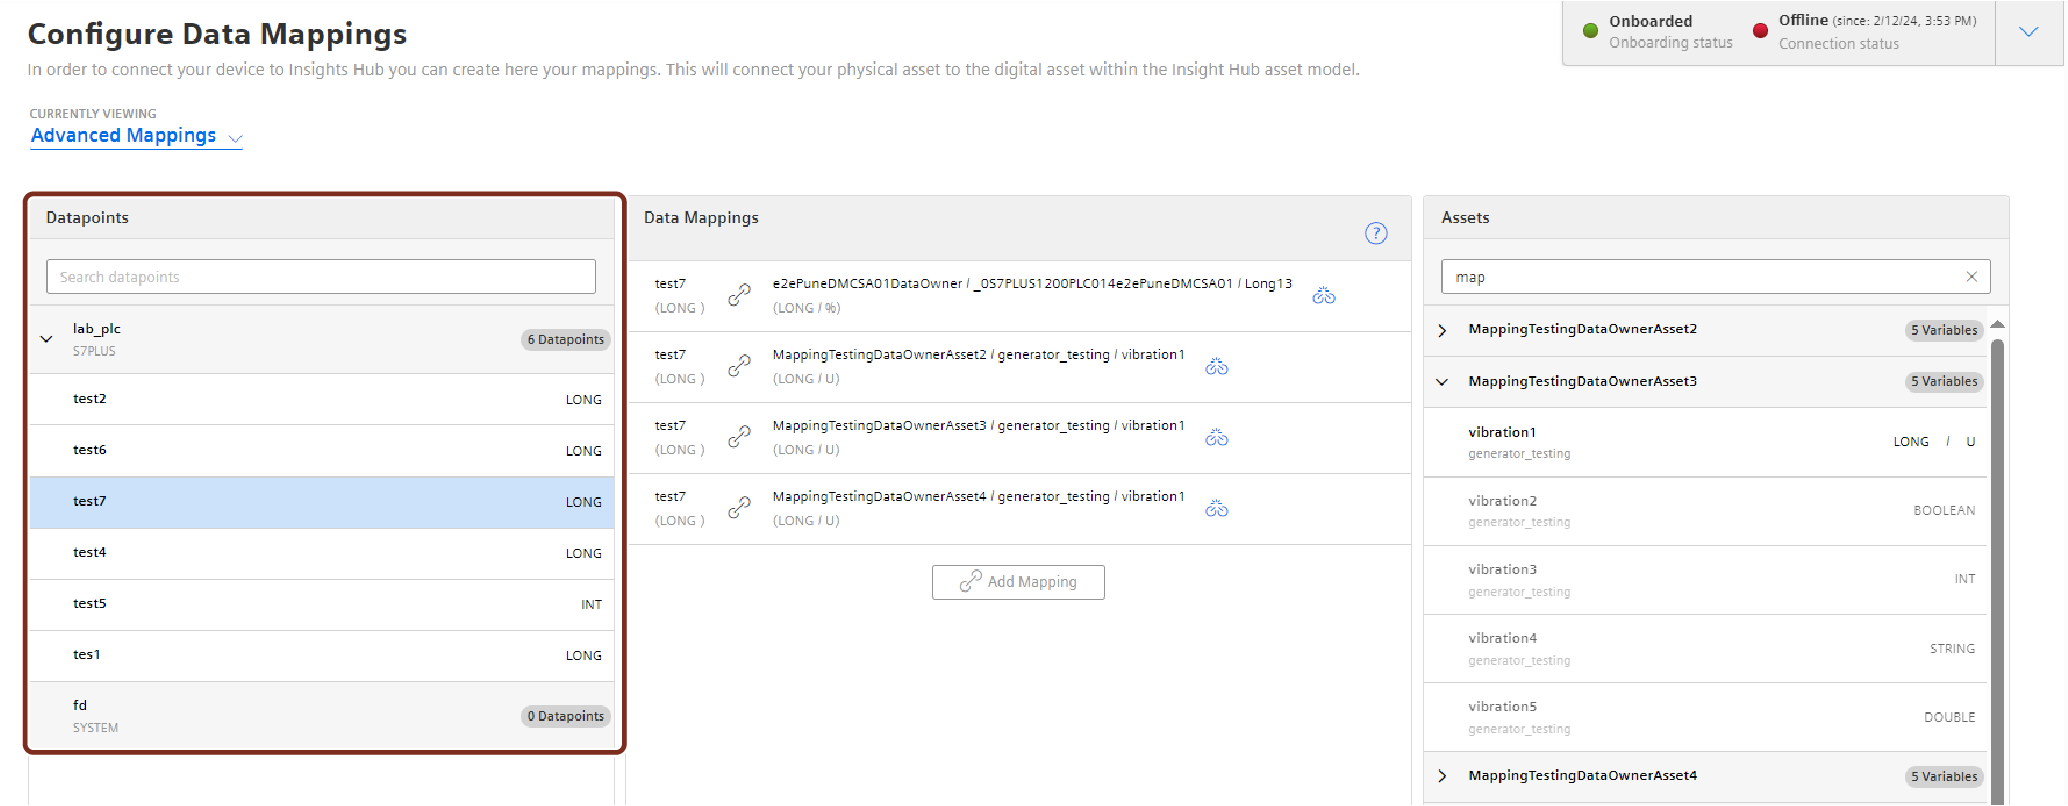
Map a variable to a data point from "Advance Mappings" or "Datapoint Mapping" option
To map a variable to a data point by "Advance Mappings" or "Datapoint Mapping" option, follow these steps:
- Select the asset in the "Assets" tab, for example: "Wind turbine1".
- Click the MindConnect Nano Plugin icon.
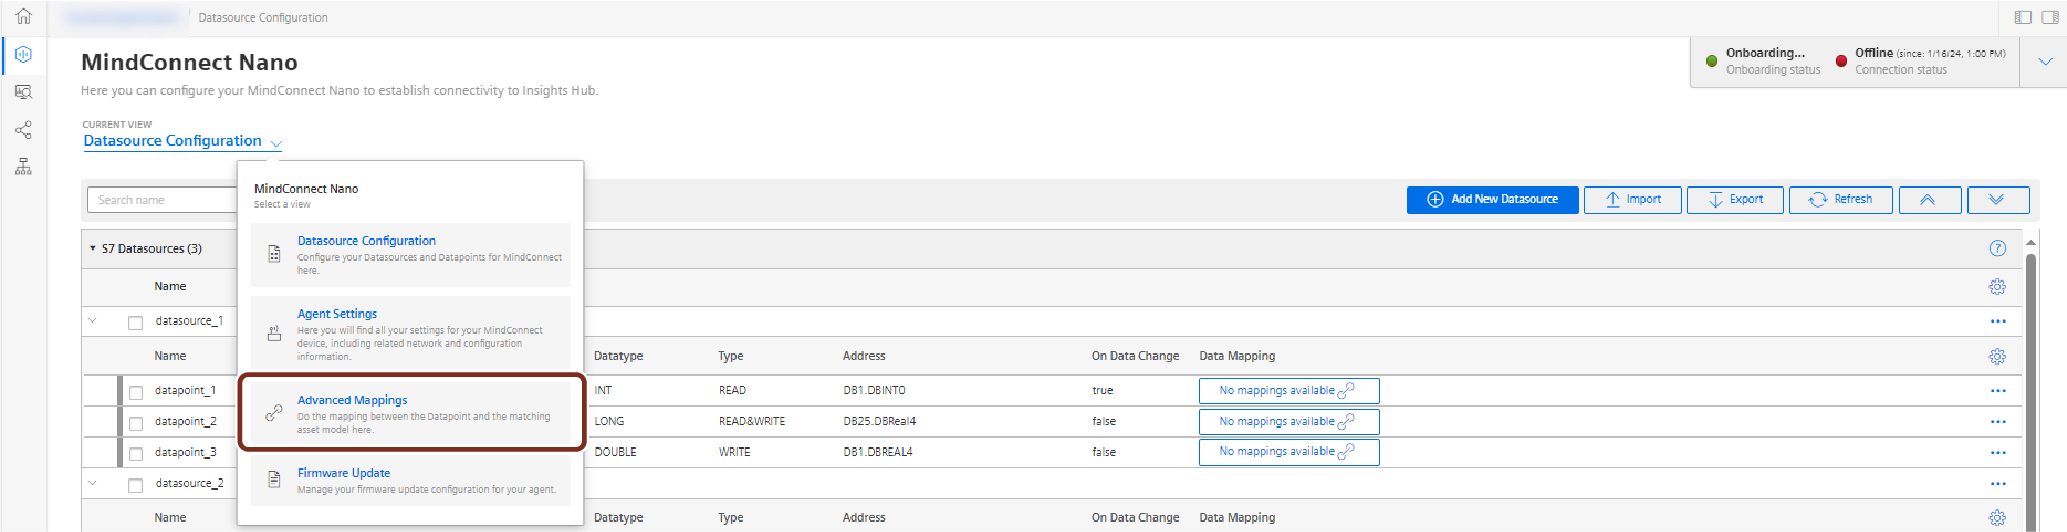
- Click "Datapoint Mapping" as shown in the image.

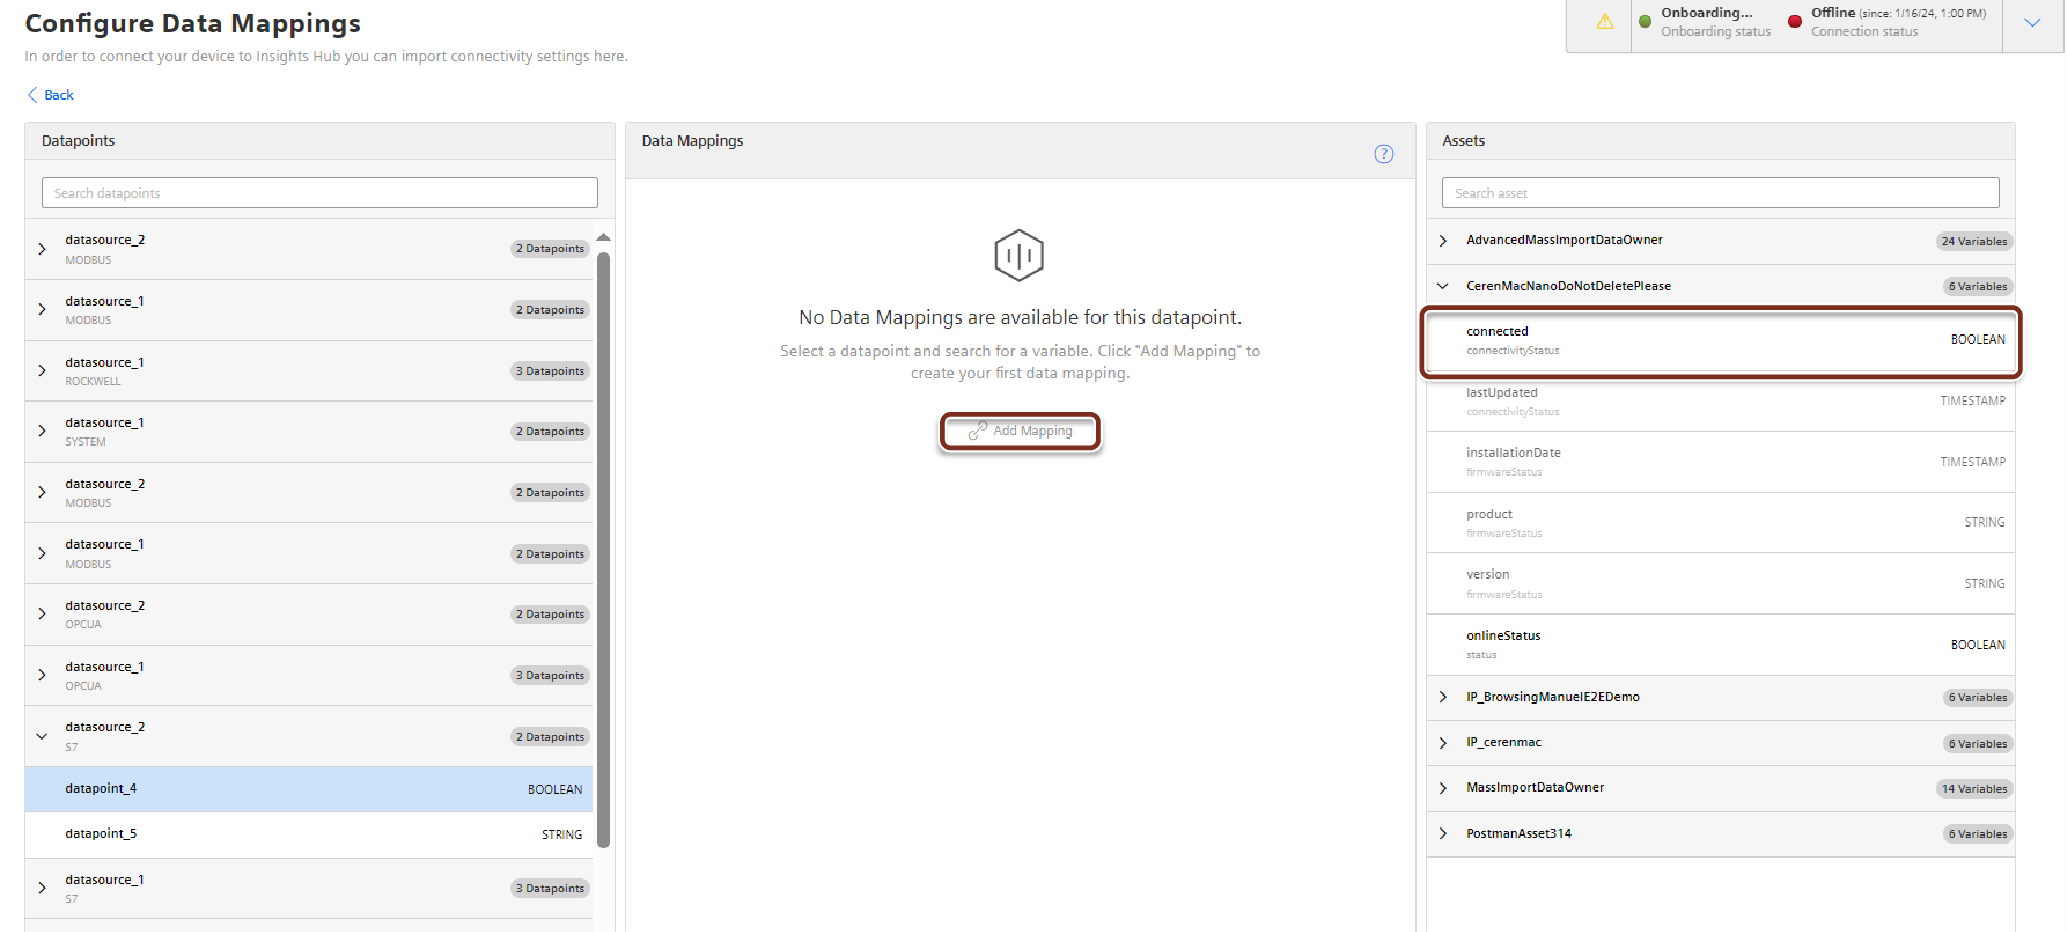
To map a datapoint to a datasource by "Advance mapping", select the "Advance mapping" option on the Mindconnect Nano plugin homepage. The below image displays the Advance mapping option.
- Enter the variable to map in the Assets tab to select the variable and click "Add Mapping".
Note
In "Advance mapping", select the datapoint to be mapped in the datapoint window before selecting the variable.
 .
.
- To map multiple datapoint, select an another variable to be mapped and click "Add Mapping". The below image shows the multiple data mapping.
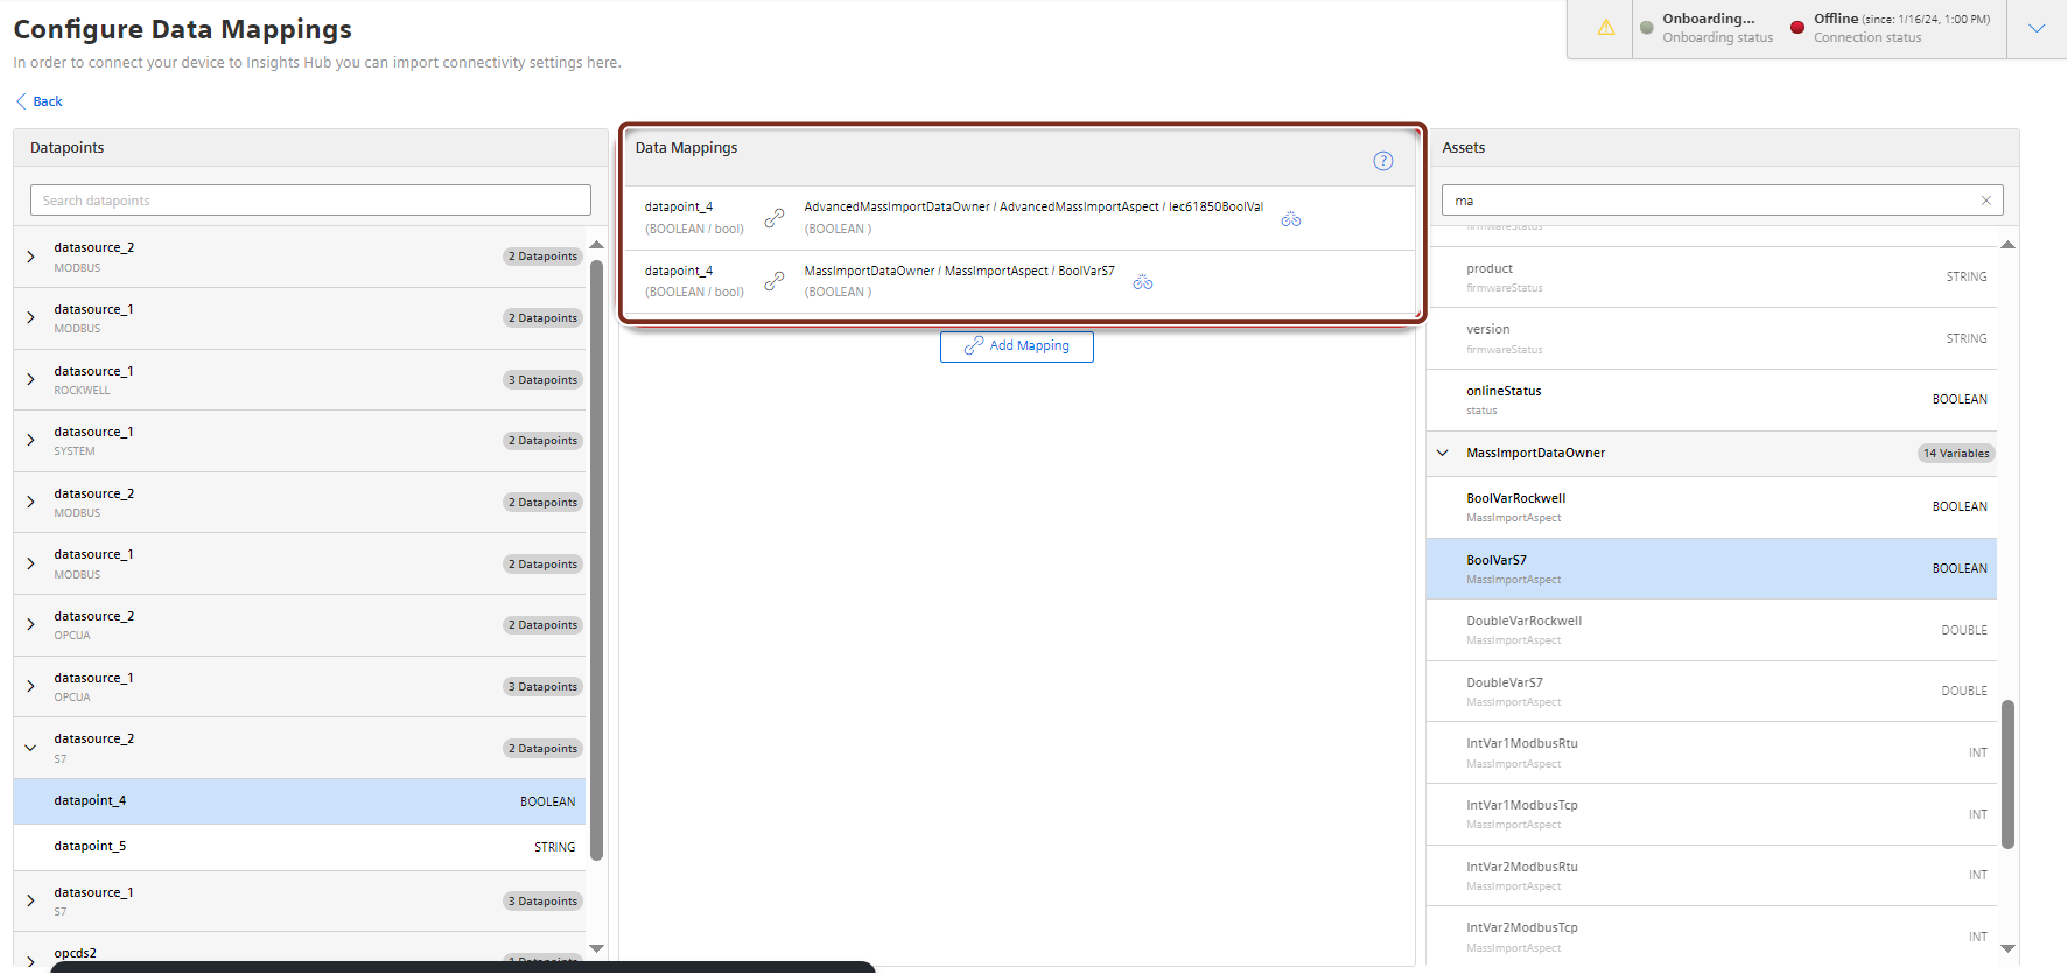
Result
The datapoint is now mapped to the variable. User can also perform mappings for multiple datapoints.
The following graphic shows a data mapped variable:

The following graphic shows a Multiple data mapped variable:
