Configuring Network settings
Network configuration of MindConnect IoT2050 requires information on the ethernet interfaces for data acquisition (ethernet labeled with X1P1) and Insights Hub (ethernet labeled with X1P2). If your company uses a proxy server, it must also be configured to connect MindConnect IoT2050 to Industrial IoT. Contact your IT administrator for details on your local network settings. For more information, refer Connecting MindConnect IoT2050 to Insights Hub network.
After enabling the connection to the MindConnect Element you can edit the network configuration. You can enter either a static IP address or use DHCP. The last option is possible, if there is a DHCP server available in your company network.
Procedure
To configure the network setting, follow these steps:
- Select the asset in the "Asset" tab.
- Click the asset icon, for example "MindConnect IoT2050".
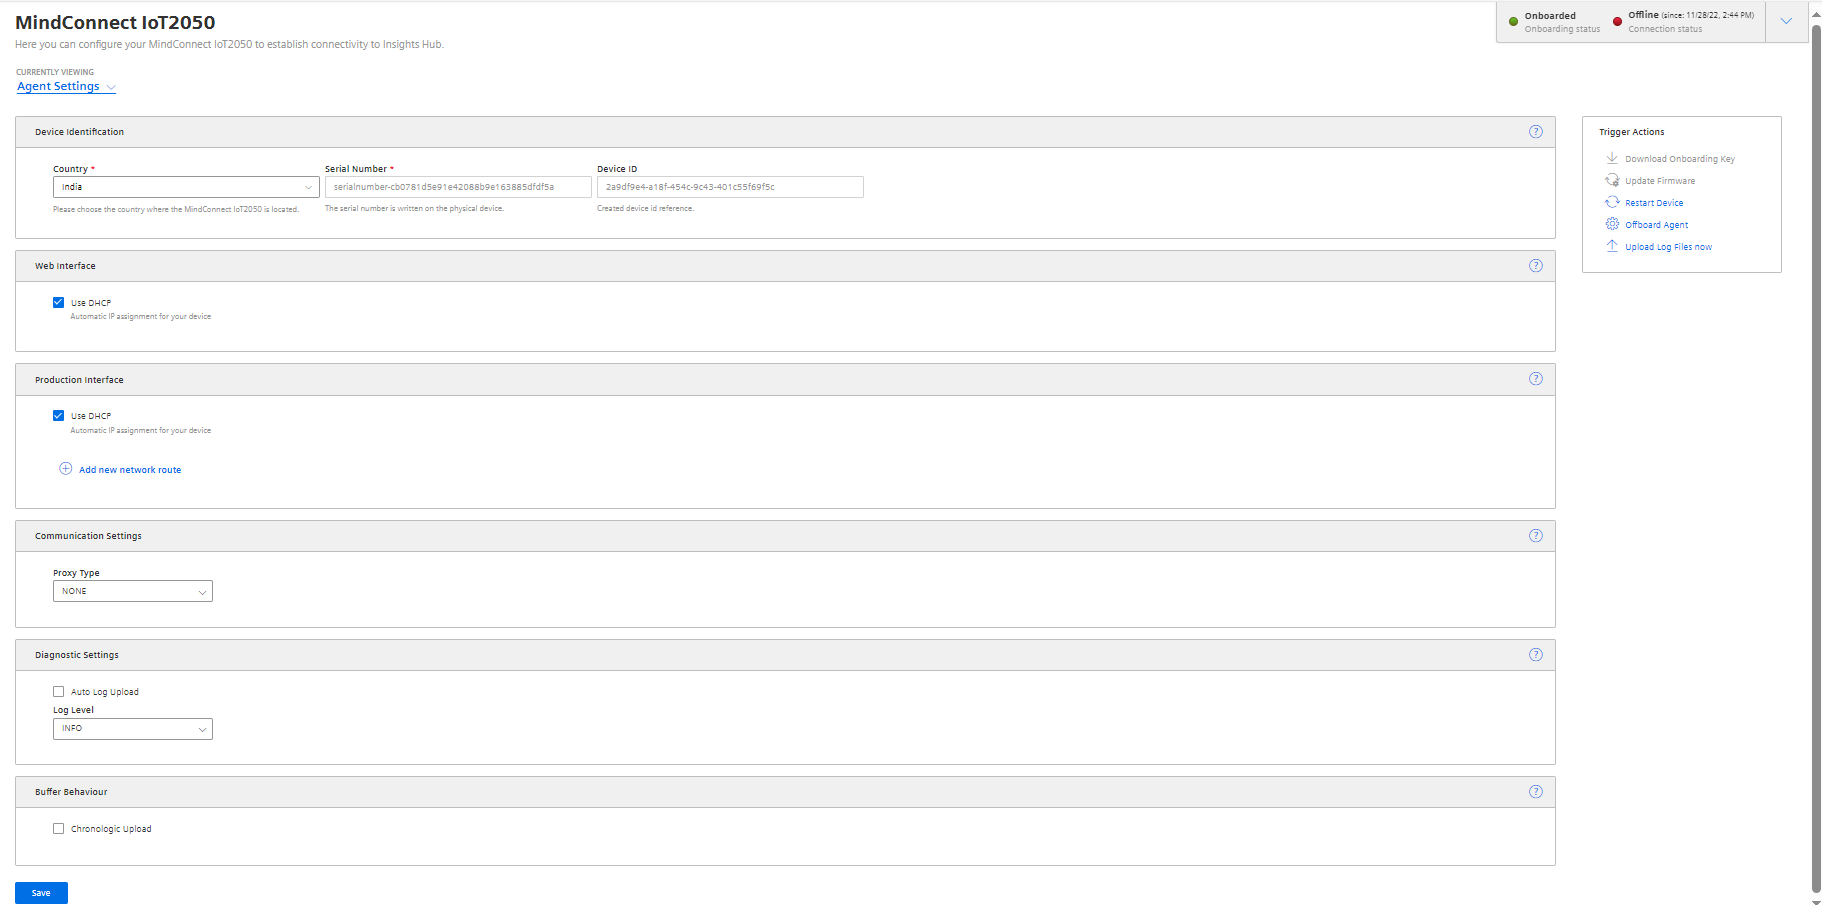
- In th Agent settings section, the following graphic displays the edit MindConnect window.

- Enable "DHCP" if the DHCP server is available in a company network or enter the address information for static IP address.
The following graphic shows the IP address input fields:

Note
- It is recommended to add network routes instead of using Gateway field. It is applicable for "Production Interface" only.
- Configuring “Production interface" is not necessary for the case of reading data from serial devices using Modbus RTU protocol and the setting DHCP is enabled by default.
5.Select the proxy type in "Communication Settings" if necessary and click "Save".
- In this case, contact your network administrator to get the proxy data. For Proxy IP address input field, it is also possible to define the port number, for example: 127.0.0.1:8080.
- For proxy authentication type NTLM: The domain and the username have to be provided as "username@domain" or as "domain/username".
Note
If nothing else is configured manually, MindConnect IoT2050 will try to obtain IP addresses for both adapters via DHCP.
6.Enter the available router gateways used in the company network.

7.Click "Save" to complete the configuration.