Managing Cross Account accesses
You can manage the "Cross Account Accesses" by providing access to the specific folders based on the requirement and grant the permission to read, write or delete access as per the requirements.
Procedure
To manage the cross accounts accesses, follow these steps:
- In the left navigation, click "Cross Account". The Account Details screen is displayed.
-
In the "Account Details" screen, click the "Add Accesses" button.
The "Add Access Details" screen appears.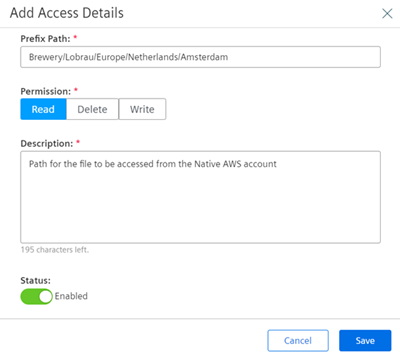
-
Enter the "Prefix Path" to specific account access path on which the accesses to be provided.
- Select the "Access Permission" (Read, Delete or Write).
- Enter the "Description" regarding the access details.
- Click "Status" button to enable or disable the "Access Permission".
-
Click "Save".
The account access details will added to the list.
-
Click the
 icon to edit the account access permission.
 - Click the
 icon to delete the account access.
Note
- A maximum of 5 prefixes can be enabled across one or multiple cross accounts.
- A maximum 10 cross account accesses can be created in a disabled state.
- Cross Account is set to be accessed from the native AWS tools.
Last update: February 13, 2024