Importing the scheduled Time Series data
In Time Series Import, you can schedule the import data. The import data can be scheduled with the frequency of "Daily", "Weekly" or "Monthly". Based on the frequency selection, your data will be imported as per the scheduled task.
User Interface
The "Schedule Import" is accessible from the Time Series Import tab.

① Create Schedule Import jobs
② Filter or search the list of Schedule Import jobs
③ Displays the selected Schedule Import Details
Procedure
To create the scheduled IoT time series job, follow these steps:
- In the left navigation, select the "Time Series Import" tab and click "Schedule Import". The "Schedule Import Details" screen is displayed.
- Click
 .
.
The "Import Time Series Data" screen is displayed. -
In "Basic Info" section, enter the "Destination Path" and the "Task Name".

-
In "Schedule Details" section, choose any one "Frequency" to schedule the import:
- Daily: This will schedule the job to run every day.

- Weekly: This will schedule the job to run once in a week on selected day of the week. Ensure the end date of the job is far enough to execute the at least 1 execution of the job.

-
Monthly: This will schedule the job to run once every month. Ensure the end date of the job is far enough to execute the at least 1 execution on the job. There are two option available in monthly schedule:
-
On the selected day of the month
-
On the last day of every month.

-
Note
Job runs on the scheduled time and fetch the data one day prior to the execution date.
5.In "Assets/Aspects" section, select the Asset and Aspect.
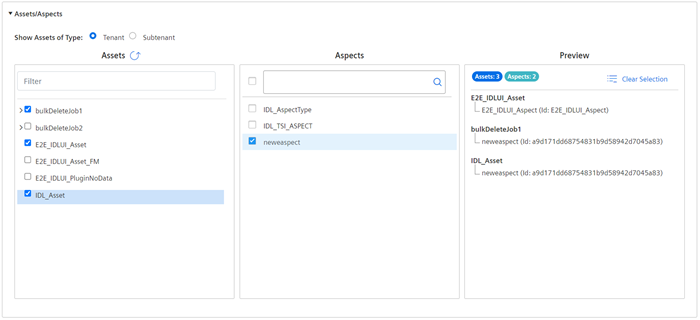
Note
Maximum 5 asset and aspect combination selection is allowed.
6.Click "Preview and Save".
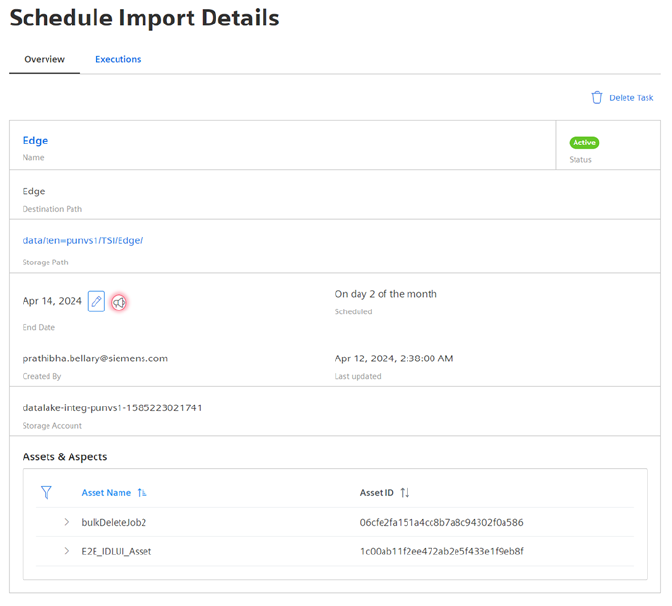
7.Check the job preview and click "Save".
The status of the created job is described below:
- Active – It is the status of the job after creation. In "Active" status, you can extend "End Date" of the job.
- Inactive – It is the status of the job if any of "Asset/Aspect" from the job is deleted.
- Expired – It is the status of the job after "End Date" is met. You have to delete the job and create a new one after it expires.
Note
- Maximum limit to schedule the jobs is 10 for all users (tenant + subtenant).
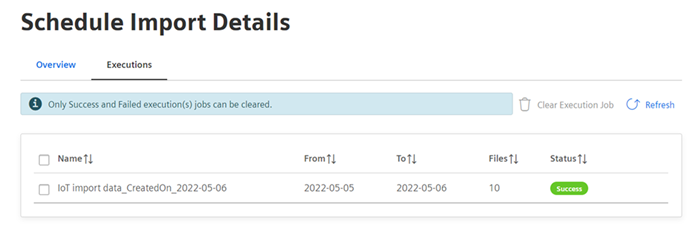
- Only "Success" and "Failed execution" jobs can be cleared.
Result
The scheduled Time Series job is created successfully.
In "Schedule Import Details", click "Executions" tab for the outputs.