Adding and managing oData Contract
The oData Contract allows you to add and manage the contracts of selected folders path to be used in the Mendix app via the Mendix Data Hub.
To access the data using Mendix Data Hub, you need to create oData contract(s) to allow access based on selected folder. For more information about this process, refer to Data Hub Guide.
oData Contract Status
| Status | Description |
|---|---|
| Published | Contract is published to Mendix Data hub |
| Publishing | Contract is not published due to network issue while Publishing to Mendix Data hub |
| Not published | Contract is ready to be published to Mendix Data hub |
Procedure
To add and manage the oData contract, follow these steps:
-
In oData Contract, click "Add contract".
-
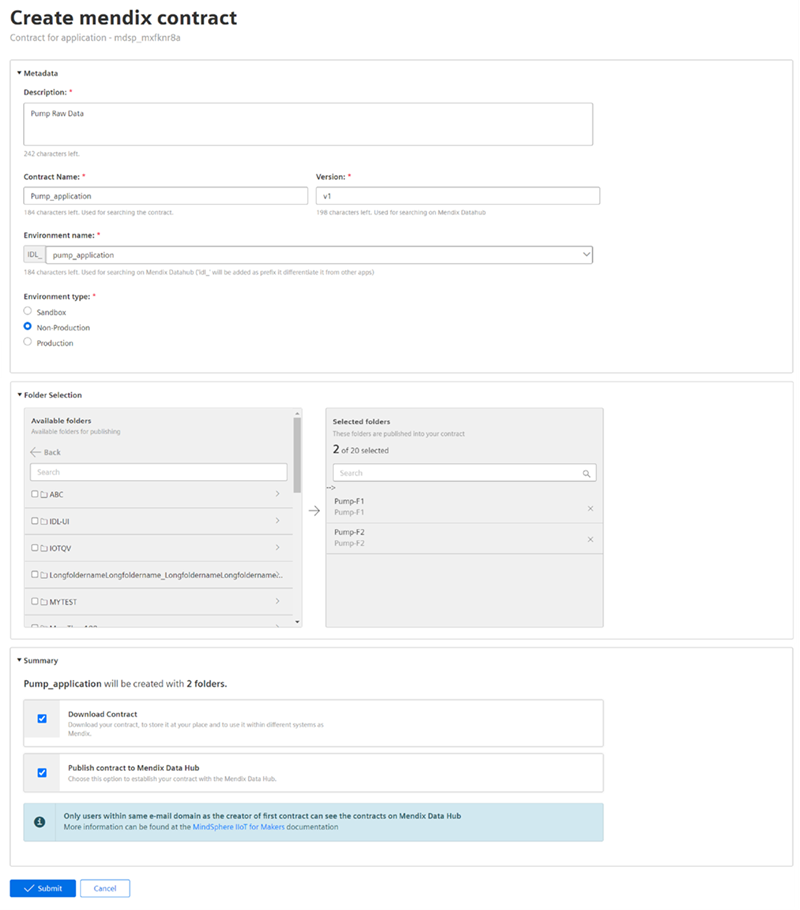
In "Create mendix contract" screen, configure the following sections:
- In "Metadata" section, enter the contract details for the application.
- In "Folder Selection" section, select the required folders for the contract.
Note:
Maximum 20 possible folders can be selected for a single contract. - In "Summary" section, select "Download" and "Publish contract to Mendix Data Hub".
Note:
Downloading a contract is optional.
-
Click "Submit".
-
In Mendix "Authorize access to account" screen, confirm and accept the agreement.
Note
Maximum 50 possible contracts can be created in oData Contract.
Result
The oData Contract is successfully added and you can also view the contract in Mendix data hub.