Managing Calendars
In case you choose the first option, click “Calendars” from the “Configuration” page and it will redirect you to the “Calendar” configuration.
User interface
In “Calendar” overview, you can perform the following actions:
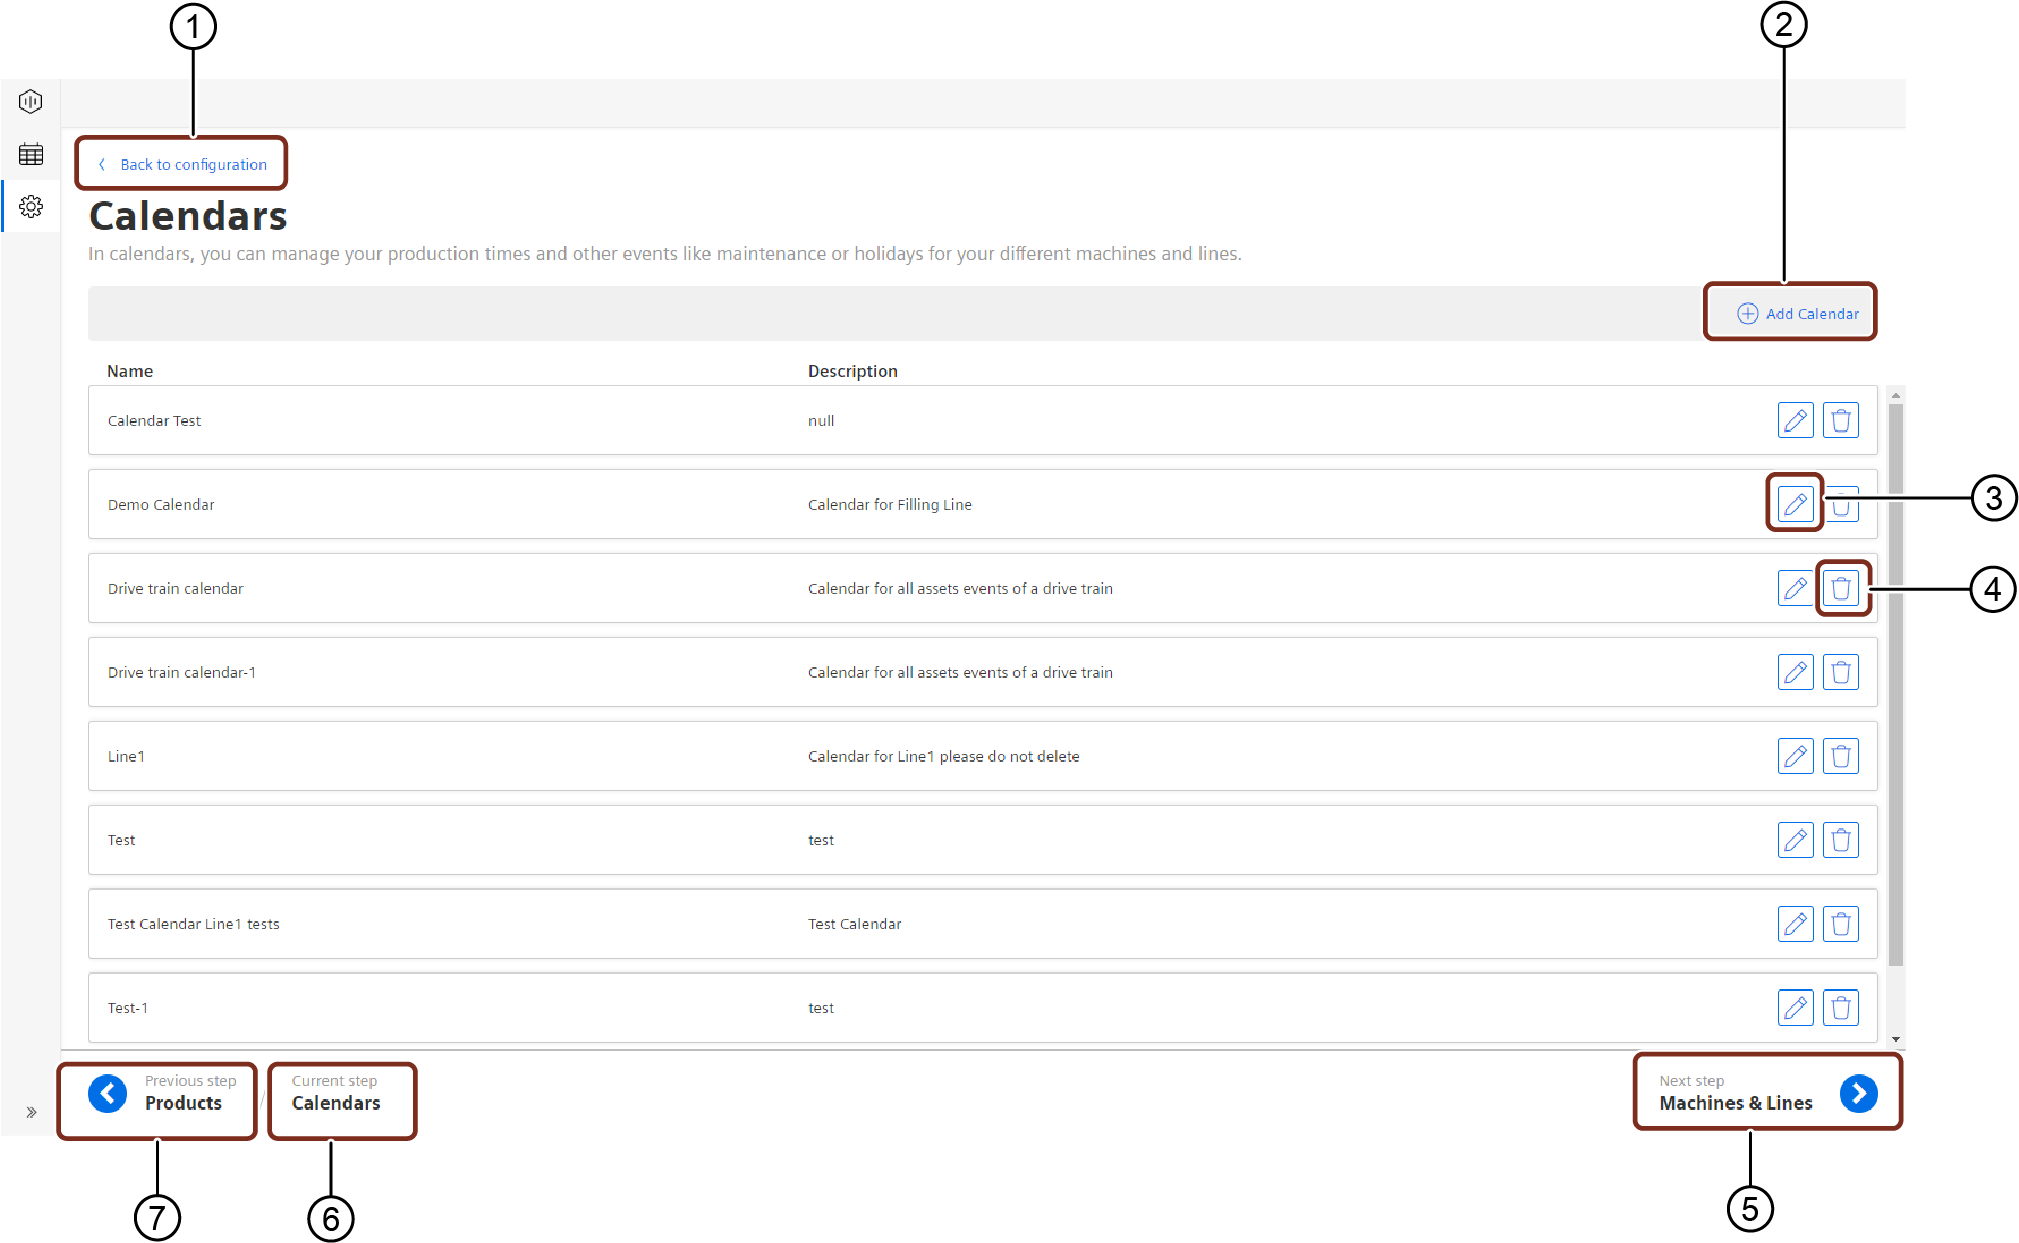
① Navigates to the “Configuration” tab
② Adds a new “Calendar”
③ Edits the existing “Calendar”
④ Deletes the existing “Calendar”
⑤ Navigates to the next step
⑥ Displays the current step
⑦ Navigates to the previous step
Procedure
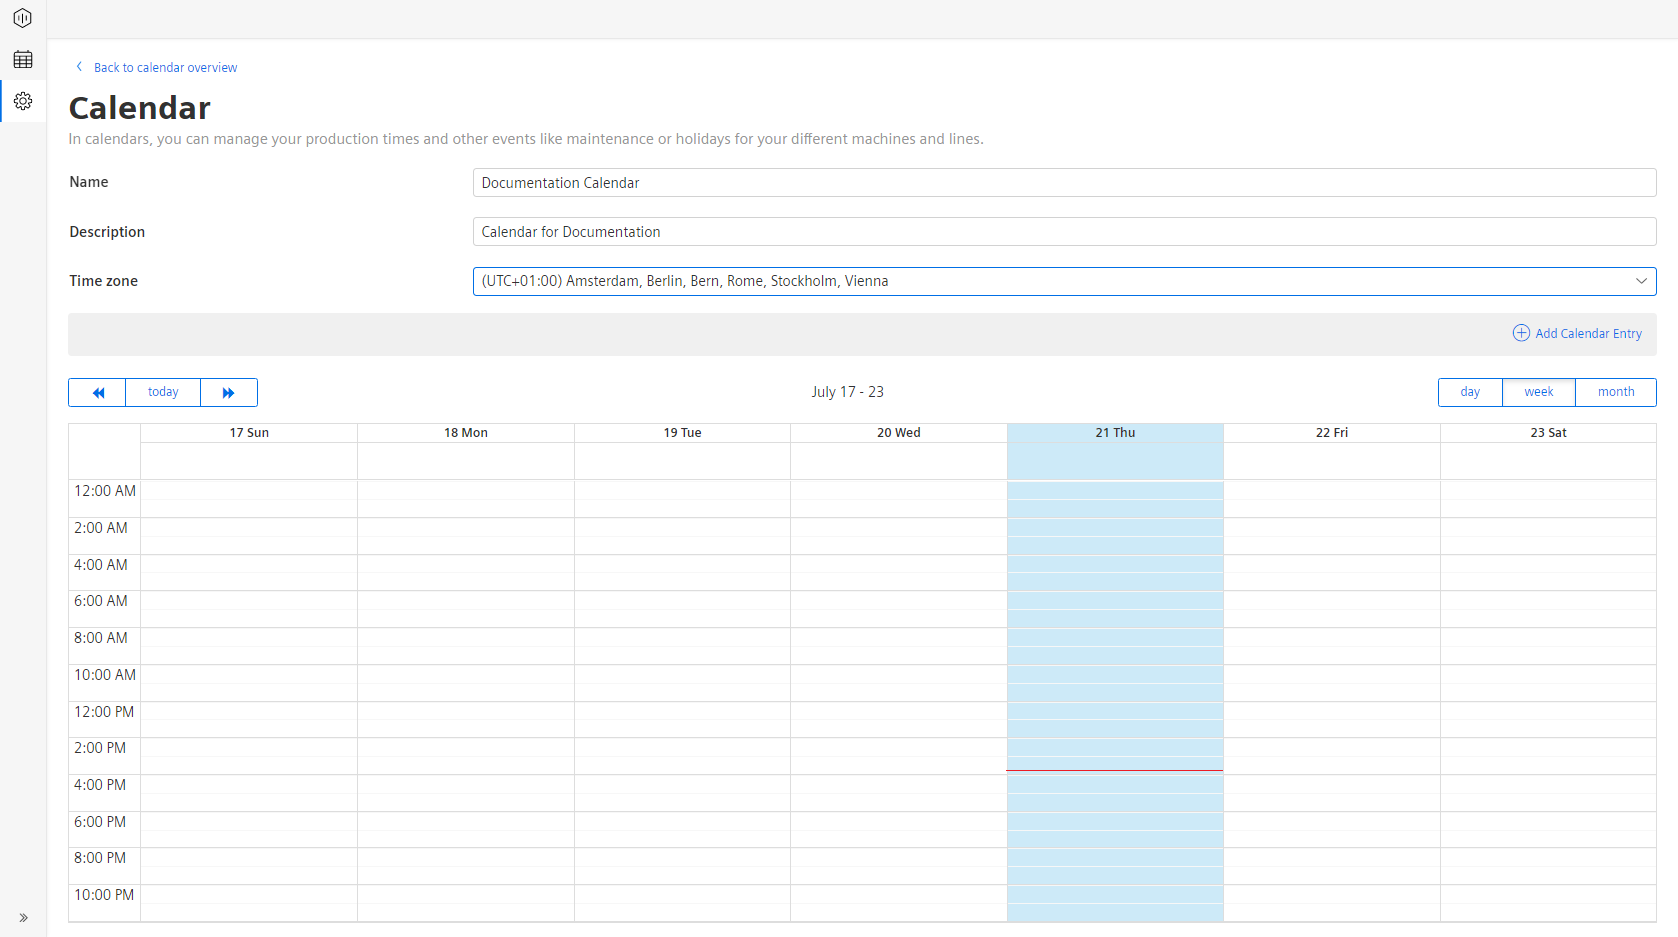
To add a first calendar, proceed as follows:
- In “Calendars”, click on “Add Calendar”.
- Enter “Name” and “Description”.
- Select the time zone whereby the calendar for the line and machines should be relevant.
- Add calendar entries through the “Add Calendar Entries” Button. More details on different calendar entries can be found in Section Managing Calendar Entries.
-
After adding “Calendar” and “Calendar Entries”, click “Back to calendar overview” button and click “Next step” to proceed with “Machines & Lines”.
Last update: January 22, 2024