Managing Calendar Entries
To manage calendar entries, Click the Calendar Icon ![]() from the navigation tab. This page provides different navigation and view options which are described in the following section.
from the navigation tab. This page provides different navigation and view options which are described in the following section.
User interface
In “Calendar” overview, you can perform the following actions:
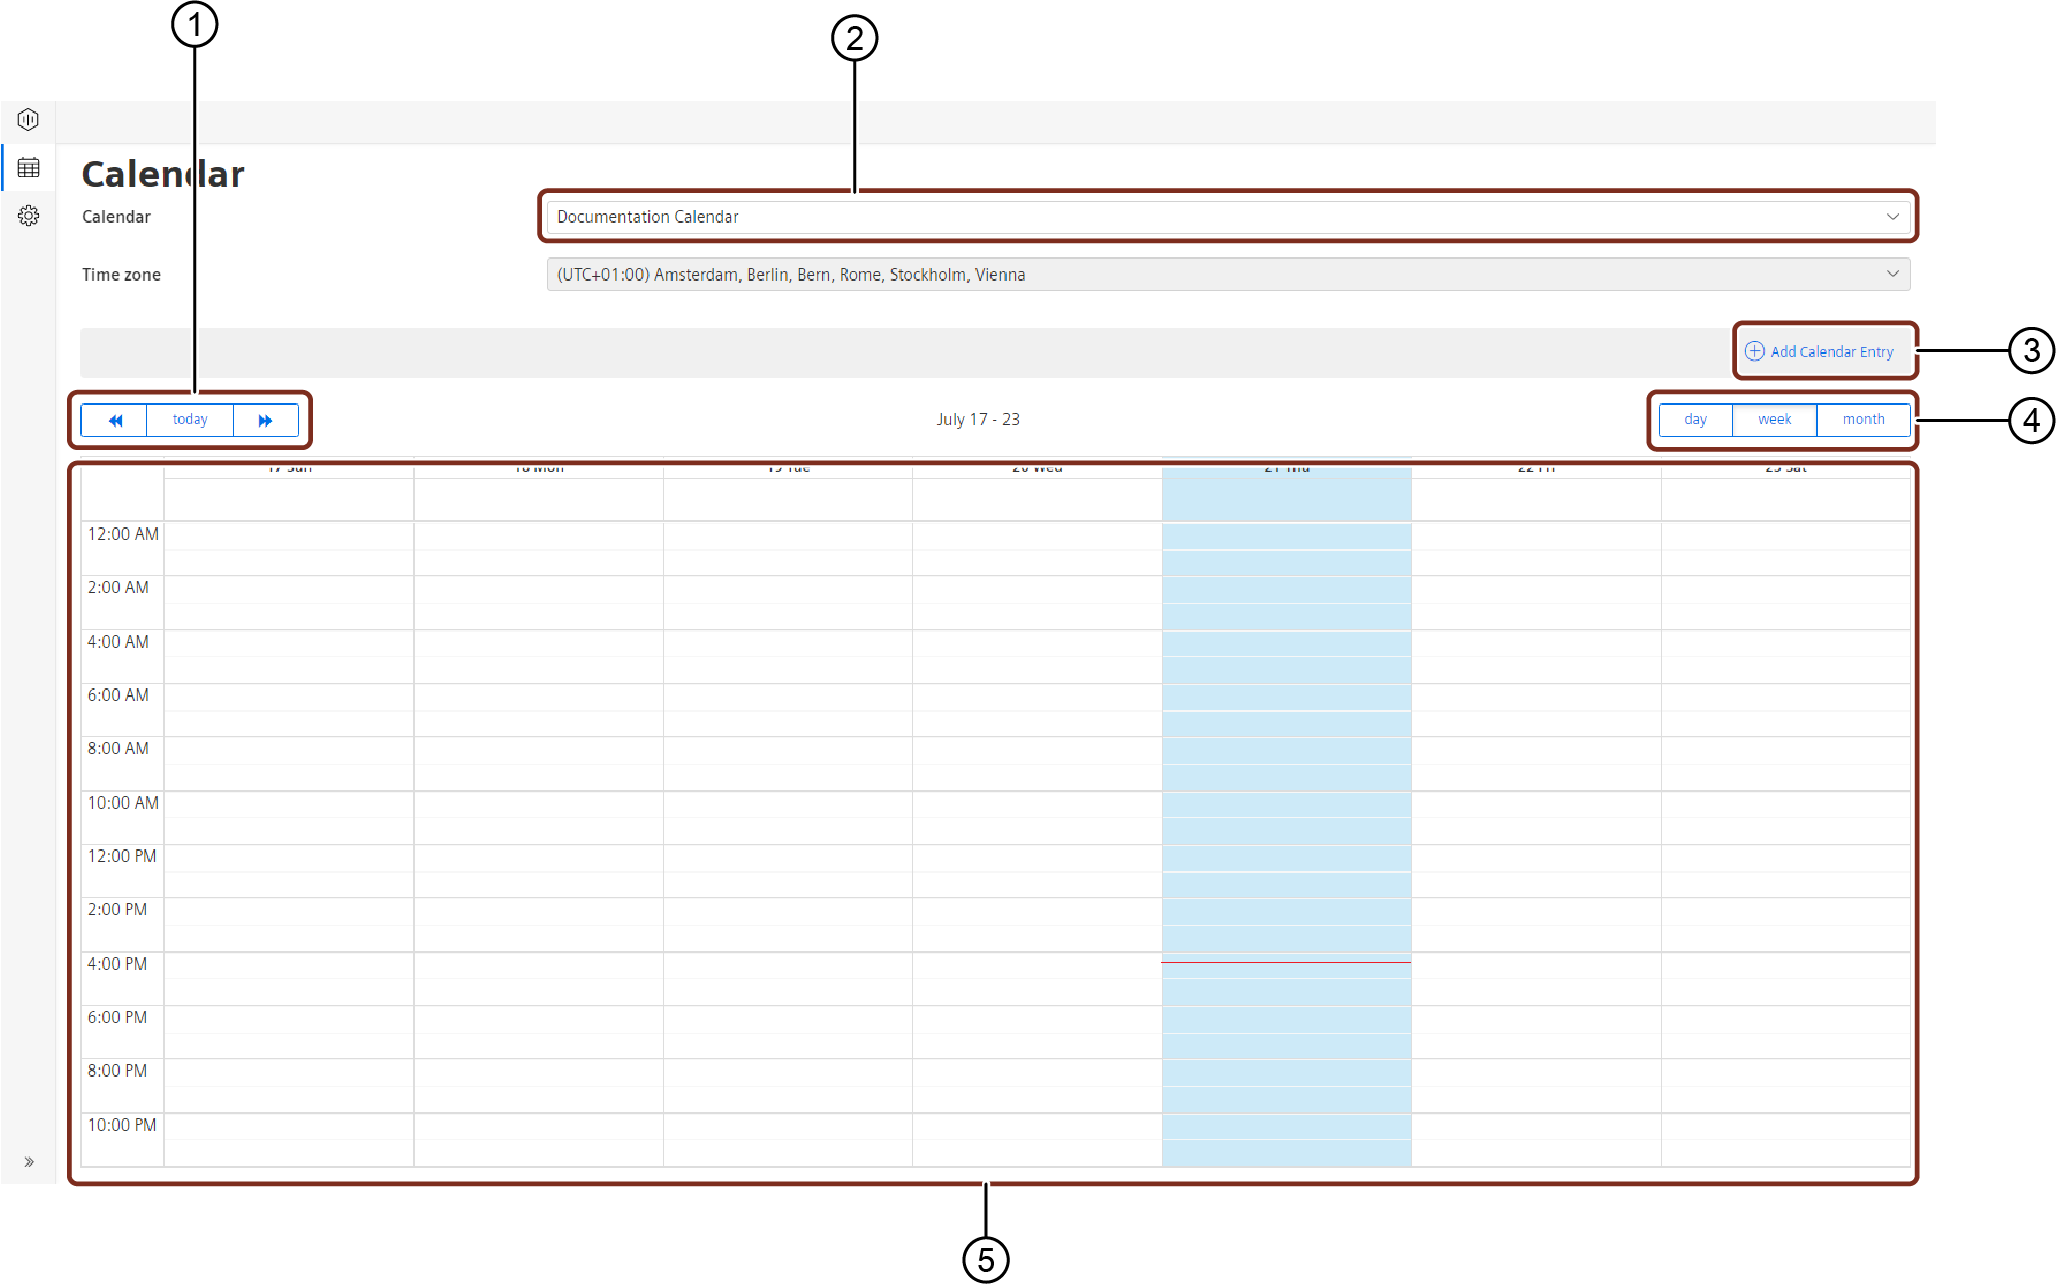
① Navigation Options
② Shows the selected calendar. The dropdown allows the user to change the selected calendar.
③ Adds a new calendar entry
④ View Options
⑤ Displays the ongoing calendar entry
View Options
You will find three buttons to change the view mode of the calendar:
- Day
- Week
- Month
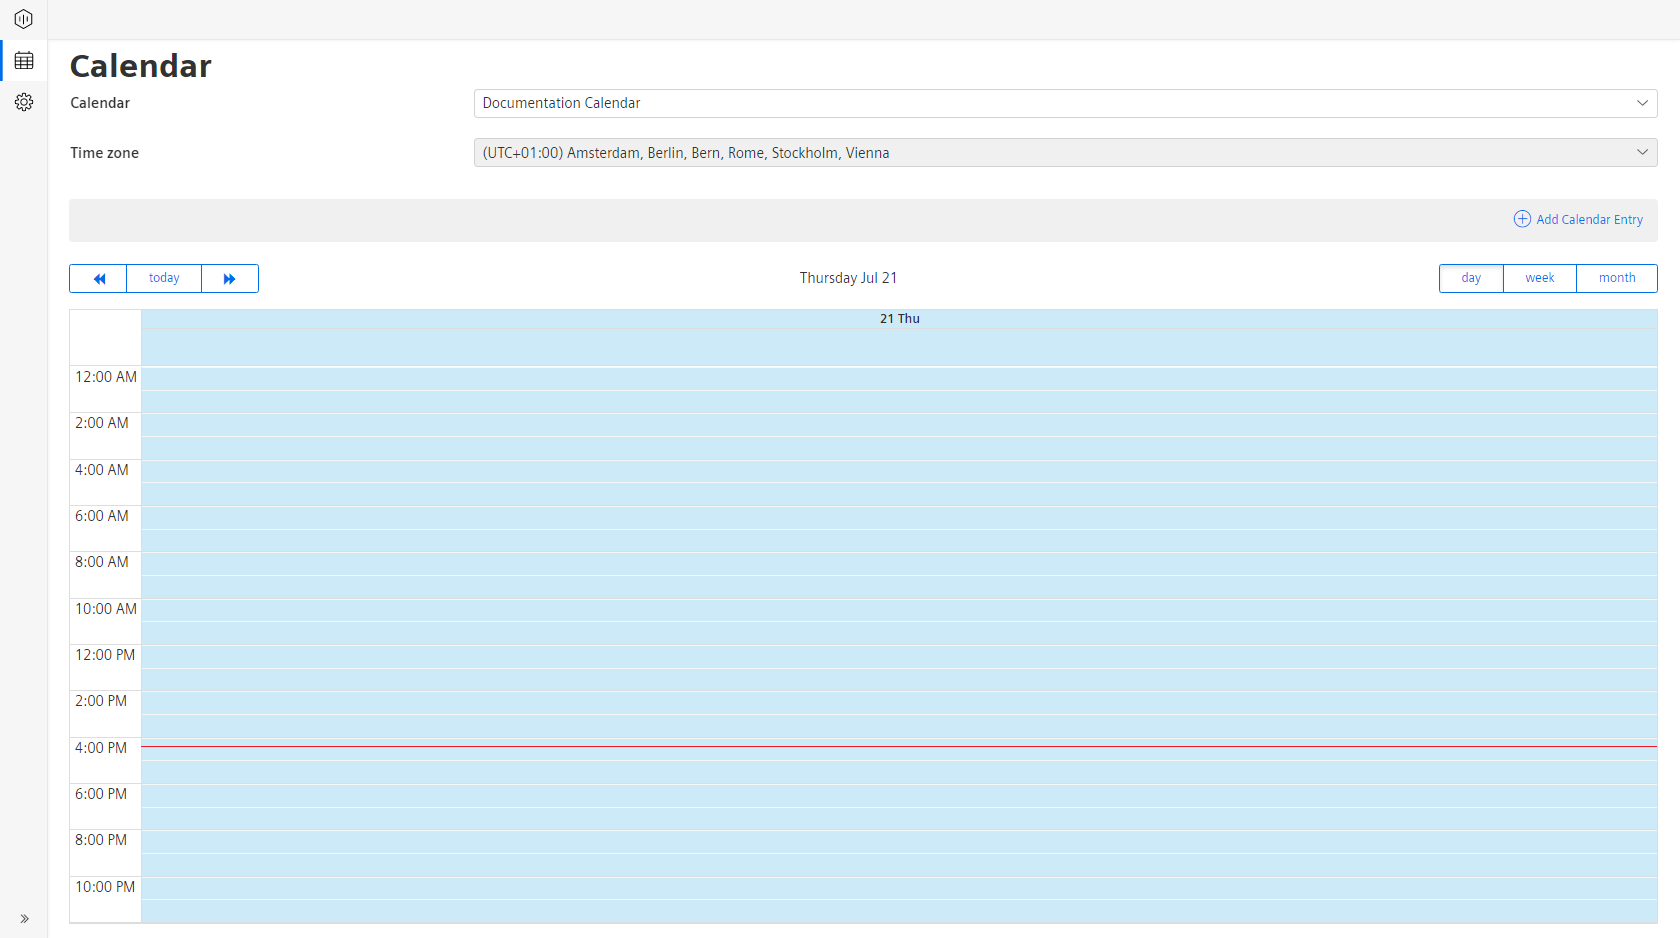
To change the view mode of the calendar, click one of the above options. For example, by clicking the option “day”, it will display the Day View. The current date is always highlighted in “light-blue” color.
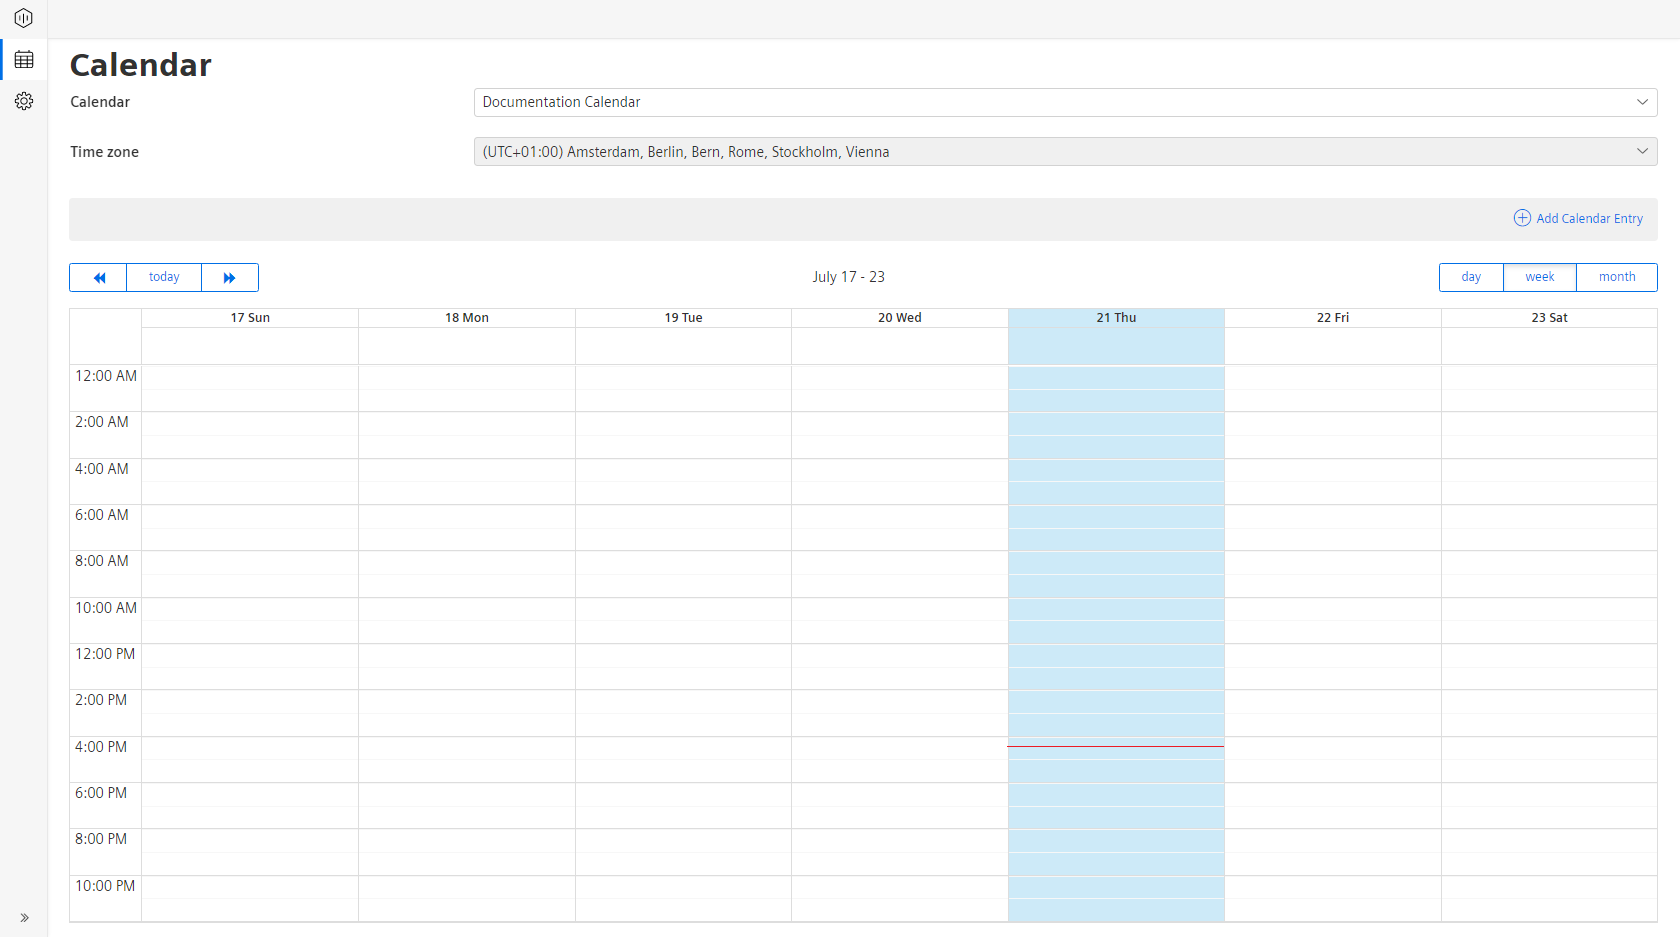
By clicking the option “week”, it will display the weekly View showing the week from Sunday to Saturday.
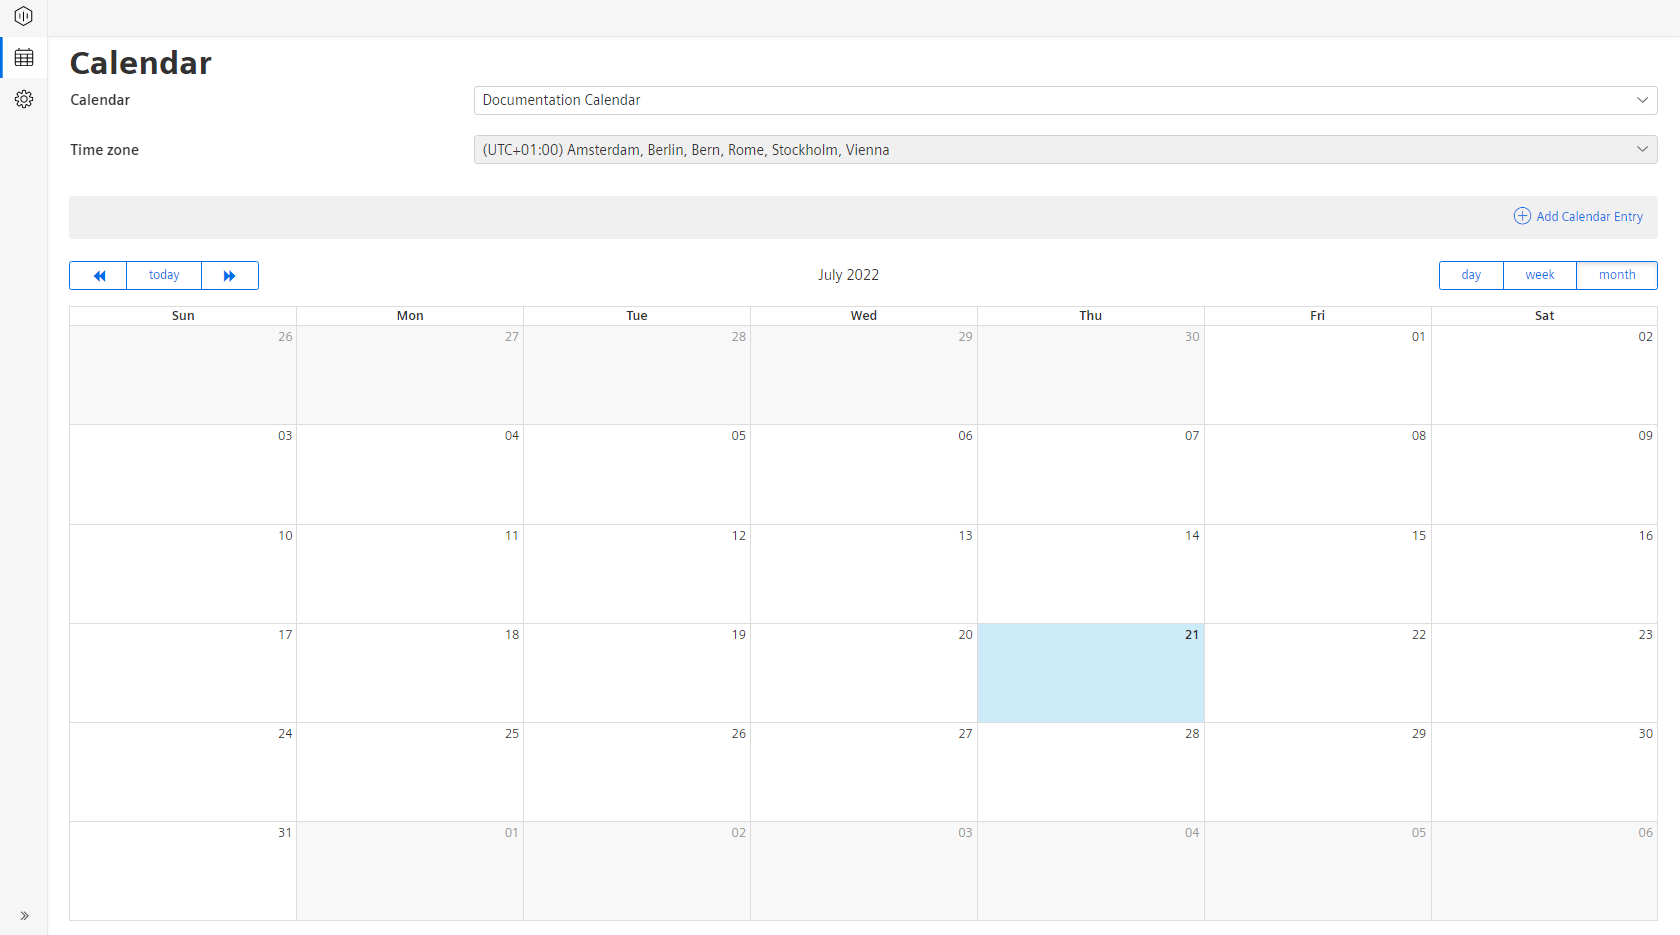
By clicking the option “month”, it will display the monthly View.
Navigation Options
You will find three navigation related buttons to change the view by the following options:
- Left Arrow
- Today
- Right Arrow
Depending on the selection of the view mode, these buttons will change the view mode:
Left Arrow button:
- Day View: It will navigate to the previous day
- Week View: It will navigate to the previous week
- Month View: It will navigate to the previous month
Today button:
- Day View: It will display the current day highlighted in light blue
- Week View: It will display the current week, with the current day highlighted in light blue
- Month View: It will display the current month, with the current day highlighted in light blue
Right Arrow button:
- Day View: It will navigate to the next day
- Week View: It will navigate to the next week
- Month View: It will navigate to the next month
Adding Calendar Entries
To add the calendar entries such as production time or planned stops, click the "Add Calendar Entry" button. This option allows you to add not only one-time calendar entries but also recurring calendar entries.
One Time Calendar Entries
To add a one-time calendar entry, proceed as follows:
- Click “Add Calendar Entry” and enter “Title”.
- Click
 to select a start date.
Note
- The “Start Time” and “End Time” displays the selected date and “12:00 AM”. The time can be changed manually in the input field.
- After selecting the date, you can change the timestamp in the input field.
3.Select “Time Category”.
Note
The application displays all configured time categories of the “Production Time” and “Planned Stop” category.

4.Click “Save” to configure the calendar entry in the calendar.
Recurring Calendar Entries
The calendar functionality allows you to select the calendar entries in different recurrences. It supports daily, weekly, monthly and yearly calendar entries.
Daily Calendar Entries
To add a daily calendar entry, the procedure is similar to one-time calendar entry. For adding a daily calendar entry, proceed as follows:
- Click “Add Calendar Entry”.
- Enter the parameters such as start and end time and select time category for the calendar entry.
- Toggle the “Recurring”, so that you can select a frequency from multiple options.
- Select “Daily”, it loads two more fields.
- In the “Every” field, you can change the default value, if required.
Note
The default value is “1” in the "Every" field. Which means, it configures the calendar entry daily. For example, if you change the value to “2”, then it configures the calendar entry for every alternate day.
6.Select the recurring “Start” and “End” date and time.
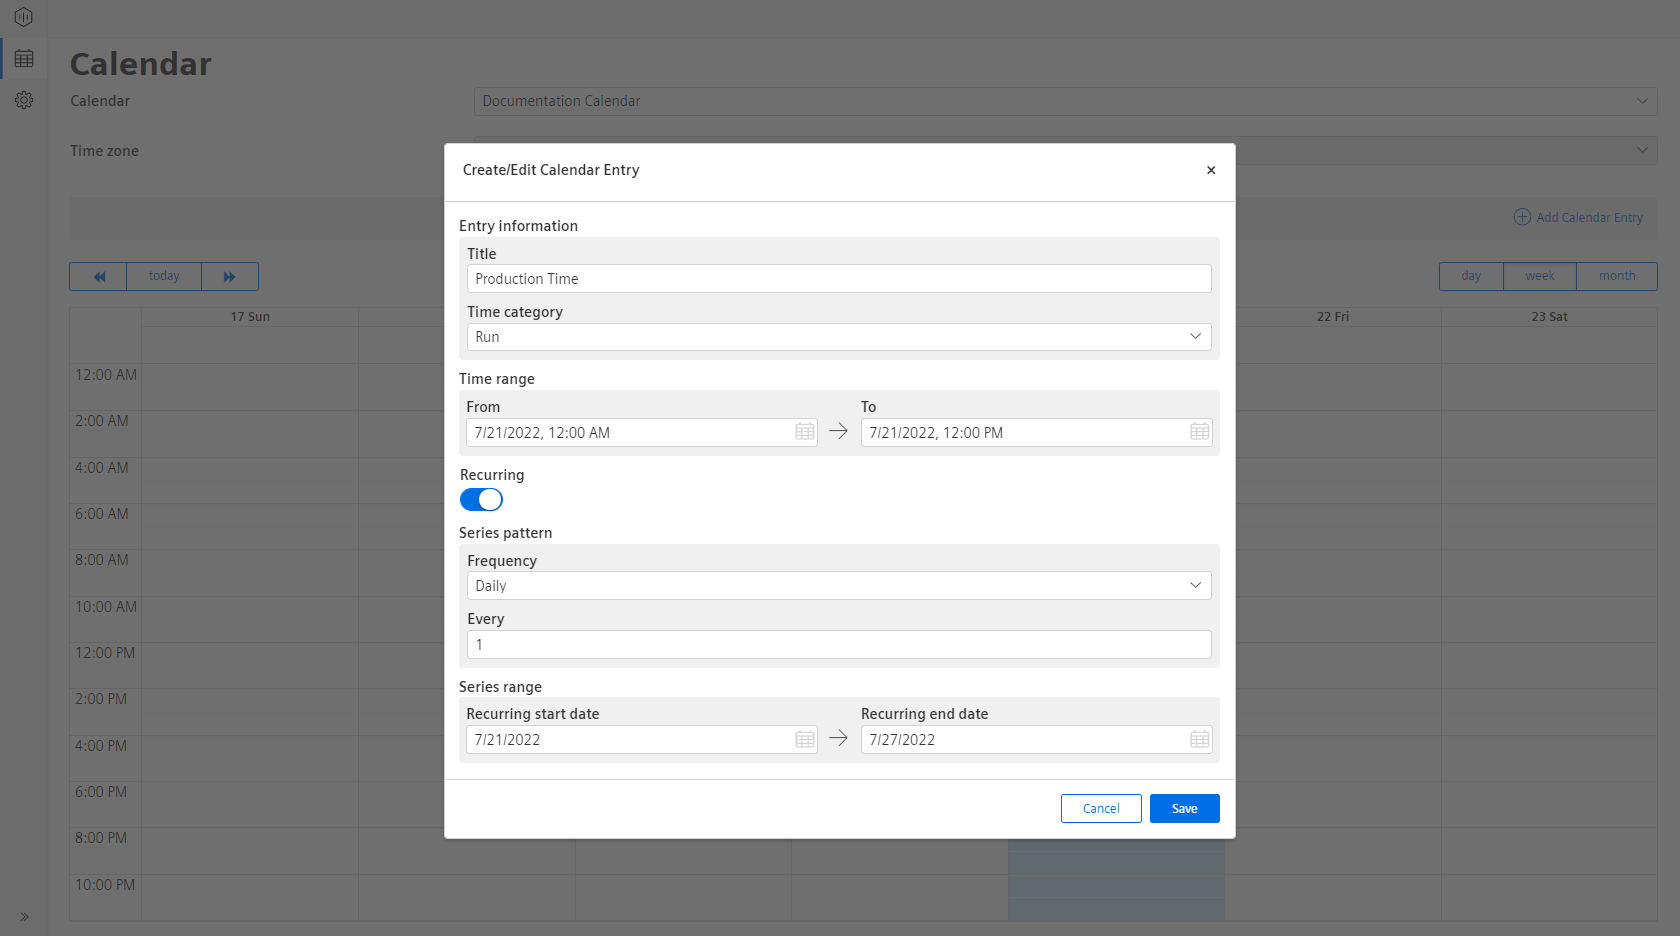
7.Click “Save” to configure the daily calendar entry in the calendar.
Weekly Calendar Entries
To add a weekly calendar entry, the procedure is similar to one-time calendar entry. For adding a weekly calendar entry, proceed as follows:
- Click “Add Calendar Entry”.
- Enter the parameters such as start and end time and select time category for the calendar entry.
- Toggle the “Recurring”, so that you can select a frequency from multiple options.
- Select “Weekly”, it loads two more fields.
- In the "Every" field, you can enter the frequency in which weekly cycle the calendar entry should occur. You can also select the days on which the calendar entry should occur.
Note
The default value is “1” in the "Every" field. Which means, it configures the calendar entry weekly. For example, if you change the value to “2”, then it configures the calendar entry for every alternate week.
6.Select the recurring “Start” and “End” date and time.
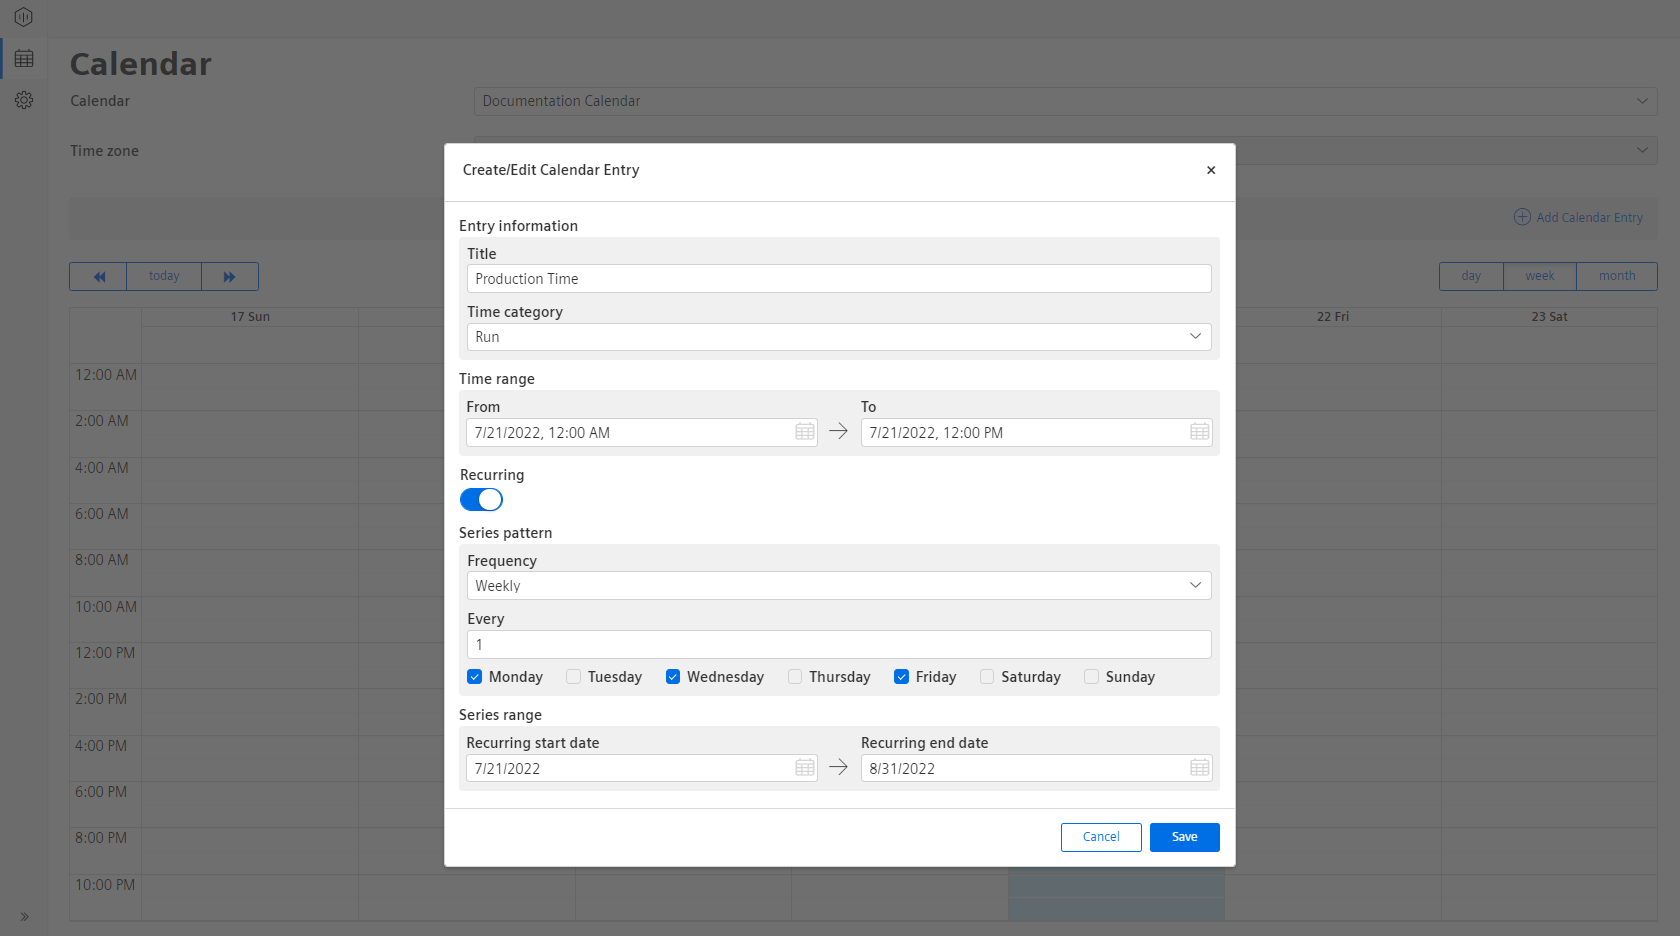
7.Click “Save” to configure the weekly calendar entry in the calendar.
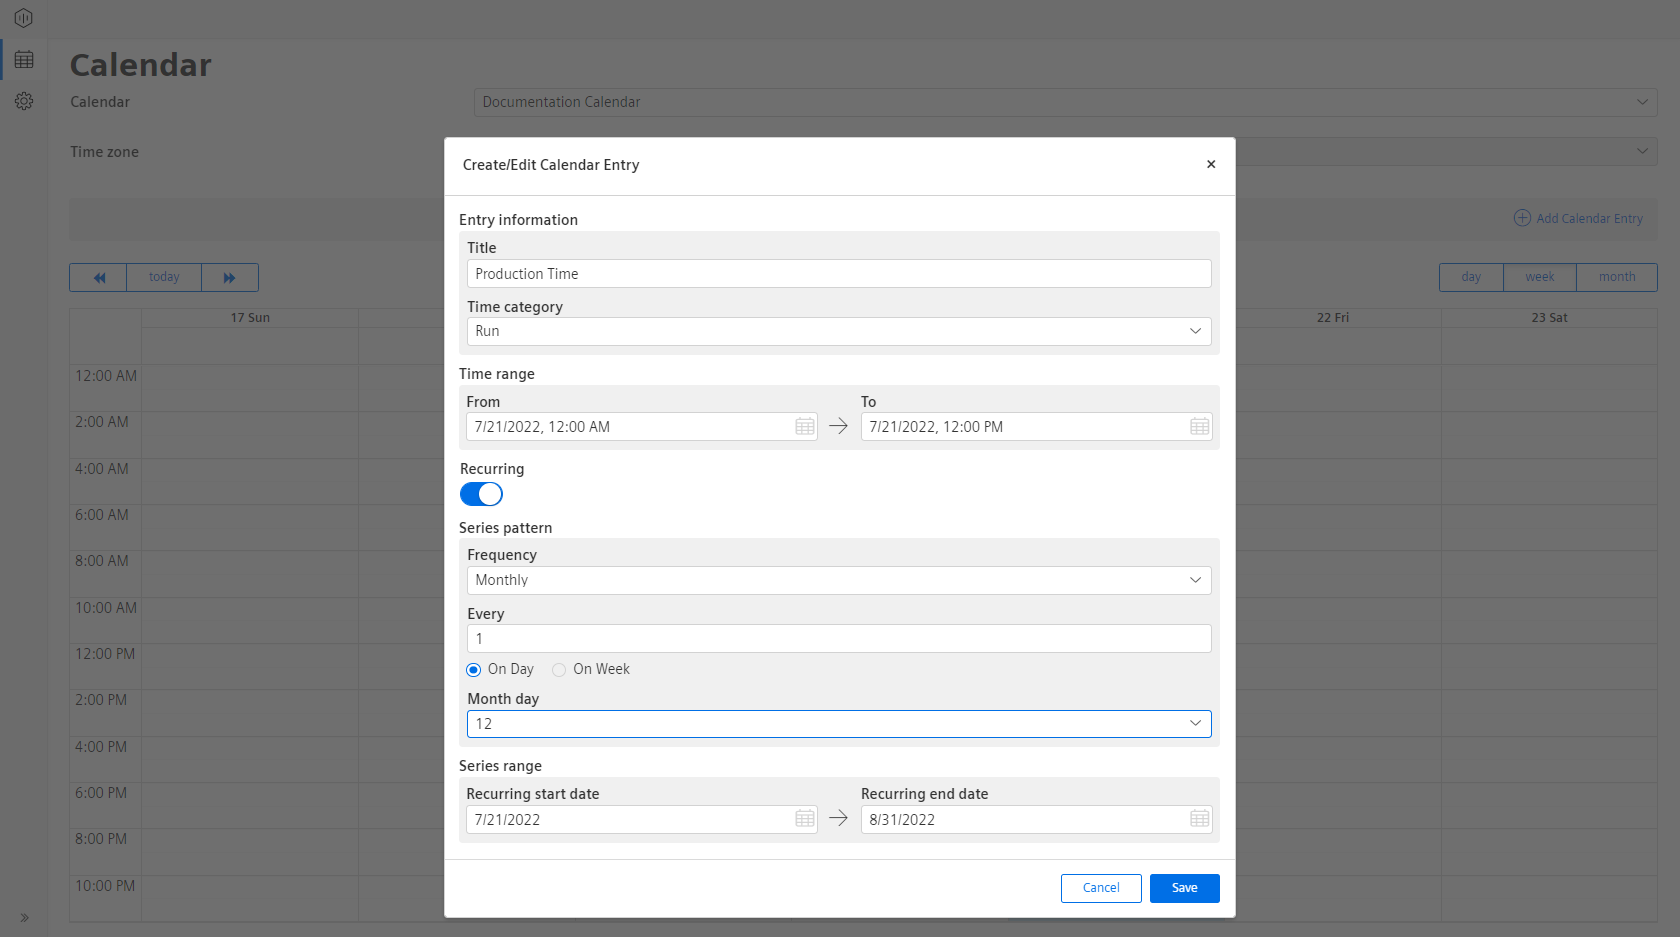
Monthly Calendar Entries
To add a monthly calendar entry, the procedure is similar to one-time calendar entry. For adding a monthly calendar entry, proceed as follows:
- Click “Add Calendar Entry”.
- Enter the parameters such as start and end time and select time category for the calendar entry.
- Toggle the “Recurring”, so that you can select a frequency from multiple options.
- Select “Monthly”, it loads two more fields.
- In the "Every" field, you can change the default value. You can also select the specific day(s) or week(s) of the month, if required.
Note
The default value is “1” in the "Every" field. Which means, it configures the calendar entry monthly. For example, if you change the value to “2”, then it configures the calendar entry for every alternate month.
- “On Day”: It allows you to select a specific day. For example, if you enter “12” in the "Month Day" field, then the calendar entry will be configured on the 12th of every month on your selected cadence and selected “1” in “Month day”, then the calendar entry will be configured on every 12th of the month.
- “On Week”: It allows you to select a specific week and day of the month. For example, if you select “First” and “Wednesday” in “On the" field, then the calendar entry will be configured on the First week of “Wednesday” for every month on your selected cadence.
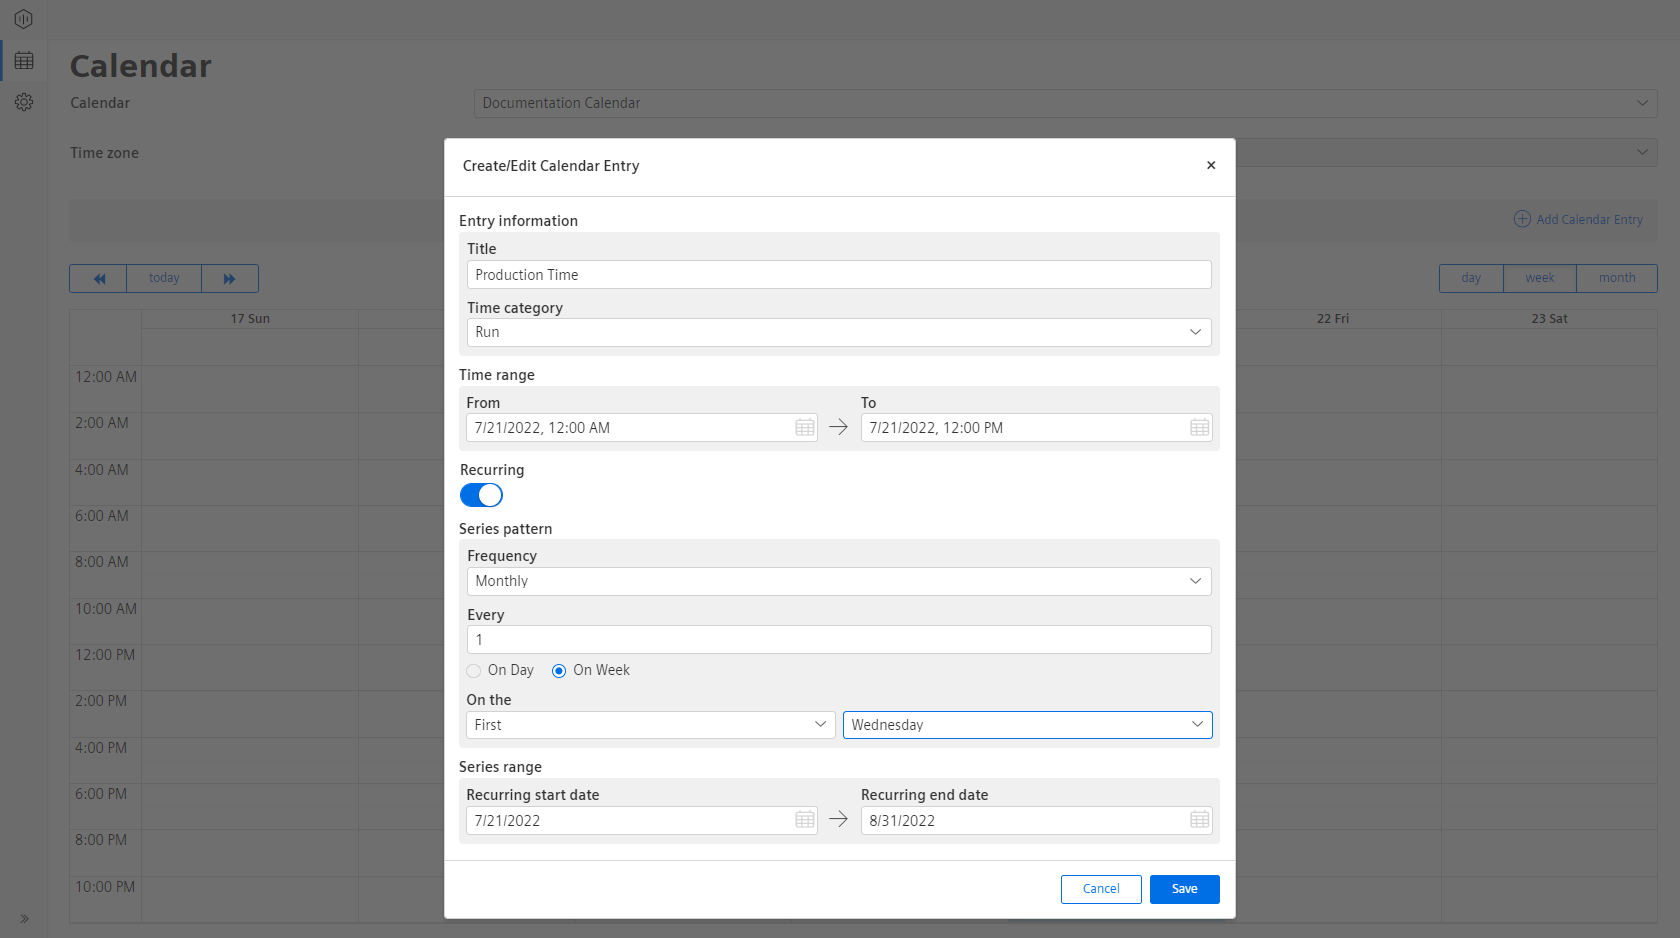
6.Select the recurring “Start” and “End” date and time. 7.Click “Save” to configure the monthly calendar entry in the calendar.
Yearly Calendar Entries
To add an yearly calendar entry, the procedure is similar to one-time calendar entry. For adding an yearly calendar entry, proceed as follows:
- Click “Add Calendar Entry”.
- Enter the parameters such as start and end time and select time category for the calendar entry.
- Toggle the “Recurring”, so that you can select a frequency from multiple options.
-
Select “Yearly”, it loads two more fields.
- "On Month Day": The default value is “Jan” and “1” for “Month” and “Day” fields. For example, if you select the “Month” value to “Aug” and “Day” value to “12”, then it configures the calendar entry for August on 12th of the year.
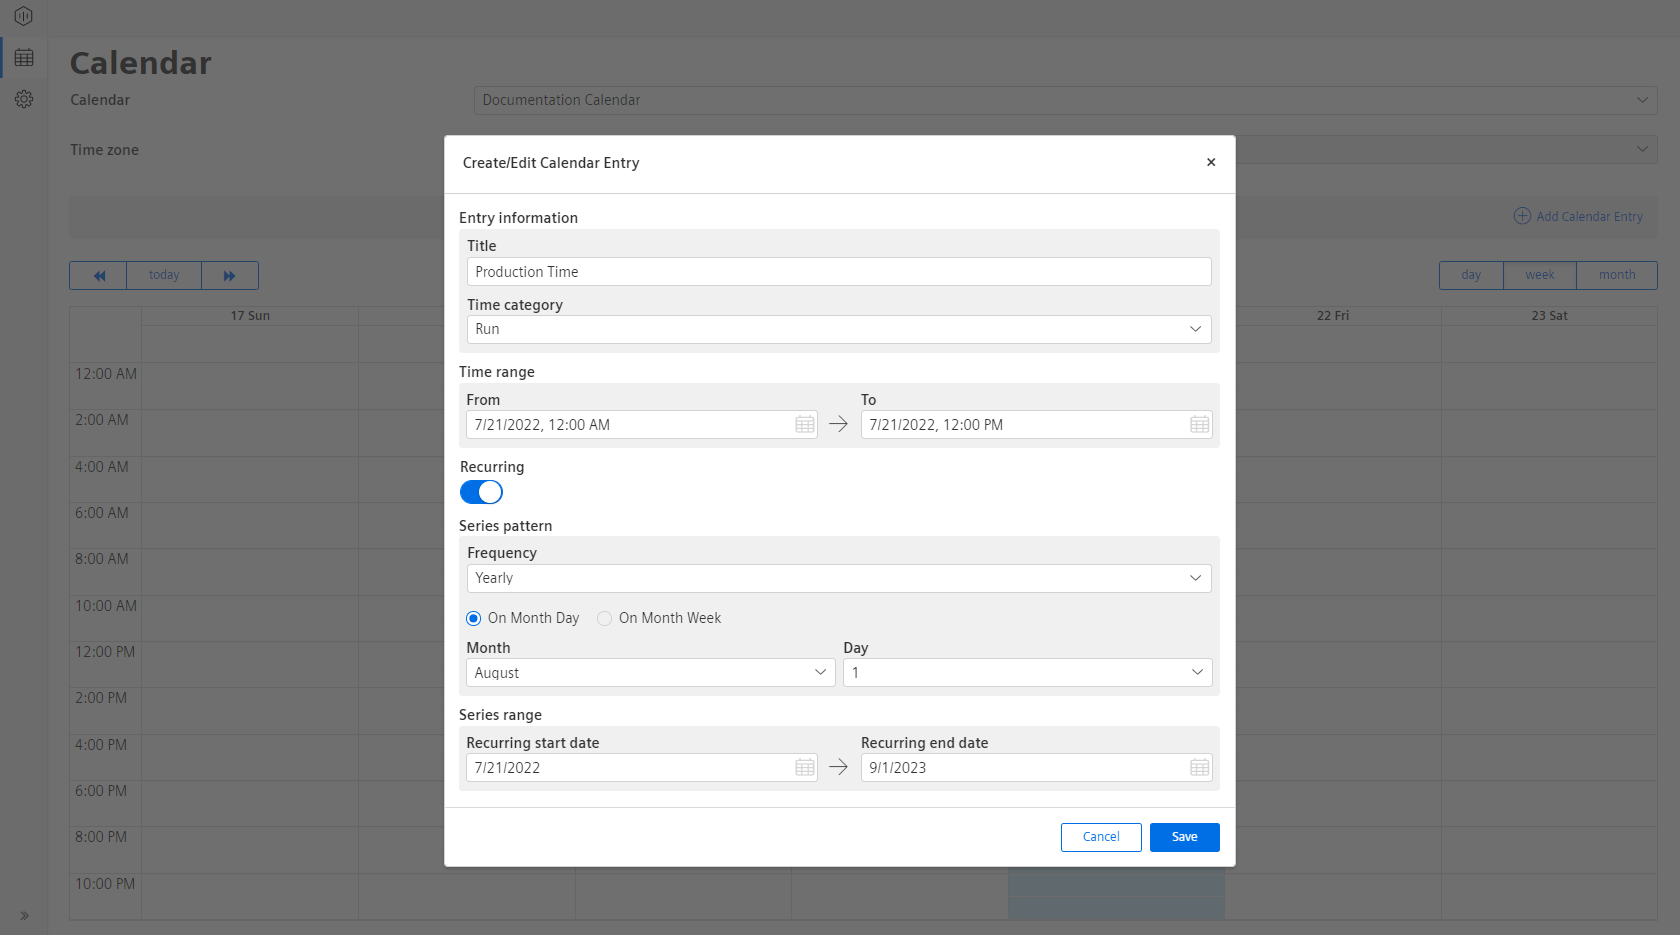
- "On Month Week": The default value is “First”, “Mon” and “Jan” for “On the” and “Of” fields. For example, if you select the “Second” and “Wed” values in the “On the” field and “Aug” in the “Of” field, then it configures the calendar entry on “Wednesday” of the August month in the second week of the year.

- "On Month Day": The default value is “Jan” and “1” for “Month” and “Day” fields. For example, if you select the “Month” value to “Aug” and “Day” value to “12”, then it configures the calendar entry for August on 12th of the year.
-
Select the recurring “Start” and “End” date and time.
- Click “Save” to configure the yearly calendar entry in the calendar.