Downtime management
The Downtime Management page shows a detailed overview of the machine downtimes and downtime related information such as added measures, workorders and comments.

The page shows a table of all the downtimes that occurred for the selected filter combination. The table itself can be sorted by clicking the up or down arrow next to every column name. In addition, you can also search for information, e.g., a specific reason by typing in the search bar. The table shows the following information per entry:
- Downtime Reason.
- Start Time.
- Downtime duration.
- Number of measures linked to the downtime.
- Number of work orders linked to the downtime.
- Number of comments linked to the downtime.
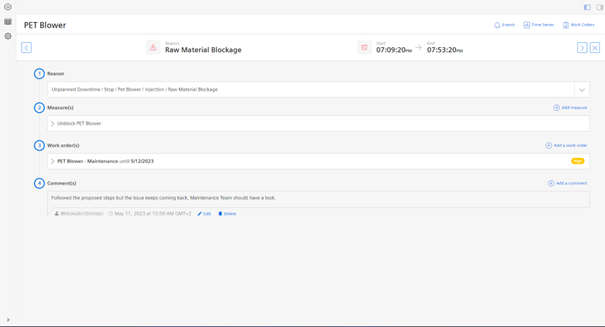
To learn more, to edit the reason and to add measures, work orders and comments to a downtime please click on one of the entries in the table. This will open the following screen for you.
In the top of the screen you can see again the details of the downtime, being the current assigned reason, and when the downtime started and ended. On the left and on the right of the header section you can find two arrows 
 , which allow you to navigate to the previous or following item of the downtime list. In case you filtered or sorted the list in a certain way, then the previous or next item of the filtered list will be displayed. To get back to the table view, please click on the close button
  in the upper right corner.
Overwrite an existing downtime reason
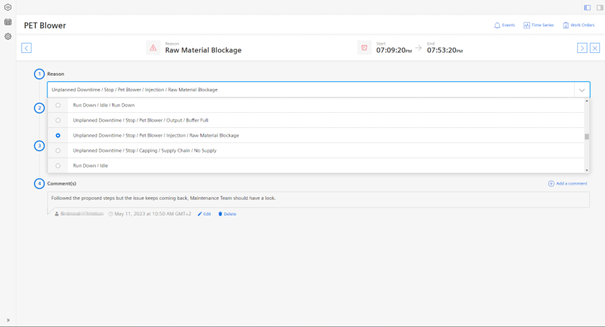
To overwrite the existing downtime reason, click on the down arrow in the reason section of the page. Then a list will populate as in the screenshot below. You can either select one reason from the populated list or start to type the reason in the search bar and let the auto-completion based of the underlying reason tree guide. Once the desired reason pops up, you can simply click on it and select it.
Assign a measure
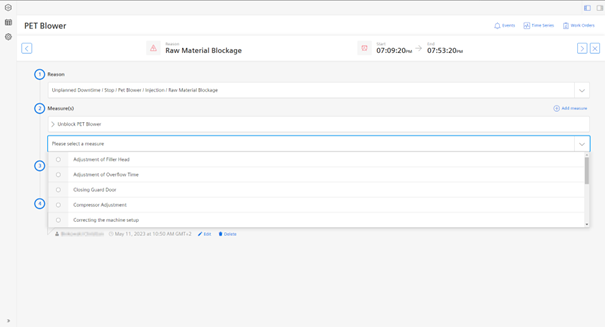
When you fixed a downtime and you would like to document how you managed to overcome the downtime, you can add multiple measures to the recorded downtime. To add one measure, please click on the “Add a measure” button. Once you clicked it, a dropdown like the downtime reason dropdown will appear, from which you can select the suitable measure that you performed.
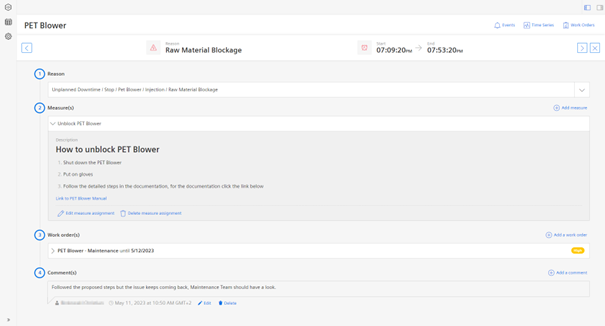
Once you selected a measure it will automatically be added to the downtime. By clicking on the expand arrow  on the measure you can see the attached description of the downtime. In addition, you can also either replace the measure or delete it via the respective button.
Create a work order
In this step you can create multiple work orders related to a specific downtime. This makes sense when a certain issue at the machine keeps coming back after it was solved by the machine operator Via a work order you can track further actions on this issue and involve other parties such as the maintenance team. To create a work order, please click “Add a work order”. Now, an input dialogue populates on the screen.
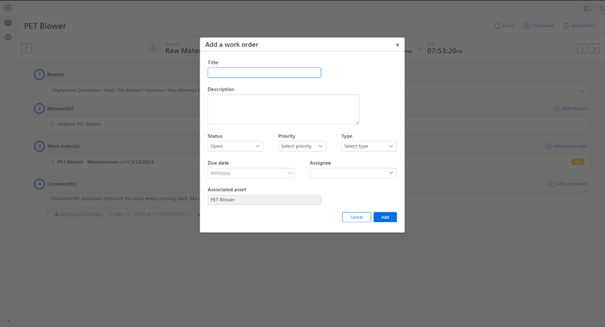
Please fill in the following information:
- Title
- Description
- Type (Planned or Incident)
- Assigned To (Select a user from the list)
- Priority (High, Medium or Low)
- Due Date
- Status (Open, On Hold, In Progress, Done)
Once everything is filled in and you click “Add”, the work order will be created
Add a comment
In special cases it is also necessary to add additional information to a recorded downtime. Here, the comment feature becomes relevant. To add a comment, please click on “Add a comment” and this will open an in-line editor. The editor allows you to structure the text properly and, e.g., to add links. Once you click outside of the editor, the comment will automatically be saved.
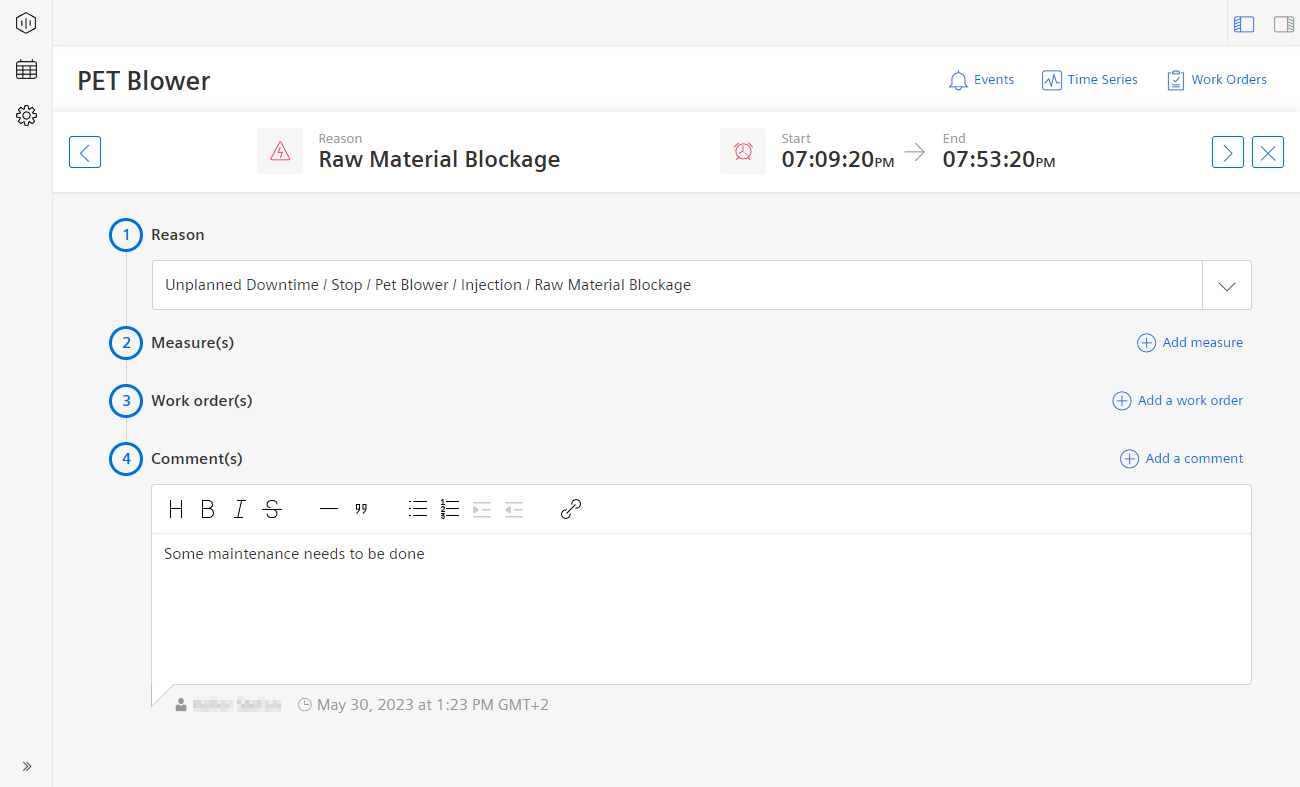
Besides that, you can also edit (via the “pen” icon) and delete (via the “trash can” icon) the comment.