Excel Import Reason Tree & Status Mapping
Excel Template
To import a reason tree and / or a status mapping, Insights Hub OEE requires an Excel template that needs to be filled in properly by the user. The template will be described in the following sections.
Excel Template Description
Once you opened the Excel Template, you will find an Excel File already pre-filled with some sample data. 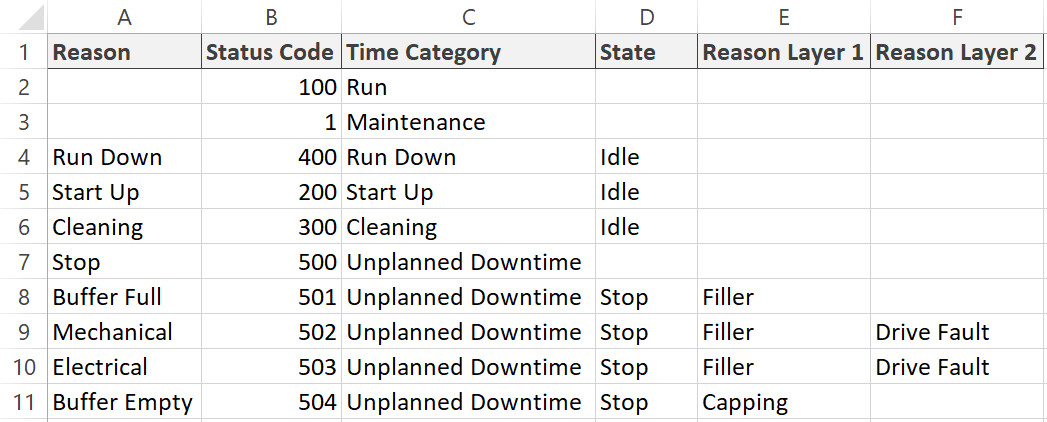
The screenshot above shows how the template is structured. To create a compatible template, you need to follow certain rules:
- First column must always be named Reason
- Second column must always be named Status Code
- Third column must always be named Time Category
- Fourth column must always be named State
- Fifth column and onwards must always be named Reason Layer 1, Reason Layer 2, …, Reason Layer N
The first two columns always describe the last element in the tree hierarchy – the so-called leaves. There is one exception to this concept. Assigning a status code to a Time Category requires an empty reason column. Generally, if your reason tree needs to cover up to N Reason Layers then you have to create N-1 Reason Layers in the template and the Nth element in the tree is covered through the Reason column.
The example template from above covers all possible combinations that can happen in a reason tree and / or status mapping, e.g., status code mapped on a time category or status code mapped on a state or status code mapped to a reason.
The template translates into the following reason tree. 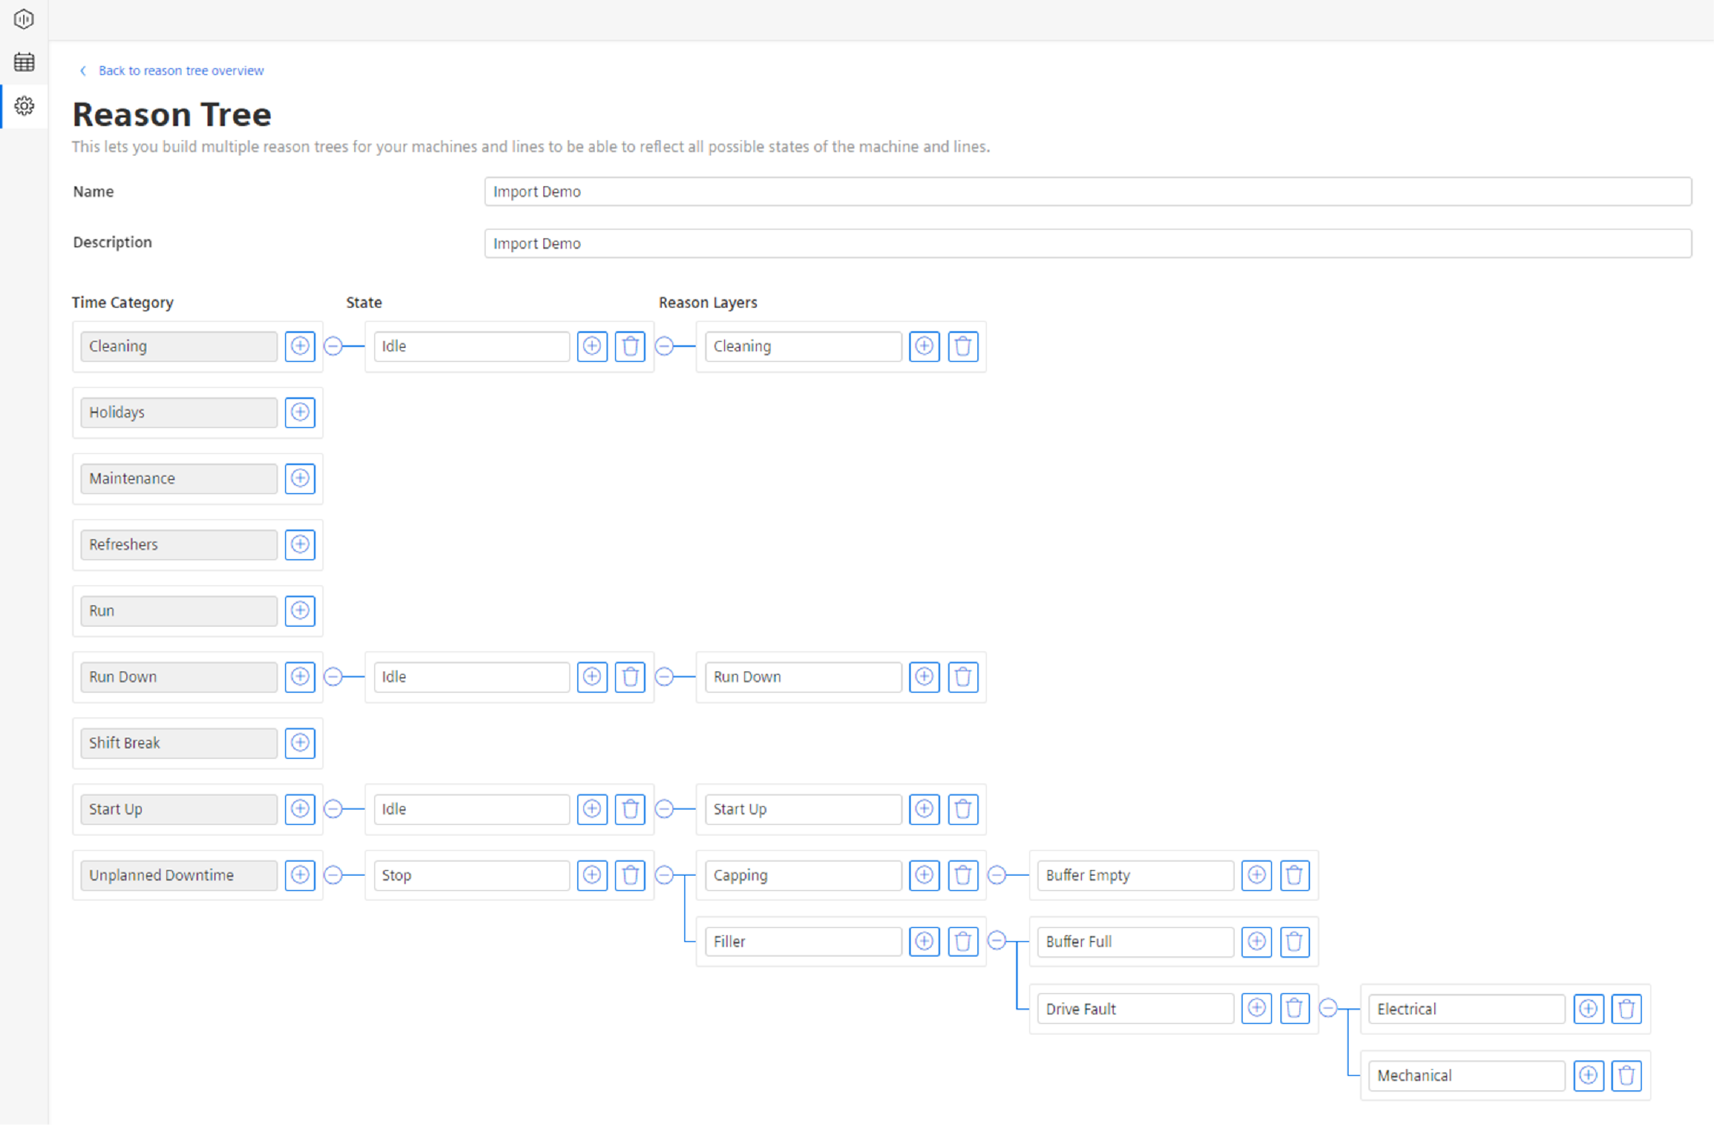
The first thing you notice, that also the time categories (Refreshers, Shift Break, Holidays), that were created in the time model but not included in the Excel template, also show up in the reason tree. This is typical and expected behavior of Insights Hub OEE. You will also notice that all reasons in the first column were turned into leaves after the time categories, e.g. “Buffer Full” in the Reason column turned into the following hierarchy “Unplanned Downtime -> Stop -> Filler -> Buffer Full”. The other reasons follow the same principal.
The template also contained status codes. The following screenshot shows how the status codes are mapped in the reason tree. 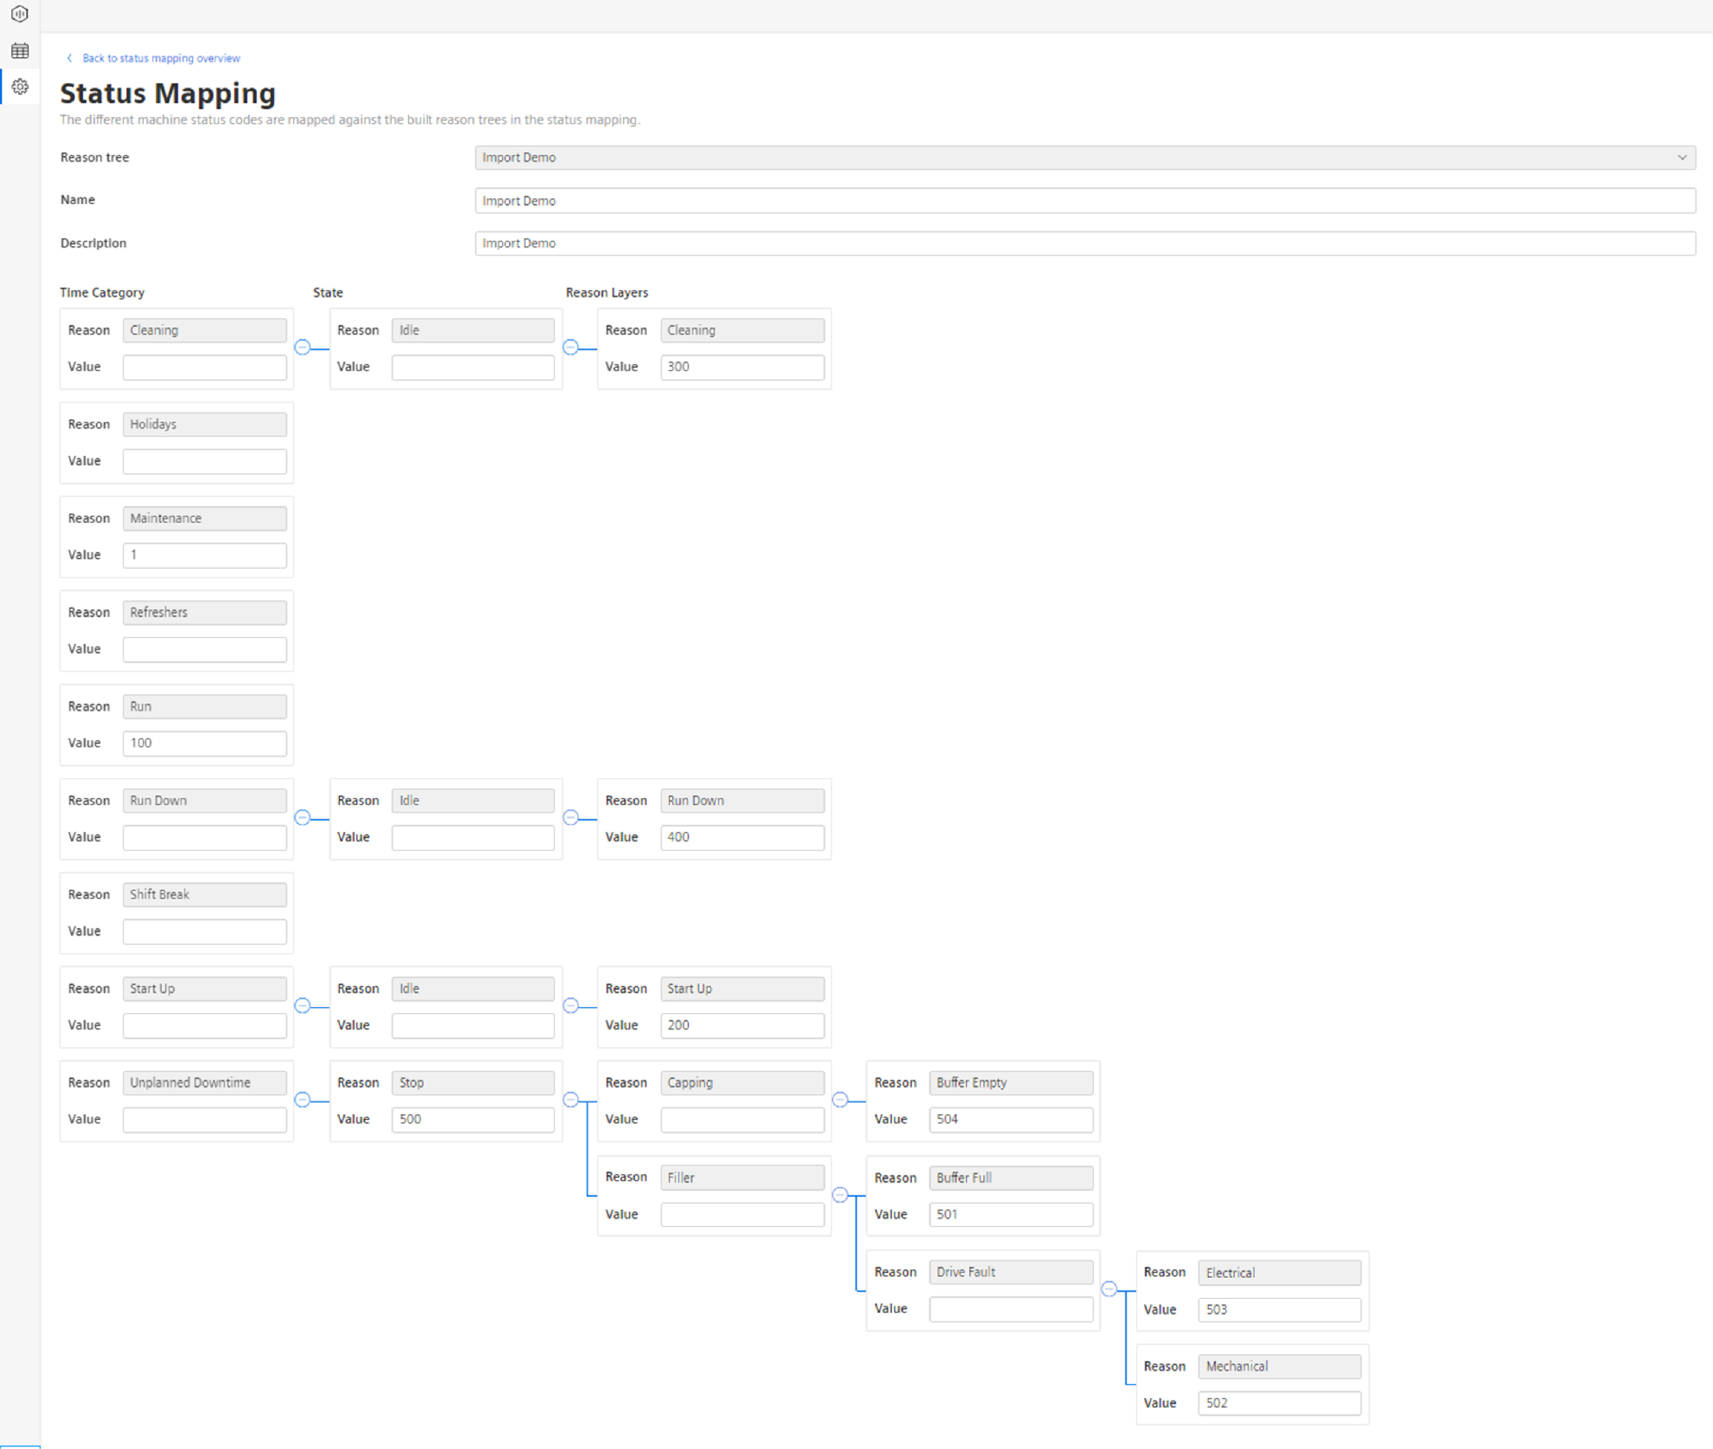
Line 2 and 3 in the Excel template above show how the special case of setting a status code at a time category is handled. Line 7 describes how you can set a status code on state. The other lines in the Excel template show that the combination of the Reason and Status Code column always describe the leaves in the status mapping.
Import Wizard
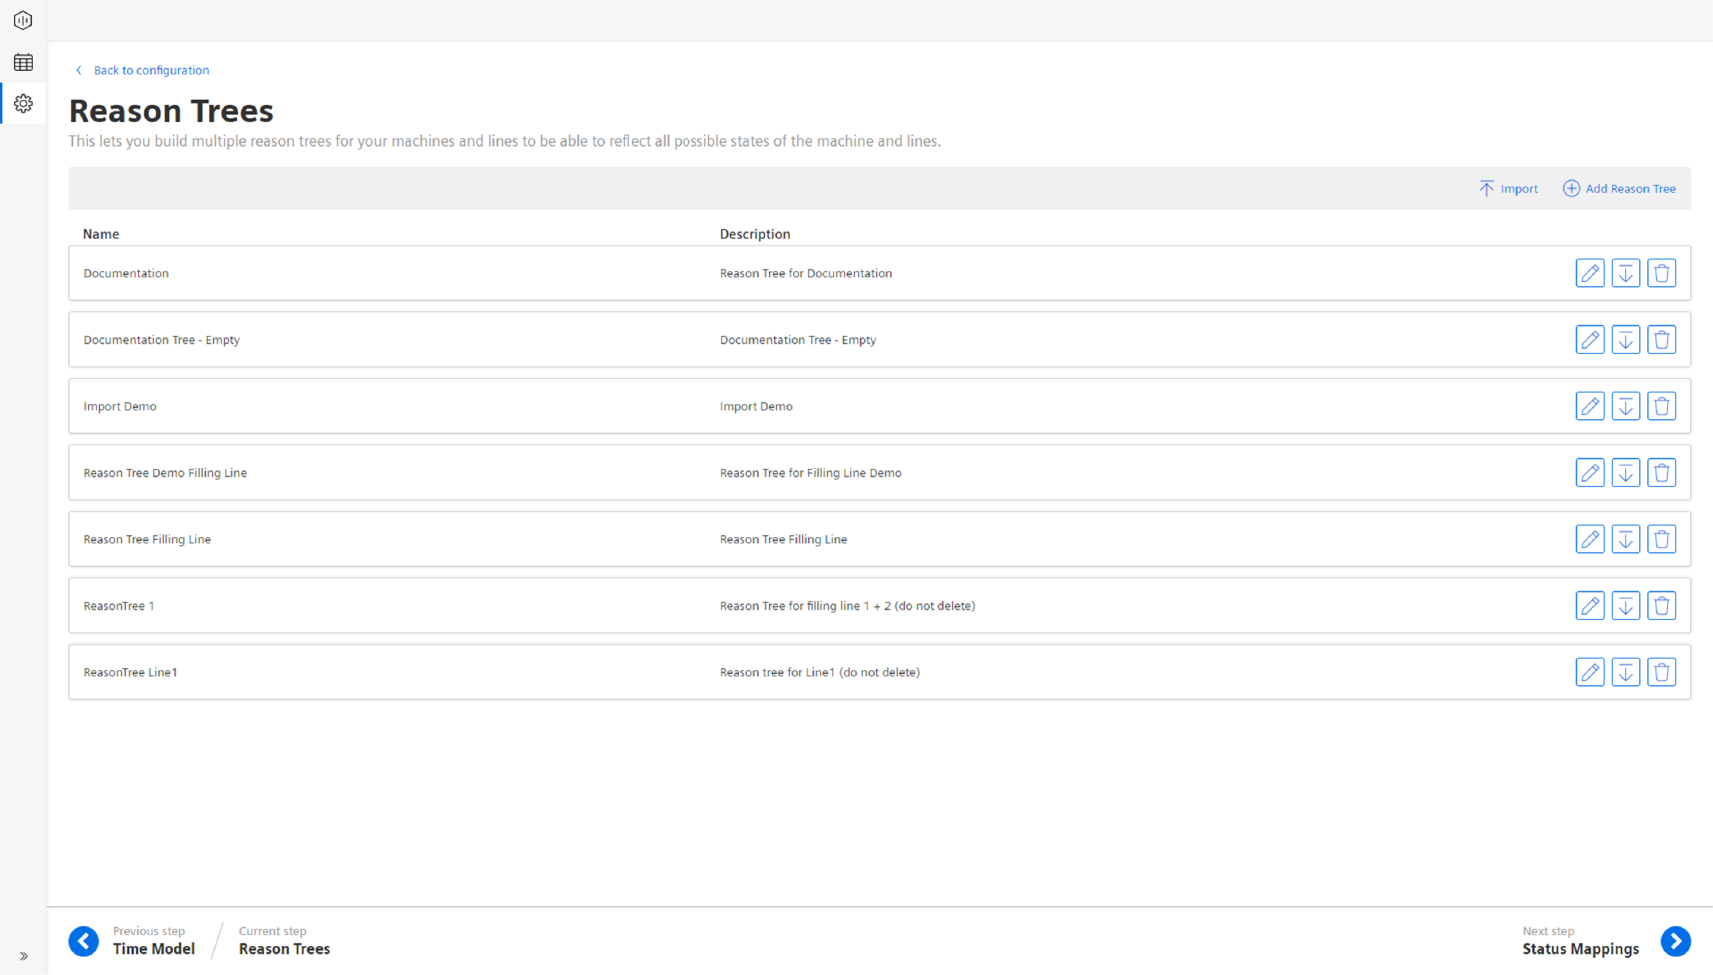
In the following sections, you will learn how to import a Reason Tree & Status Mapping and how to import each of them individually. To start the import first navigate to the configuration by clicking the gear icon in the navigation bar on the left side. Following that, you can either select “Reason Trees” or “Status Mappings” to reach the Import Wizard. 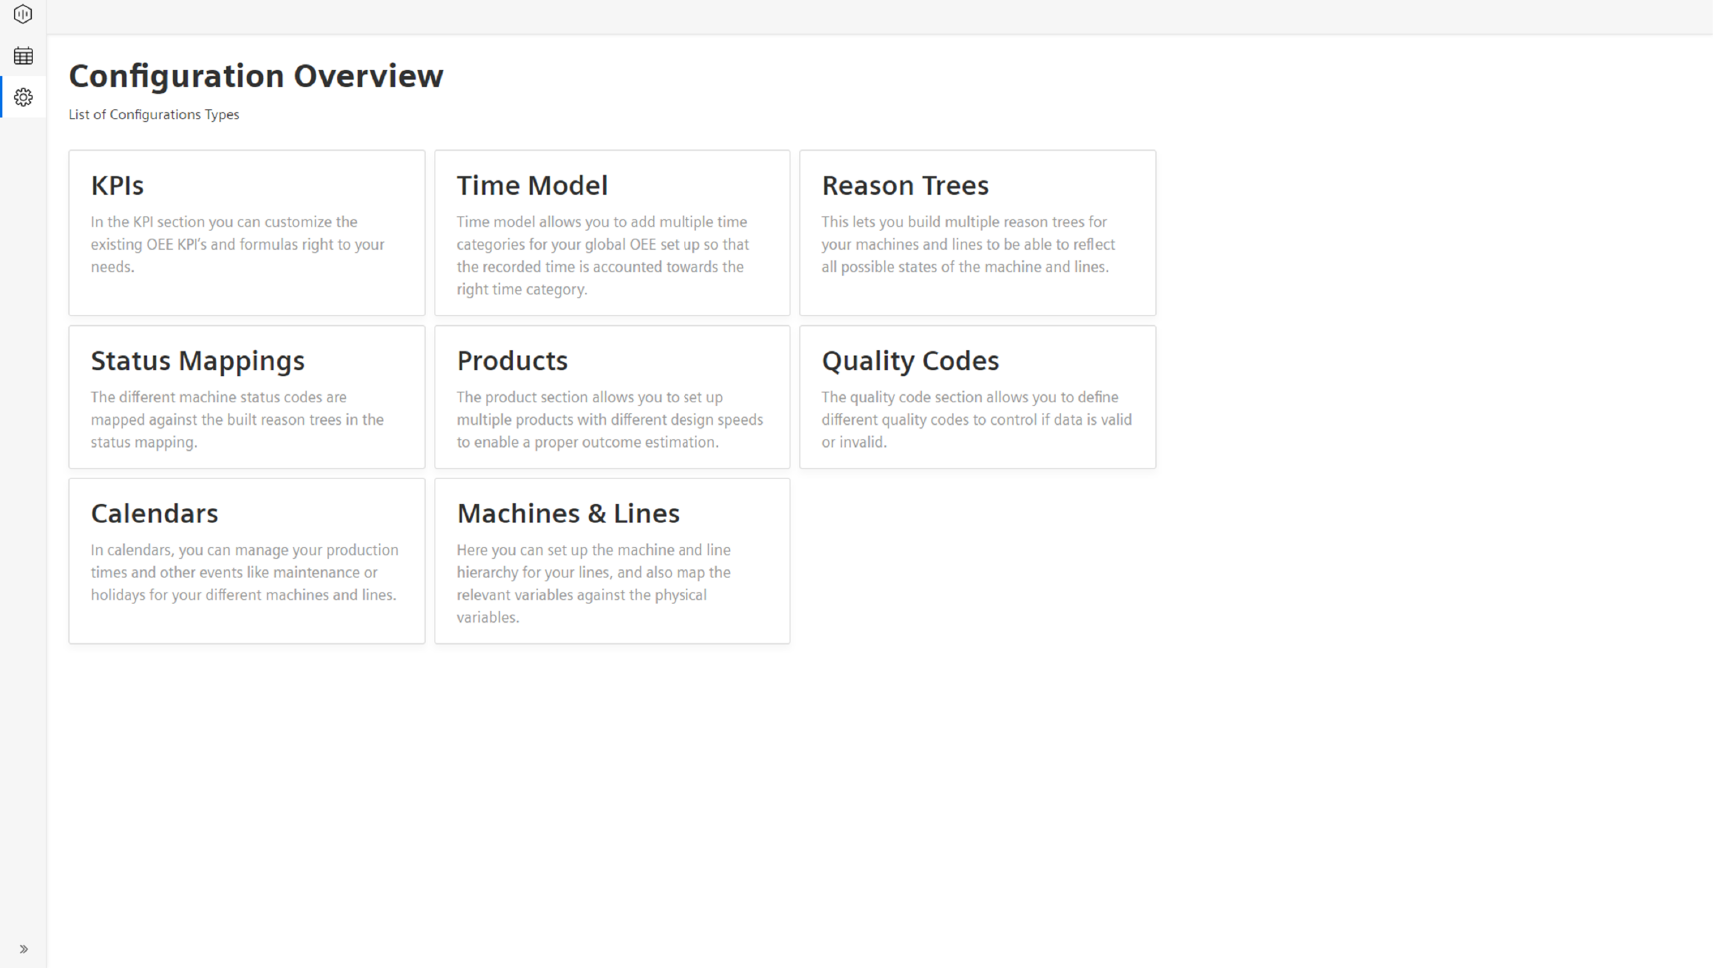
On both of the sites, you will find an import button in the upper right corner. 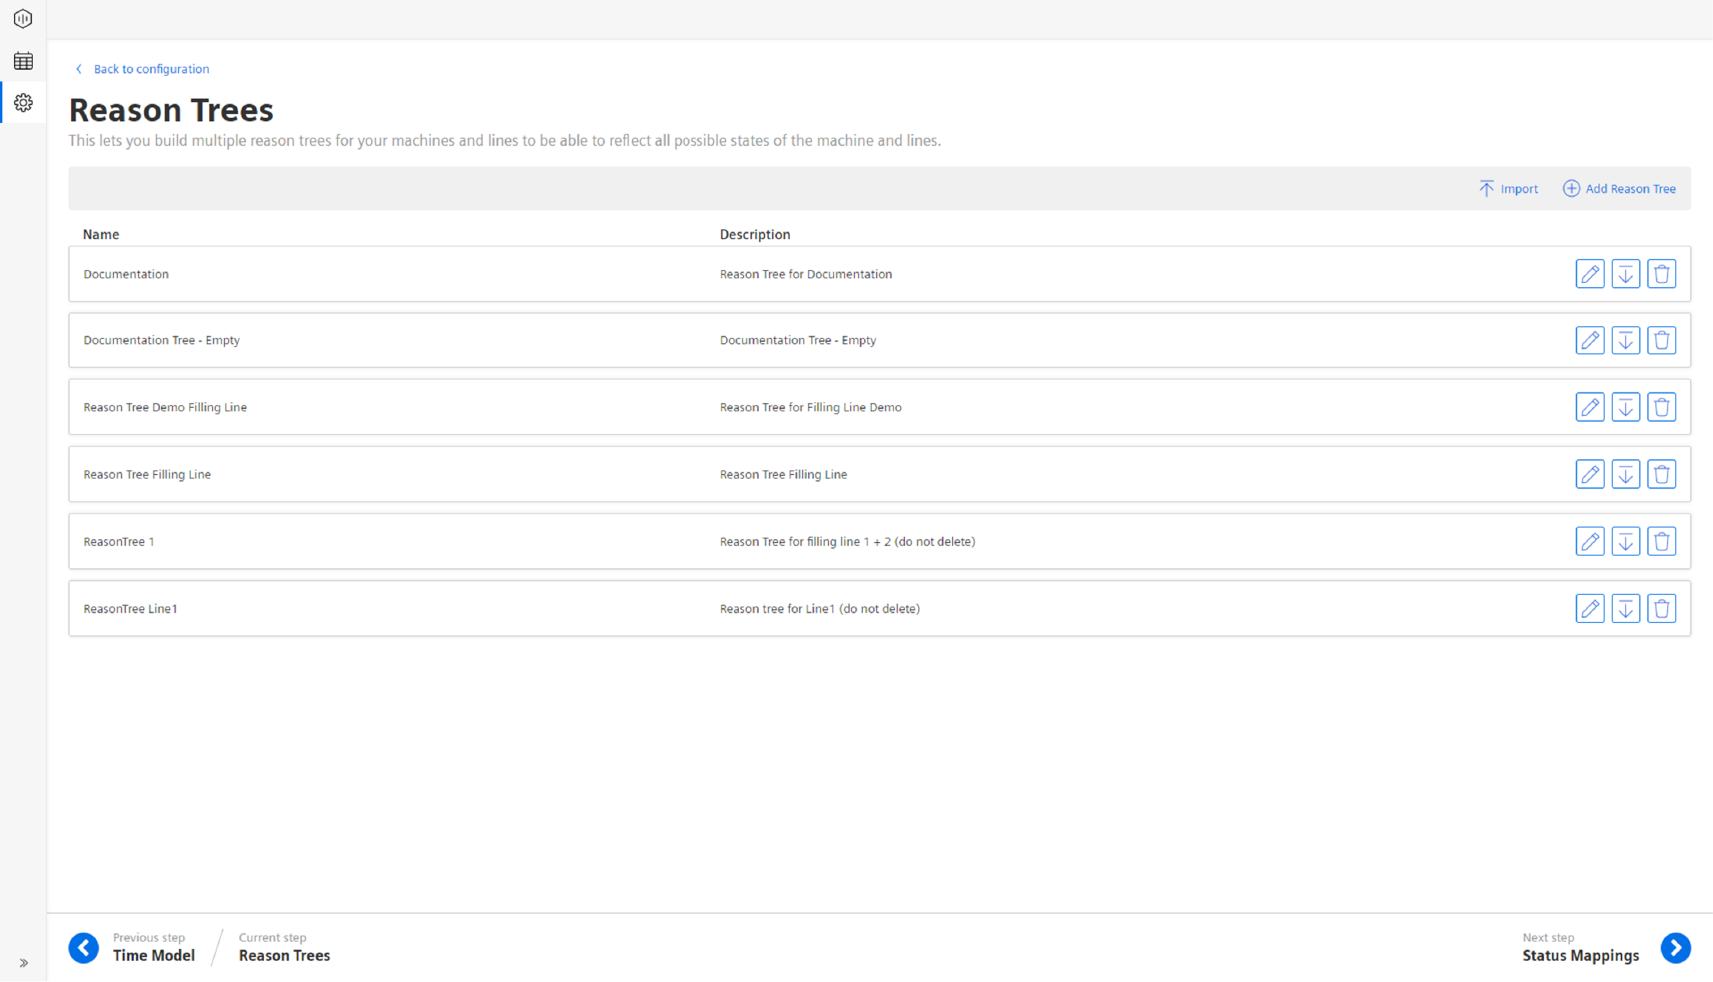
After clicking the button, the import wizard will launch. 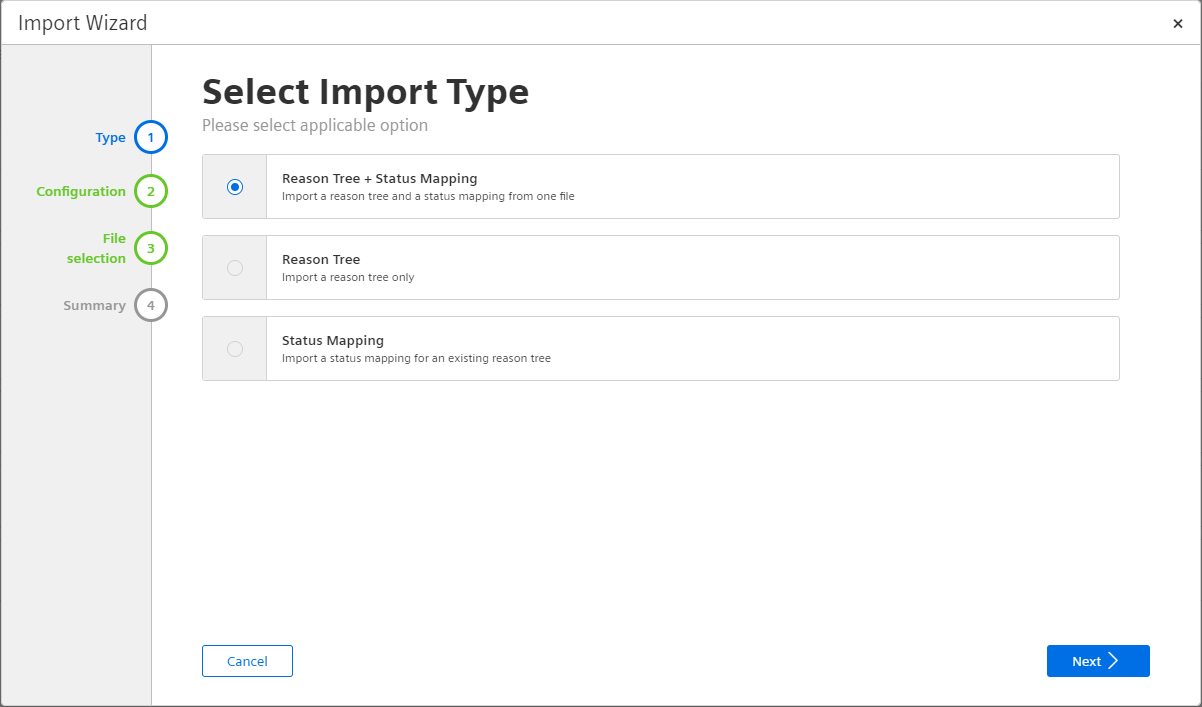
Import Reason Tree & Status Mapping
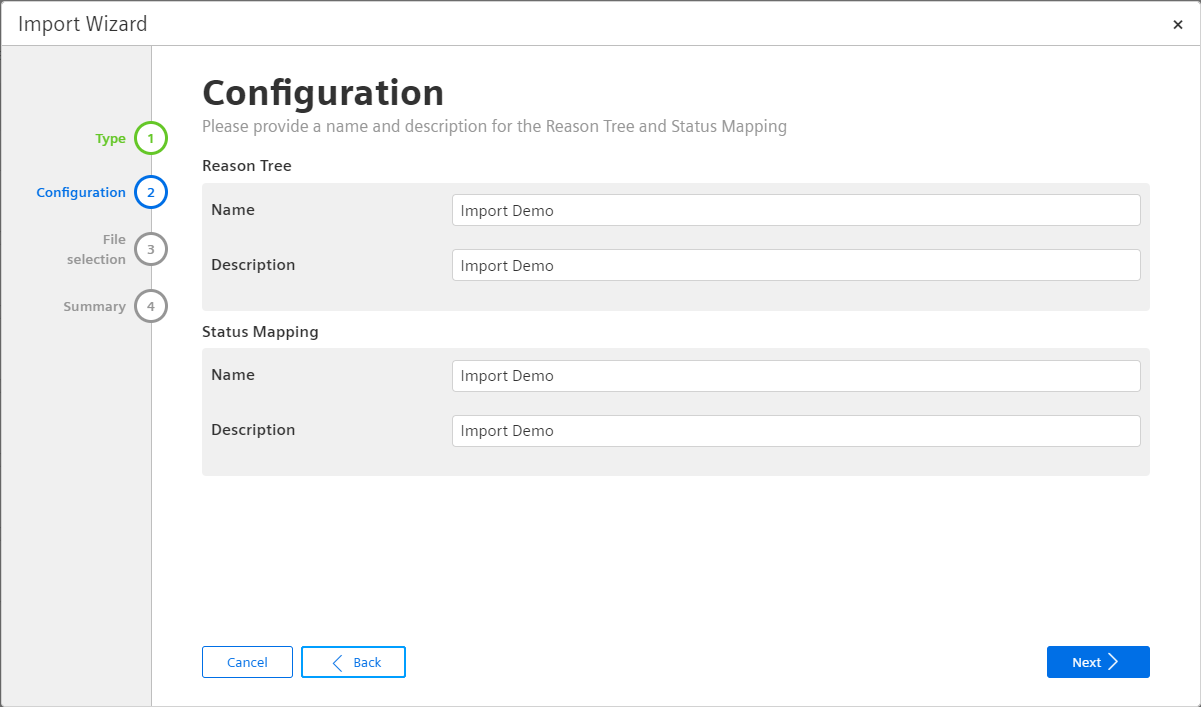
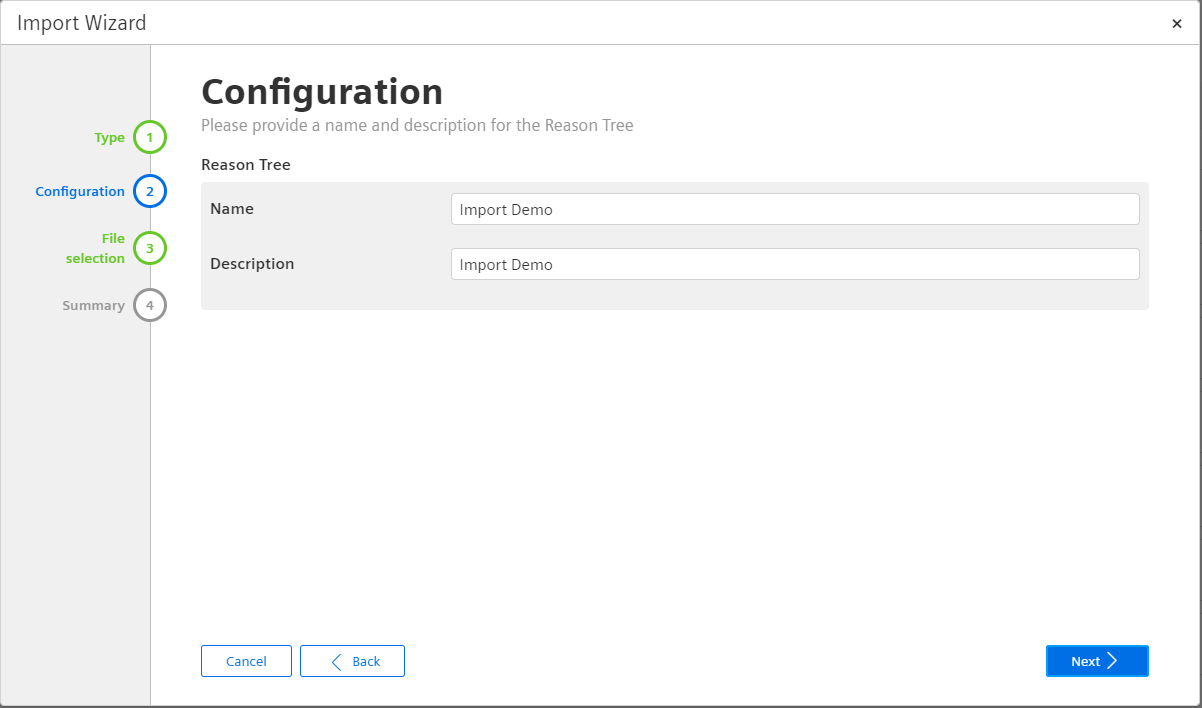
Select the first option Reason Tree + Status Mapping in the wizard and click Next, you will be guided to the next screen of the wizard. Here, you must put in a name and description of your choice for the reason tree and status mapping.
To proceed, please click Next. After this, click the Upload button. This will open another pop-up which allows you to select a file. Please select a file of the type ***.xlsx**. Note: downloading the demo template is also possible here.
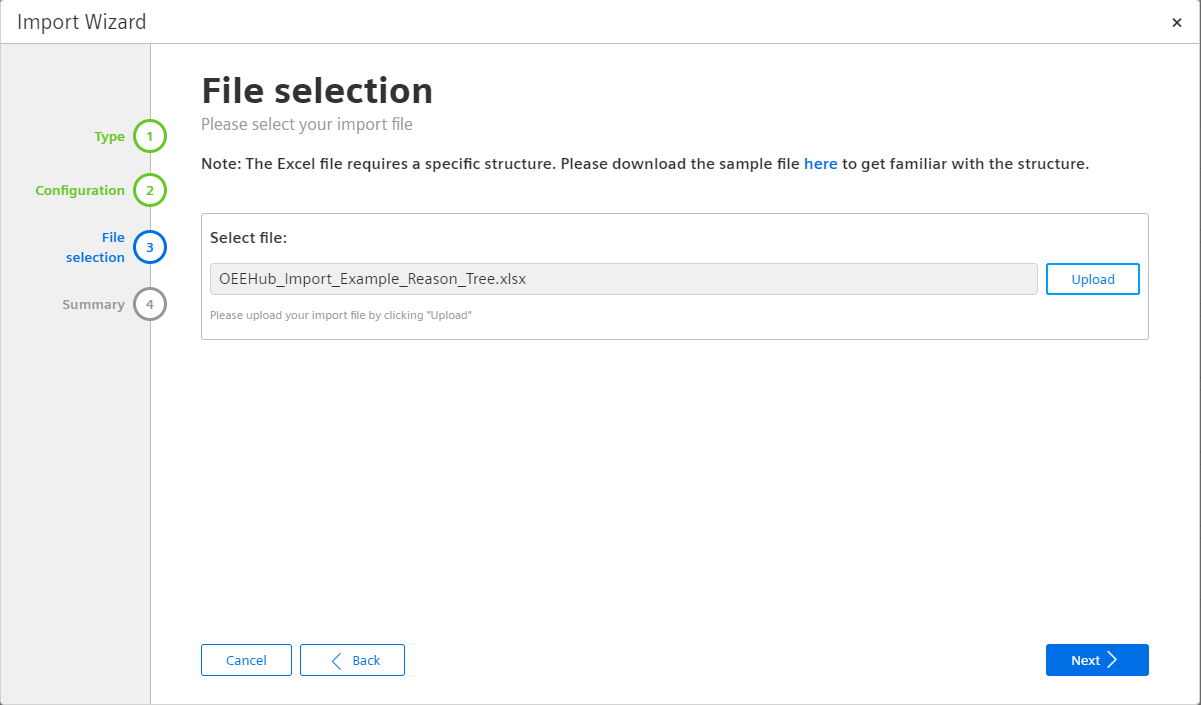
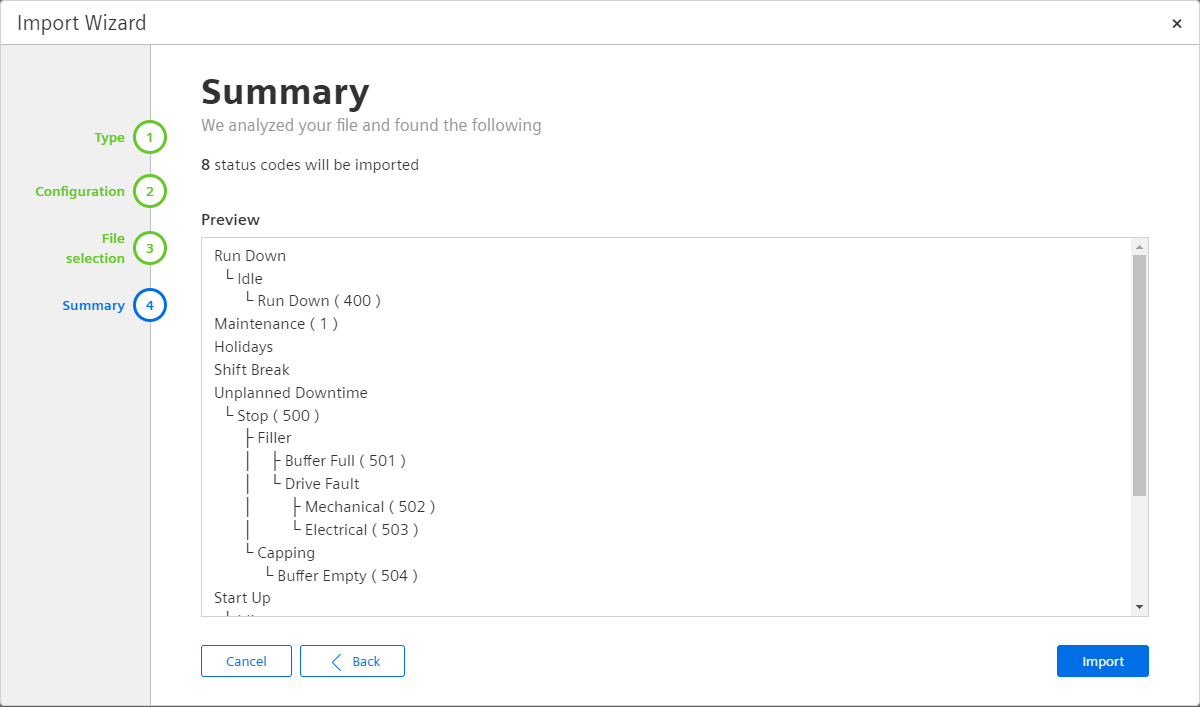
Once you click Next, the file is being uploaded and analyzed by Insights Hub OEE. The last screen will show you the details.
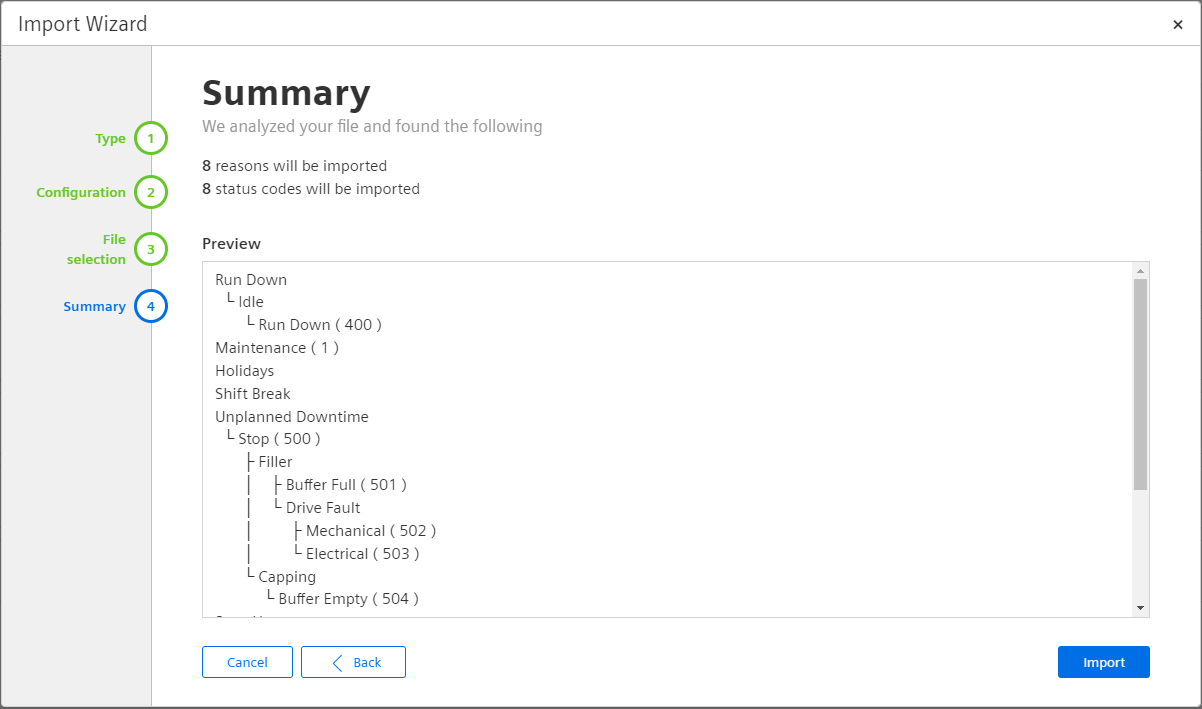
The last step shows a preview of the analyzed reasons with their status codes. Check the preview to see if everything is set up properly in the Excel file.
If warnings or errors will be detected, for example your template is not providing mandatory header cells, they will be shown here. You have now the chance to fix this in your file and to go back to step 2 and to reselect the file again. In case of errors, you can not start the import.
To finalize the import procedure, please click Import.
Import Reason Tree
Select the second option Reason Tree in the wizard and click Next, you will be guided to the next screen of the wizard. Here, you must put in a name and description of your choice for the reason tree.
To proceed, please click Next. After this, please click the Upload button. This will open another pop-up which allows you to select a file. Please select a file of the type ***.xlsx**.
Note: in the dialogue you are also able to download the template, which was described above.
Note: In case you only import the reasons of the reason tree, you must have reasons in the first column Reason. The minimum level of detail that you have to put in is depicted in line 5 of the screenshot below. Only values in the column Time Category will cause a warning during the import and will be ignored.
Once your Excel file fulfills these requirements, you can click Next and the file is being uploaded and analyzed by Insights Hub OEE.

The last step shows a preview of the analyzed reasons with their status codes. Check the preview to see if everything is set up properly in the Excel file.
To finalize the import procedure, please click Import.
Import Status Mapping
Select the second option Status Mapping in the wizard and click Next, you will be guided to the next screen of the wizard. Here, you must select an existing reason tree first and put in a name and description of your choice for the status mapping.

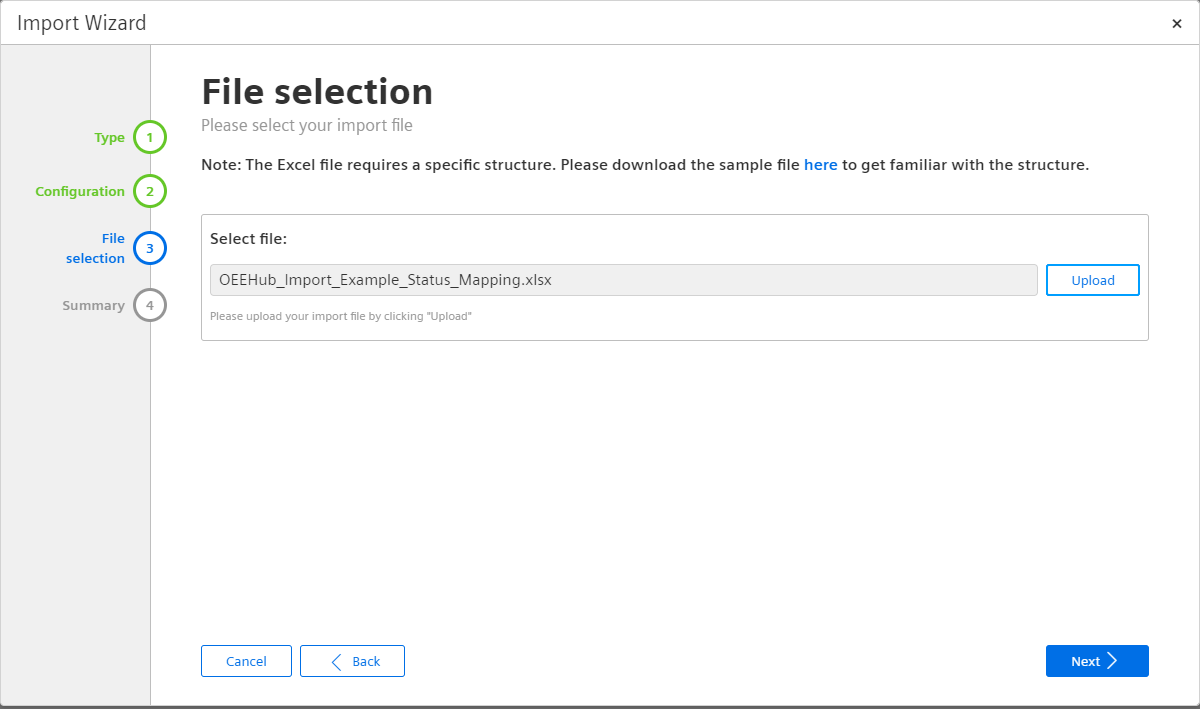
To proceed, please click Next. After this, please click the Upload button. This will open another pop-up which allows you to select a file. Please select a file of the type ***.xlsx**.
Note: In the dialogue you are also able to download the template, which was described above.
Note: To speed up the import of a status mapping, it is also possible to export the existing reason tree and fill in the relevant mappings and then upload it to Insights Hub OEE. To learn more about the export of reason trees and status mappings, please read the chapter Export of Reason Tree and Status Mappings.
A status mapping file needs to look the same way as it does in the Reason Tree + Status Mapping import scenario, so please refer to this section for an example.
Once your Excel file fulfills these requirements, you can click Next and the file is being uploaded and analyzed by Insights Hub OEE.
The last screen will show you the details.
The last step shows a preview of the analyzed reasons with their status codes. Check the preview to see if everything is set up properly in the Excel file.
To finalize the import procedure, click Import.
Export of Reason Tree and Status Mappings
Insights Hub OEE also provides Export capabilities for reason trees and status mappings. This can be used to do snapshots of the existing configuration and help to speed up the configuration.
Export of a Reason Tree
To export a reason tree, please click the gear icon on the left-hand side and go to the configuration. In the next step, please click on Reason Trees to open the reason trees configuration page. On each existing reason tree, you can find three different options to manipulate the item – edit, export and delete.
Please click the middle icon, the download button, to export the reason tree. It will automatically be saved as an Excel file to your default download folder on your PC.
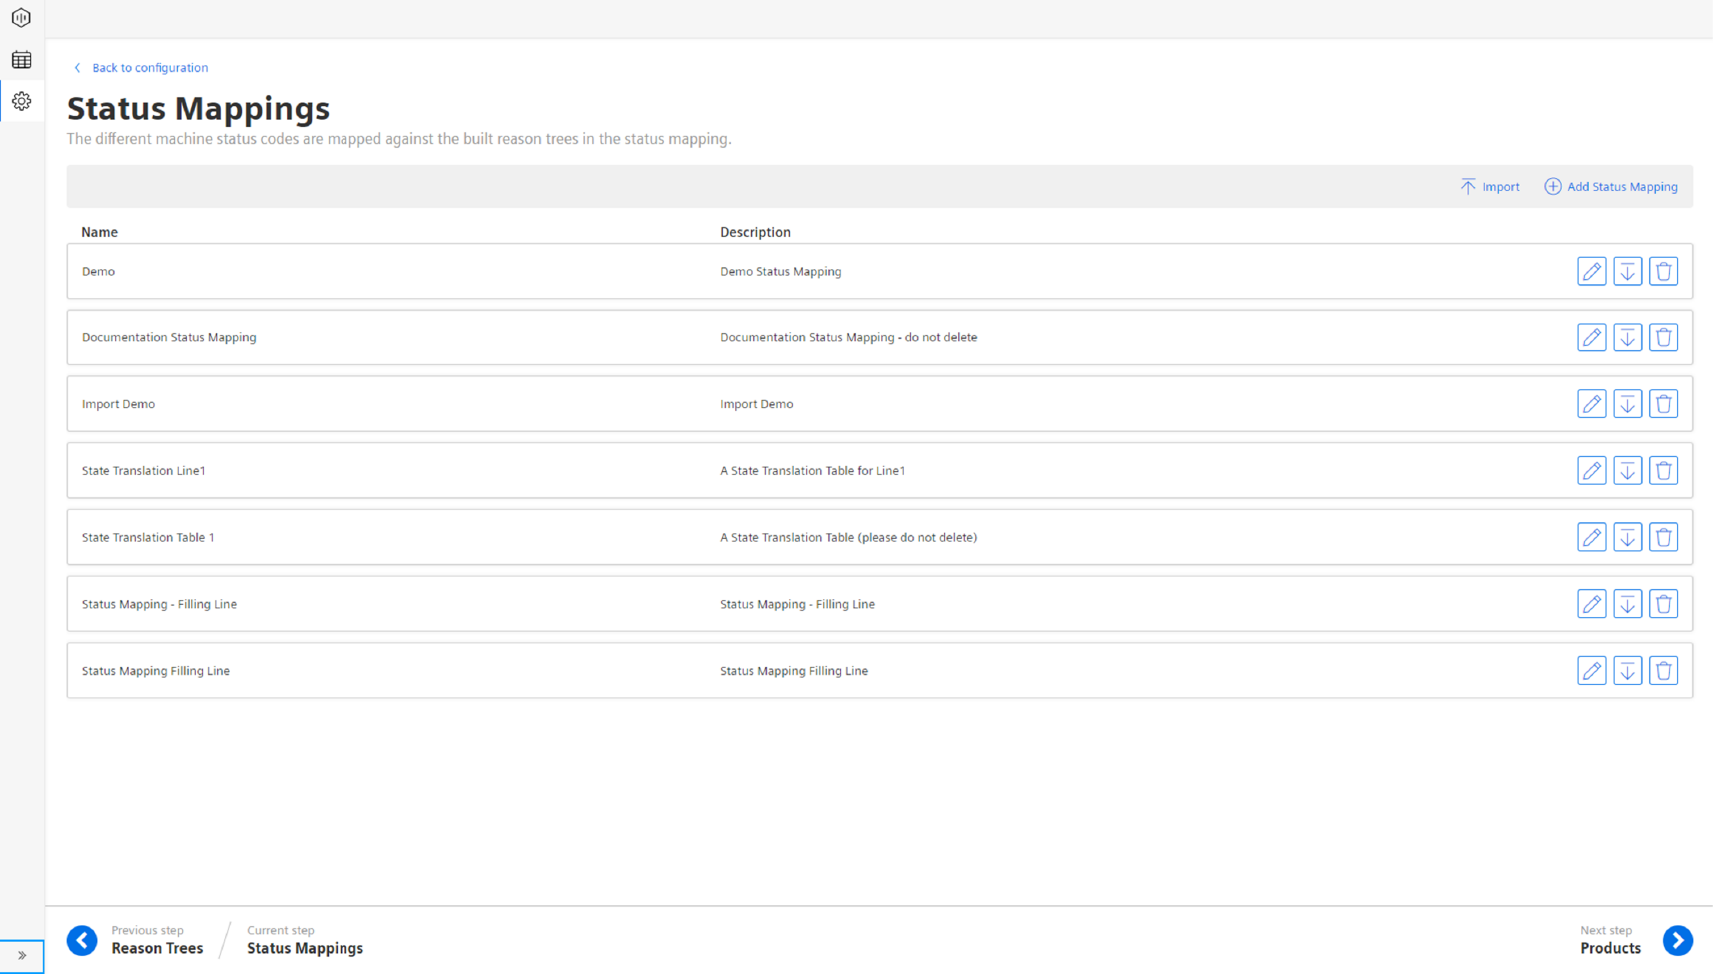
Export of a Status Mapping
To export a status mapping, please click the gear icon on the left-hand side and go to the configuration. In the next step, please click on Status Mappings to open the status mappings configuration page. On each existing status mapping, you can find three different options to manipulate the item – edit, export and delete. Please click the middle icon, the download button, to export the status mapping. It will automatically be saved as an Excel file to your standard download folder on your PC.