Configuring Products¶
Prerequisite¶
To enable proper Performance KPI calculations, refer to Section Products & Design Speed in the OEE Basics chapter.
Before configuring "Product Collections" & "Products", it is important to understand the basic concepts from Section Products & Design Speed.
With product collections, you can now create groups of products that you can later assign to a specific machine or line asset. This is helpful if you are running the same products on different lines but with different design speeds, for example, if you are having twice the same equipment, one can produce the same product at a faster rate. In this section, you will learn how to set up collections and subsequent products.
User interface¶
In “Products” overview, you can perform the following actions:
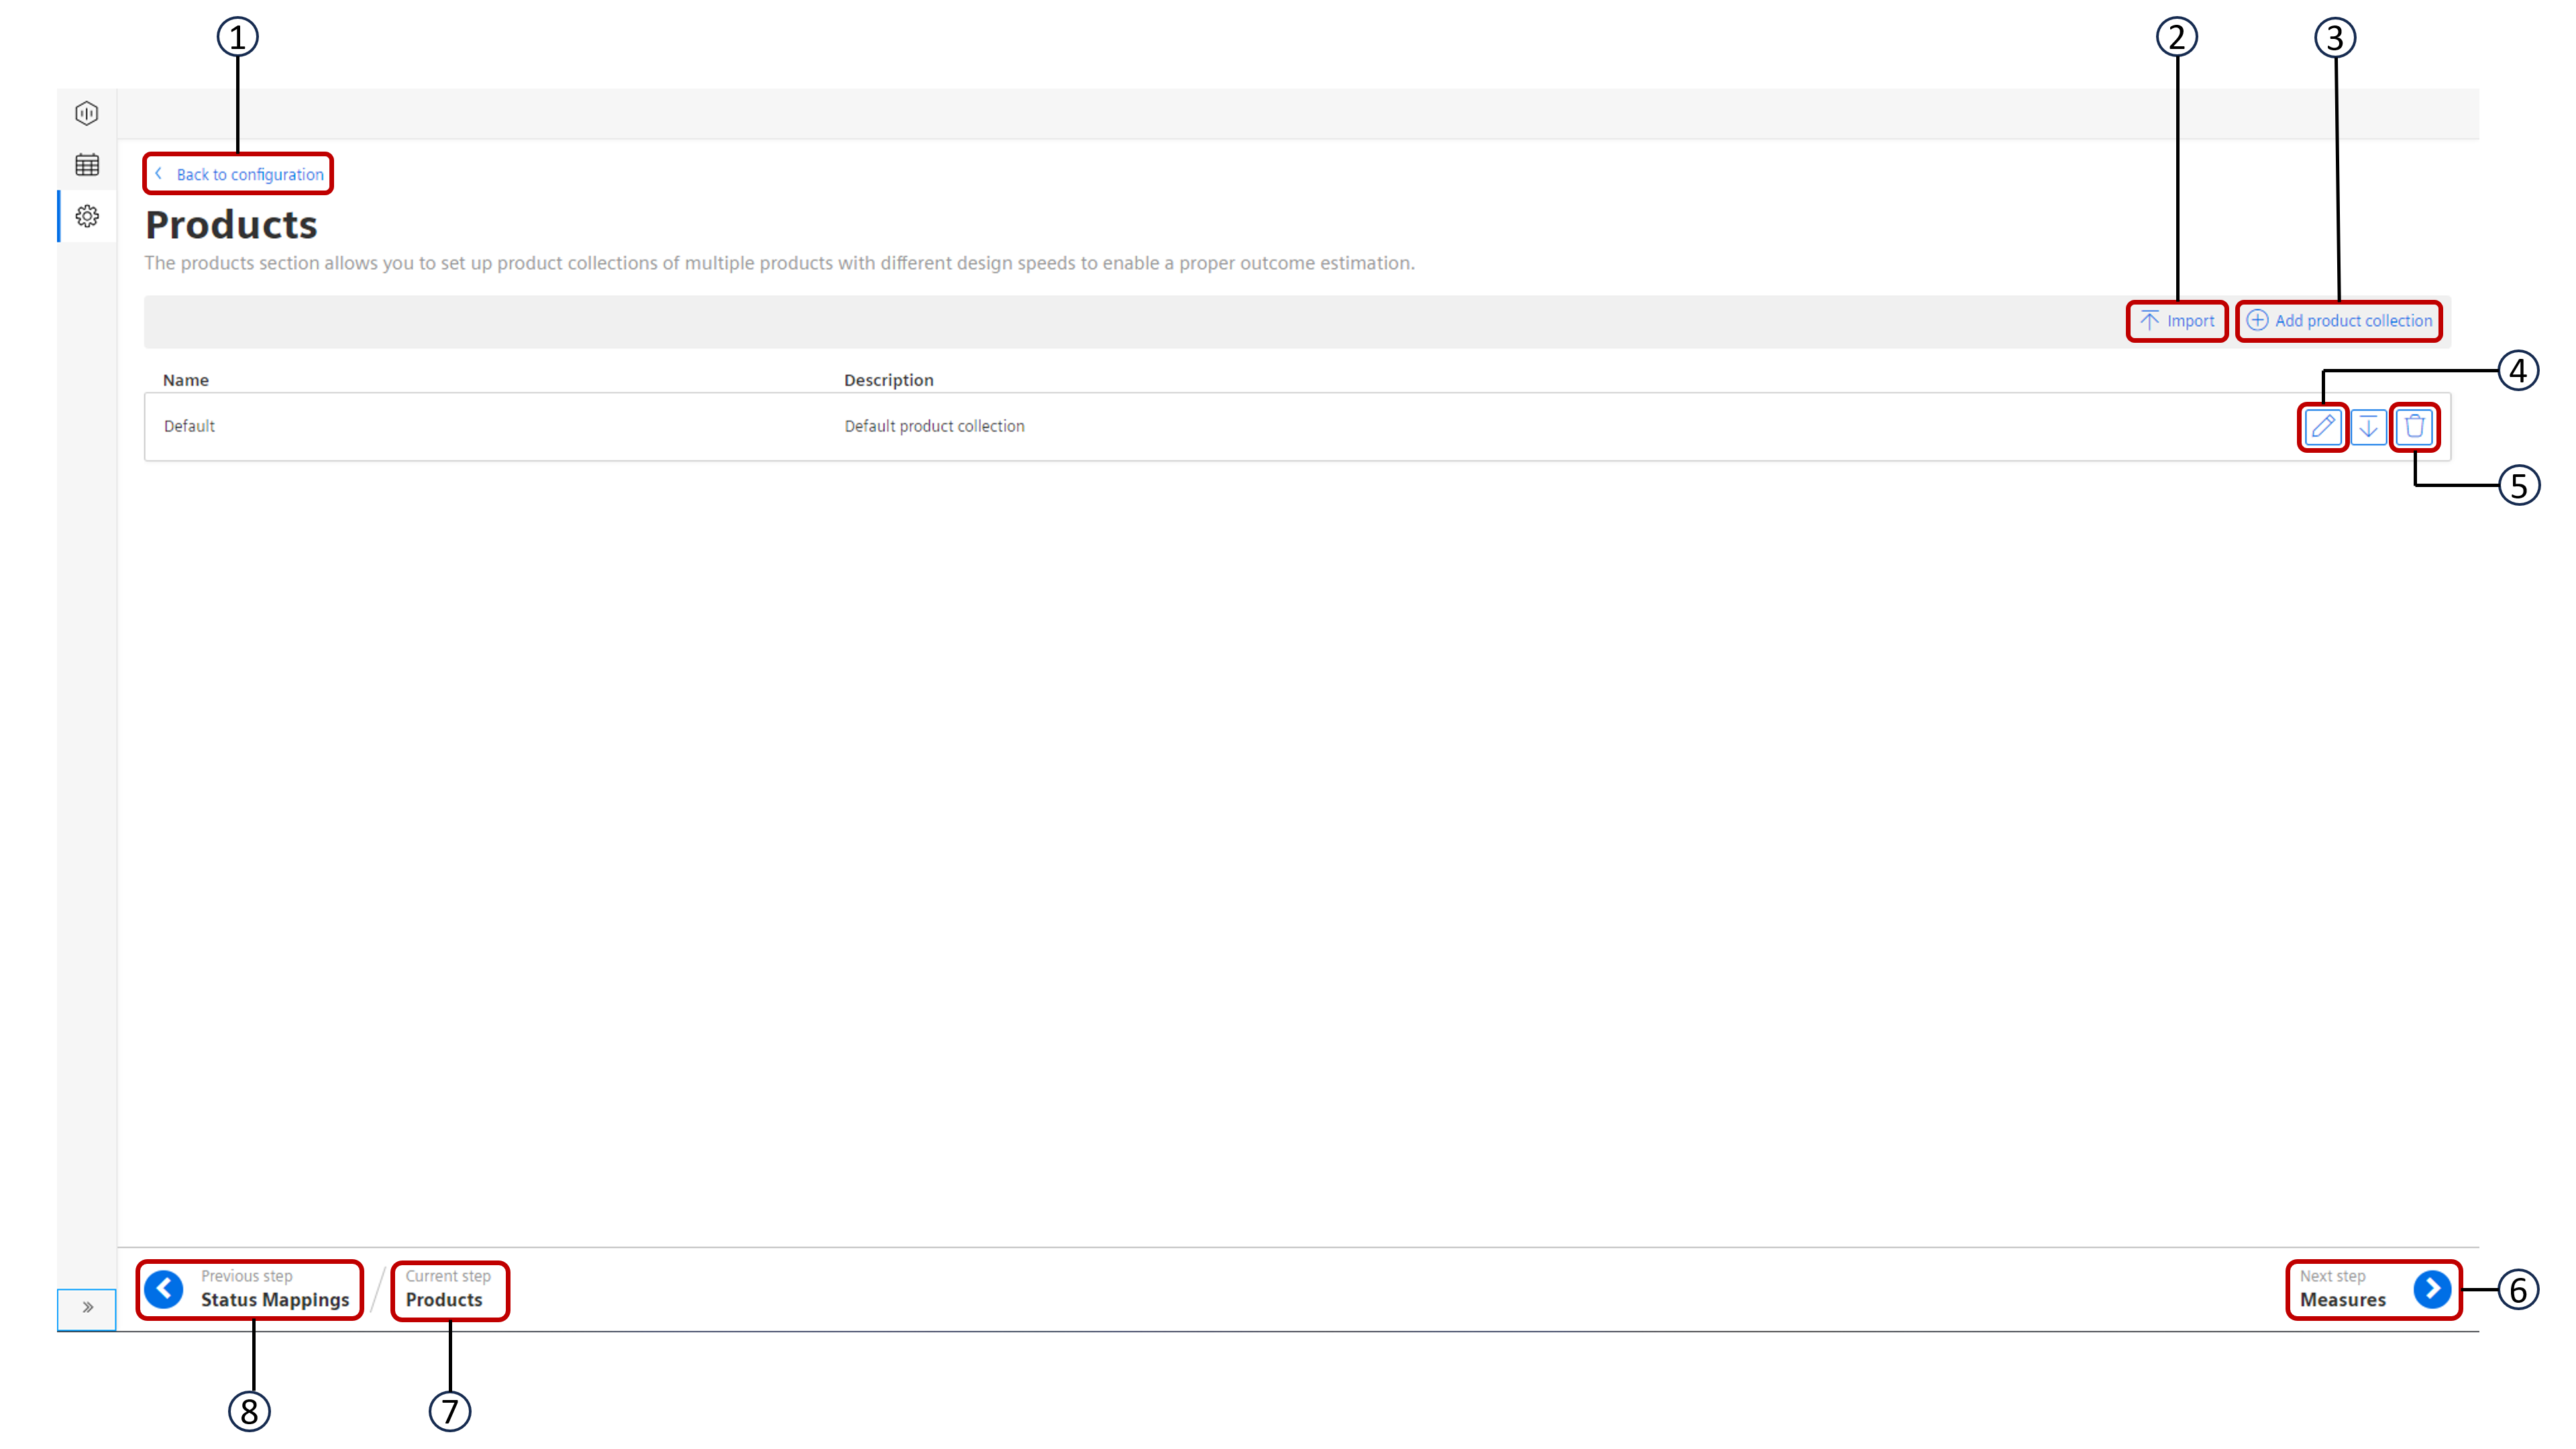
① Navigates to the “Configuration” tab
② Imports a new “Product Collection”
③ Adds a new “Product Collection”
④ Edits the existing “Product Collection”
⑤ Deletes the existing “Product Collection”
⑥ Navigates to the next step
⑦ Displays the current step
⑧ Navigates to the previous step
Procedure¶
To create a new product collection, proceed as follows:
- From the navigation tab, click “Configuration” and select “Products”.
- In “Products”, click “Add Product Collection”. This will open a new page.
- On this page, add “Name” and “Description” for the product collection. Once you entered both, the product collection is auto-saved and you can start to add products.
- Click “Add Product” to add a new product. This will open a new page.
-
Enter “Name”, “Description” and “Design Speed”, “Unit”, “Time interval” and “Product Code”.
Given below is an example scenario:- Name: Orange Lemonade 1L
- Description: Orange Lemonade 1L
- Design Speed: 6500.00
- Unit: Pcs
- Time interval: HOUR
- Product Code: OL1L
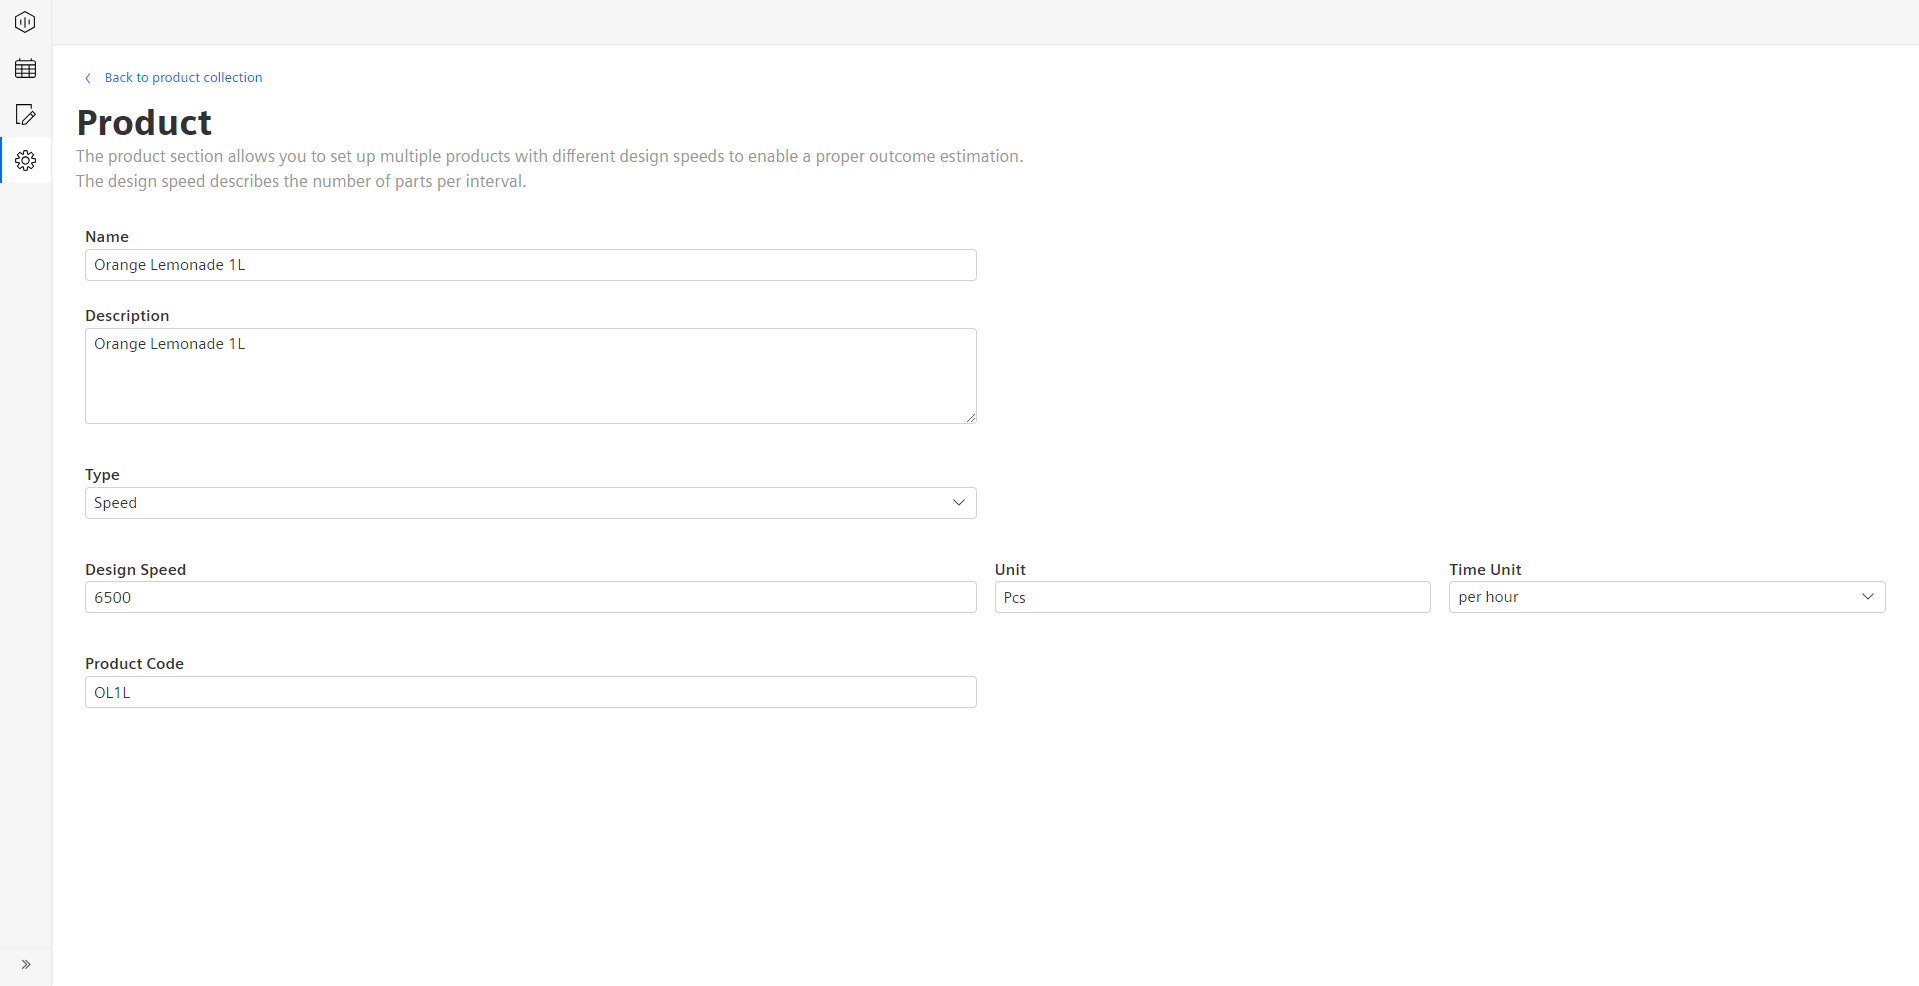
Input Field Data type or Units Name STRING Design Speed INT or DOUBLE Unit String (for example, kg, pcs, etc.) Time Interval HOUR, MINUTE or SECOND Product Code STRING or INT -
After adding the product information, click “Back to Product Collection” button to get back to the collection. You will find the newly created product as a list item in the product collection.
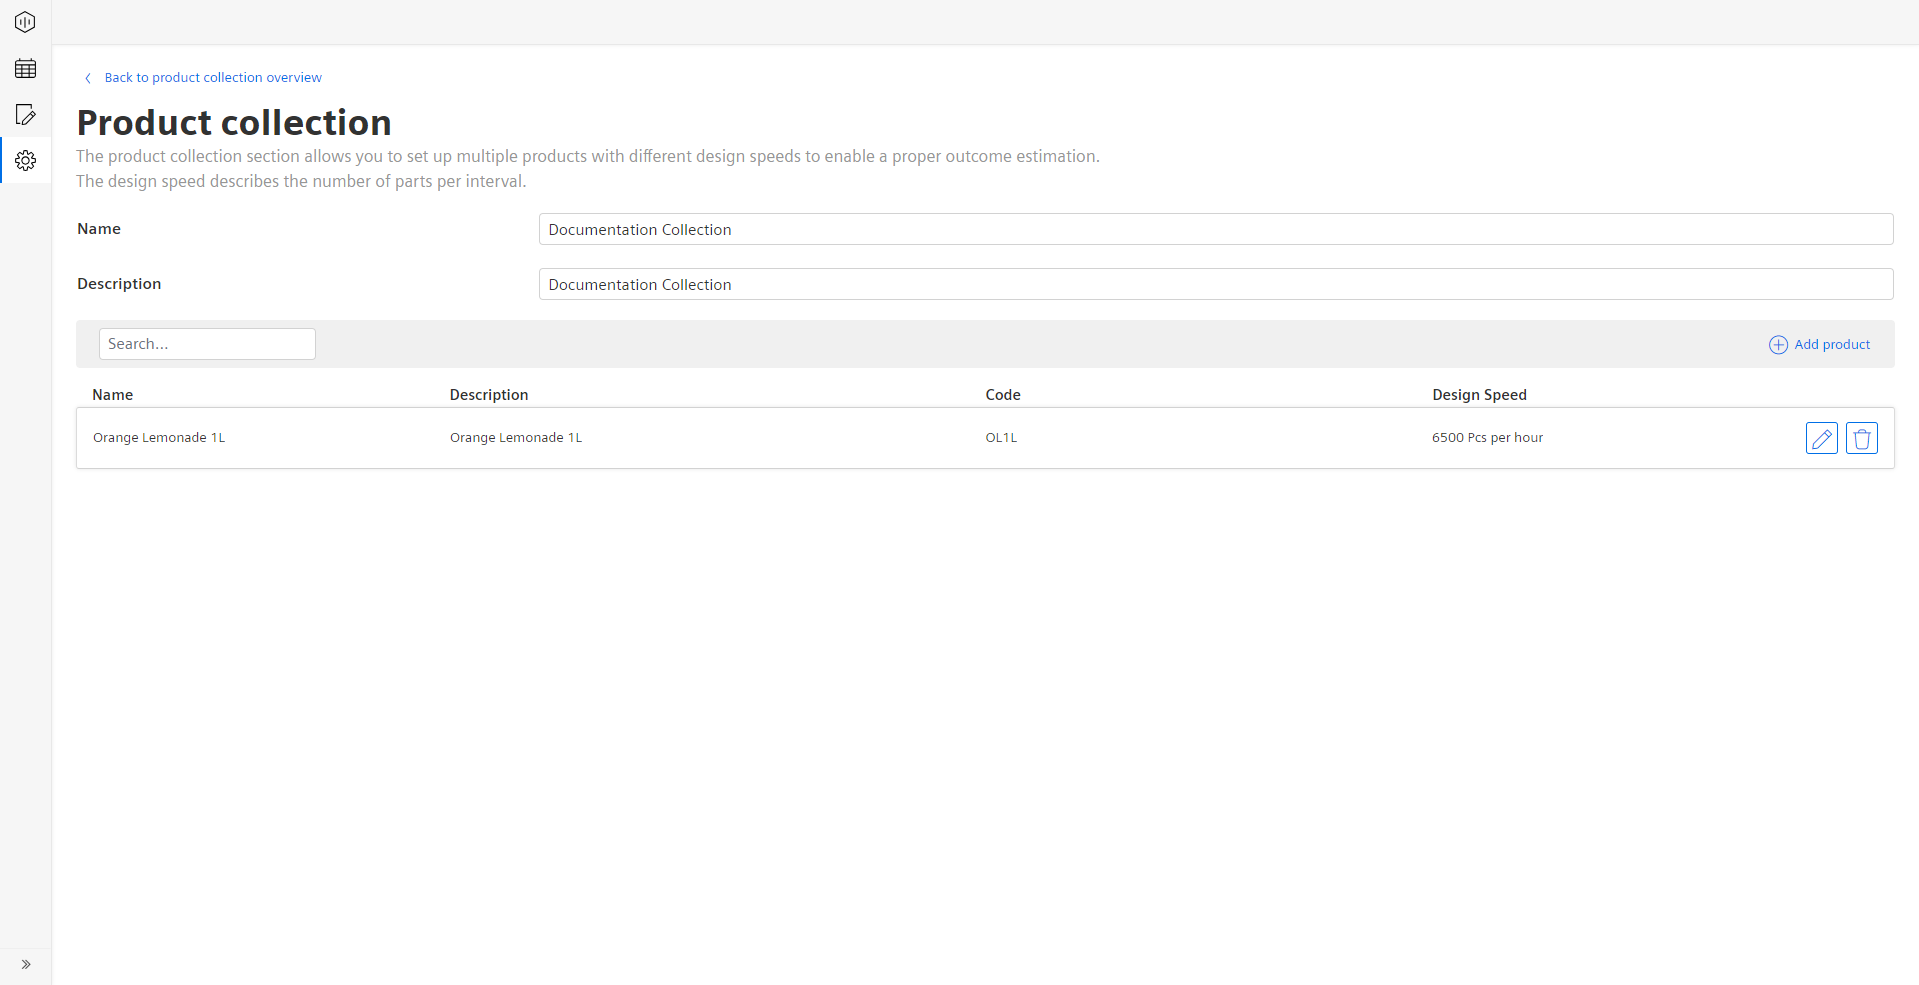
The product collection list shows all the individual products created in the collection and showing the following information for each product: - Name - Description - Code - Design Speed
The product collection also features a search bar, so you can filter the list for the desired product.
Note
Since the product collections are an enhancement compared to the previous products, all existing products are moved in a product collection called “Default”.
Excel Import and Export¶
For product collections, Insights Hub OEE also features an excel import and export to speed up the configuration of multiple products for different machines and lines. To import a product collection, Insights Hub OEE requires an excel template that needs to be filled in properly by the user. The template will be described in the following sections.
Excel Template Description¶
The template creation for a product collection is straightforward. As a first step you need to create the following columns: - Name - Description - Design Speed - Unit - Time Interval - Product Code
Once you created it properly, it should look like the picture below.

Now, for every product, that you want to set up, you have to create a single row in the excel template. In the example above, already three products are created with the different design speeds. For the individual columns some constraints apply: - Name: Must start with a character, followed by characters, digit, hyphen, underscore, dot, comma or white space, max length is 50 - Description: Must start with a character, followed by characters, digits or any of _ - , . ; : ! " ' § $ % / ( ) @ + *, max length is 50 - Design Speed: Must be a positive number (Double or INT) - Unit: Must start with a character, followed by characters, digit, hyphen, underscore, dot, comma or white space, max length is 10 - Time Interval: Must be either HOUR, MINUTE or SECOND - Product Code: Is of the datatype string and must have a length between 1 – 64 characters
Once you completed your product collection save the file as an .xlsx file to your desired location.
Import Wizard¶
In the following section, you will learn how to import a product collection in Insights Hub OEE. To start the import, first navigate to the configuration by clicking the gear icon in the navigation bar on the left side. Following that, you have to select the “Products” to reach the import wizard.

In the upper right corner, you will find an import button. After clicking the button, the import wizard will launch.
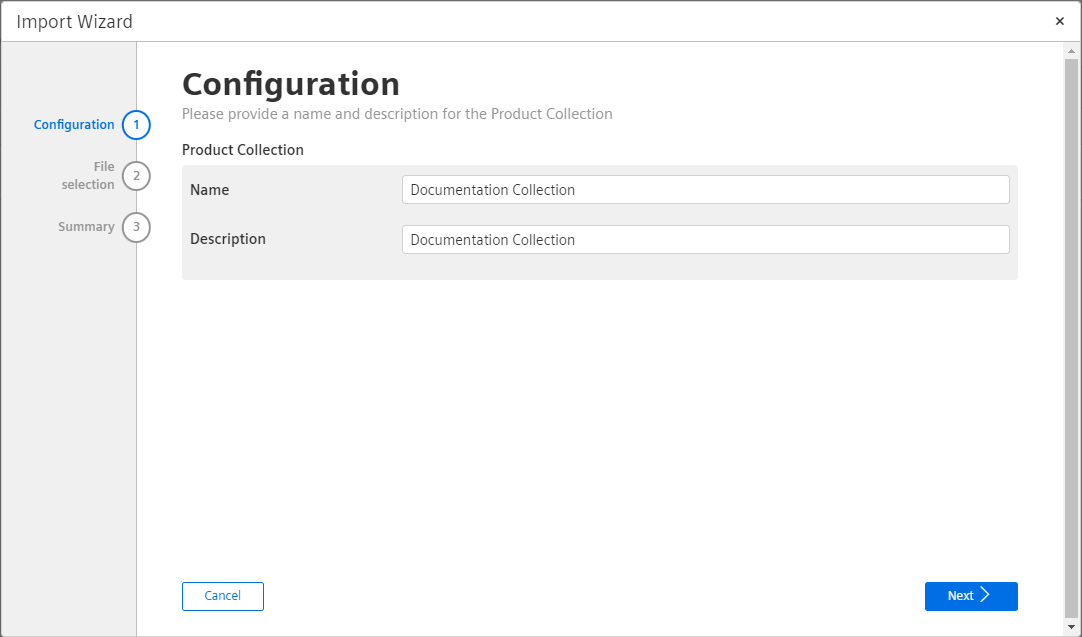
The screen above asks you to fill in the product collection name and description. Once you filled it in, please click next at the bottom of the wizard to proceed to the next step.
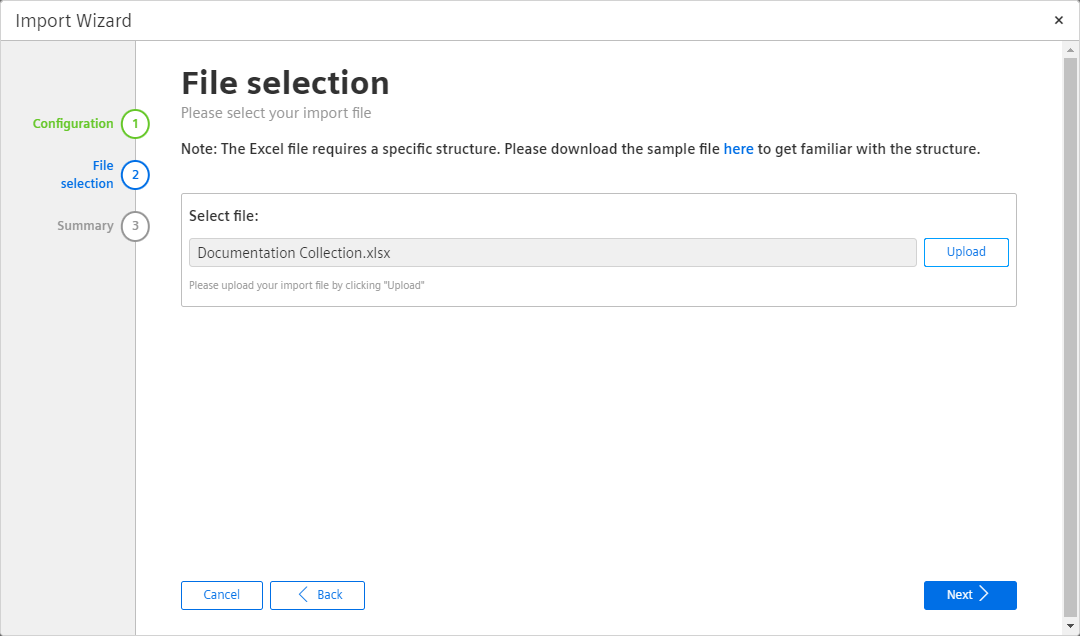
In this screen, click the Upload button. This will open another pop-up which allows you to select a file. Please select a file of the type .xlsx.
Note
Downloading a demo template is also possible here.
Once you selected the file, click next and the file is being uploaded and analyzed by Insights Hub OEE. The last screen will show you some details of the identified products in a table view.
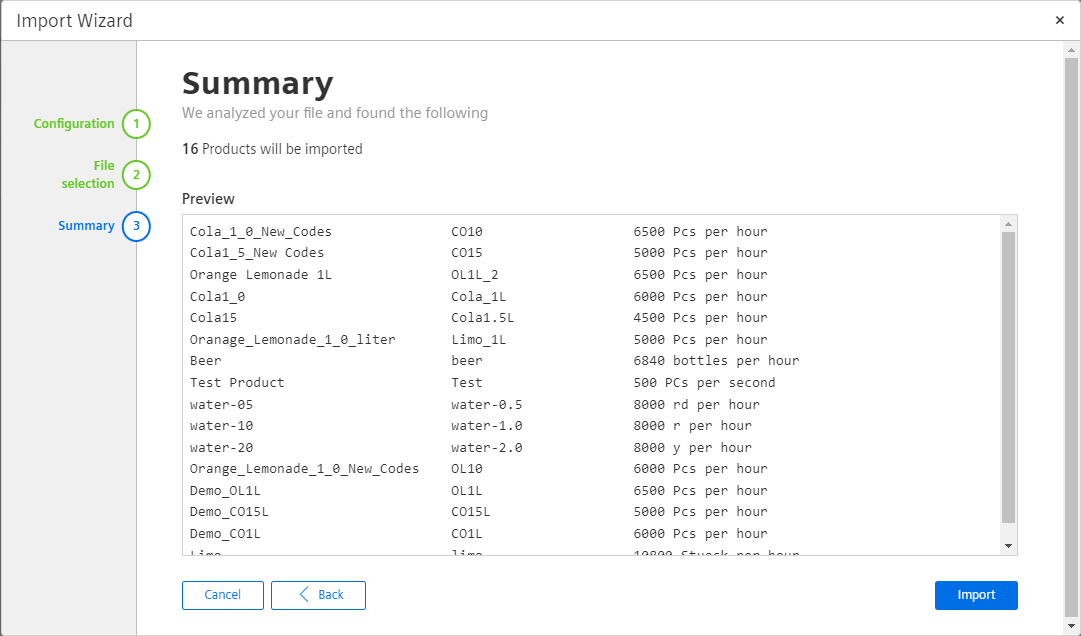
If warnings or errors are detected, e.g., your template does not provide the mandatory header cells, they will also be shown on the last page of the import wizard. Then you have the chance to fix issues in the file and go back to the second step and to reselect the file again. In case of errors, you can not start the import. To finalize the import, click the Import button.
Export of a Product Collection¶
To export a product collection, click product overview page. On each existing product collection, you can find three different icons to manipulate the item - edit, export and delete. Click download button, to export the product collection. It will automatically be saved as an .xlsx file to your default download folder on your PC.
