Forecast
The “Forecast” extension is introducing the forecasting capability as part of Predict offering, which offers an out-of-the-box model building to forecast your future time series data values, using advanced artificial intelligence and machine learning technologies.
The “Forecast” extension uses time series data from asset as dataset and does easy configuration for forecast model building and execution.
The “Forecast” extension visualizes forecasting results which could be further utilized for your targeted use cases like comparing with threshold value, reviewing historic forecasting records for model selection.
User interface of the Forecast
The following figure shows the "Forecast" screen:
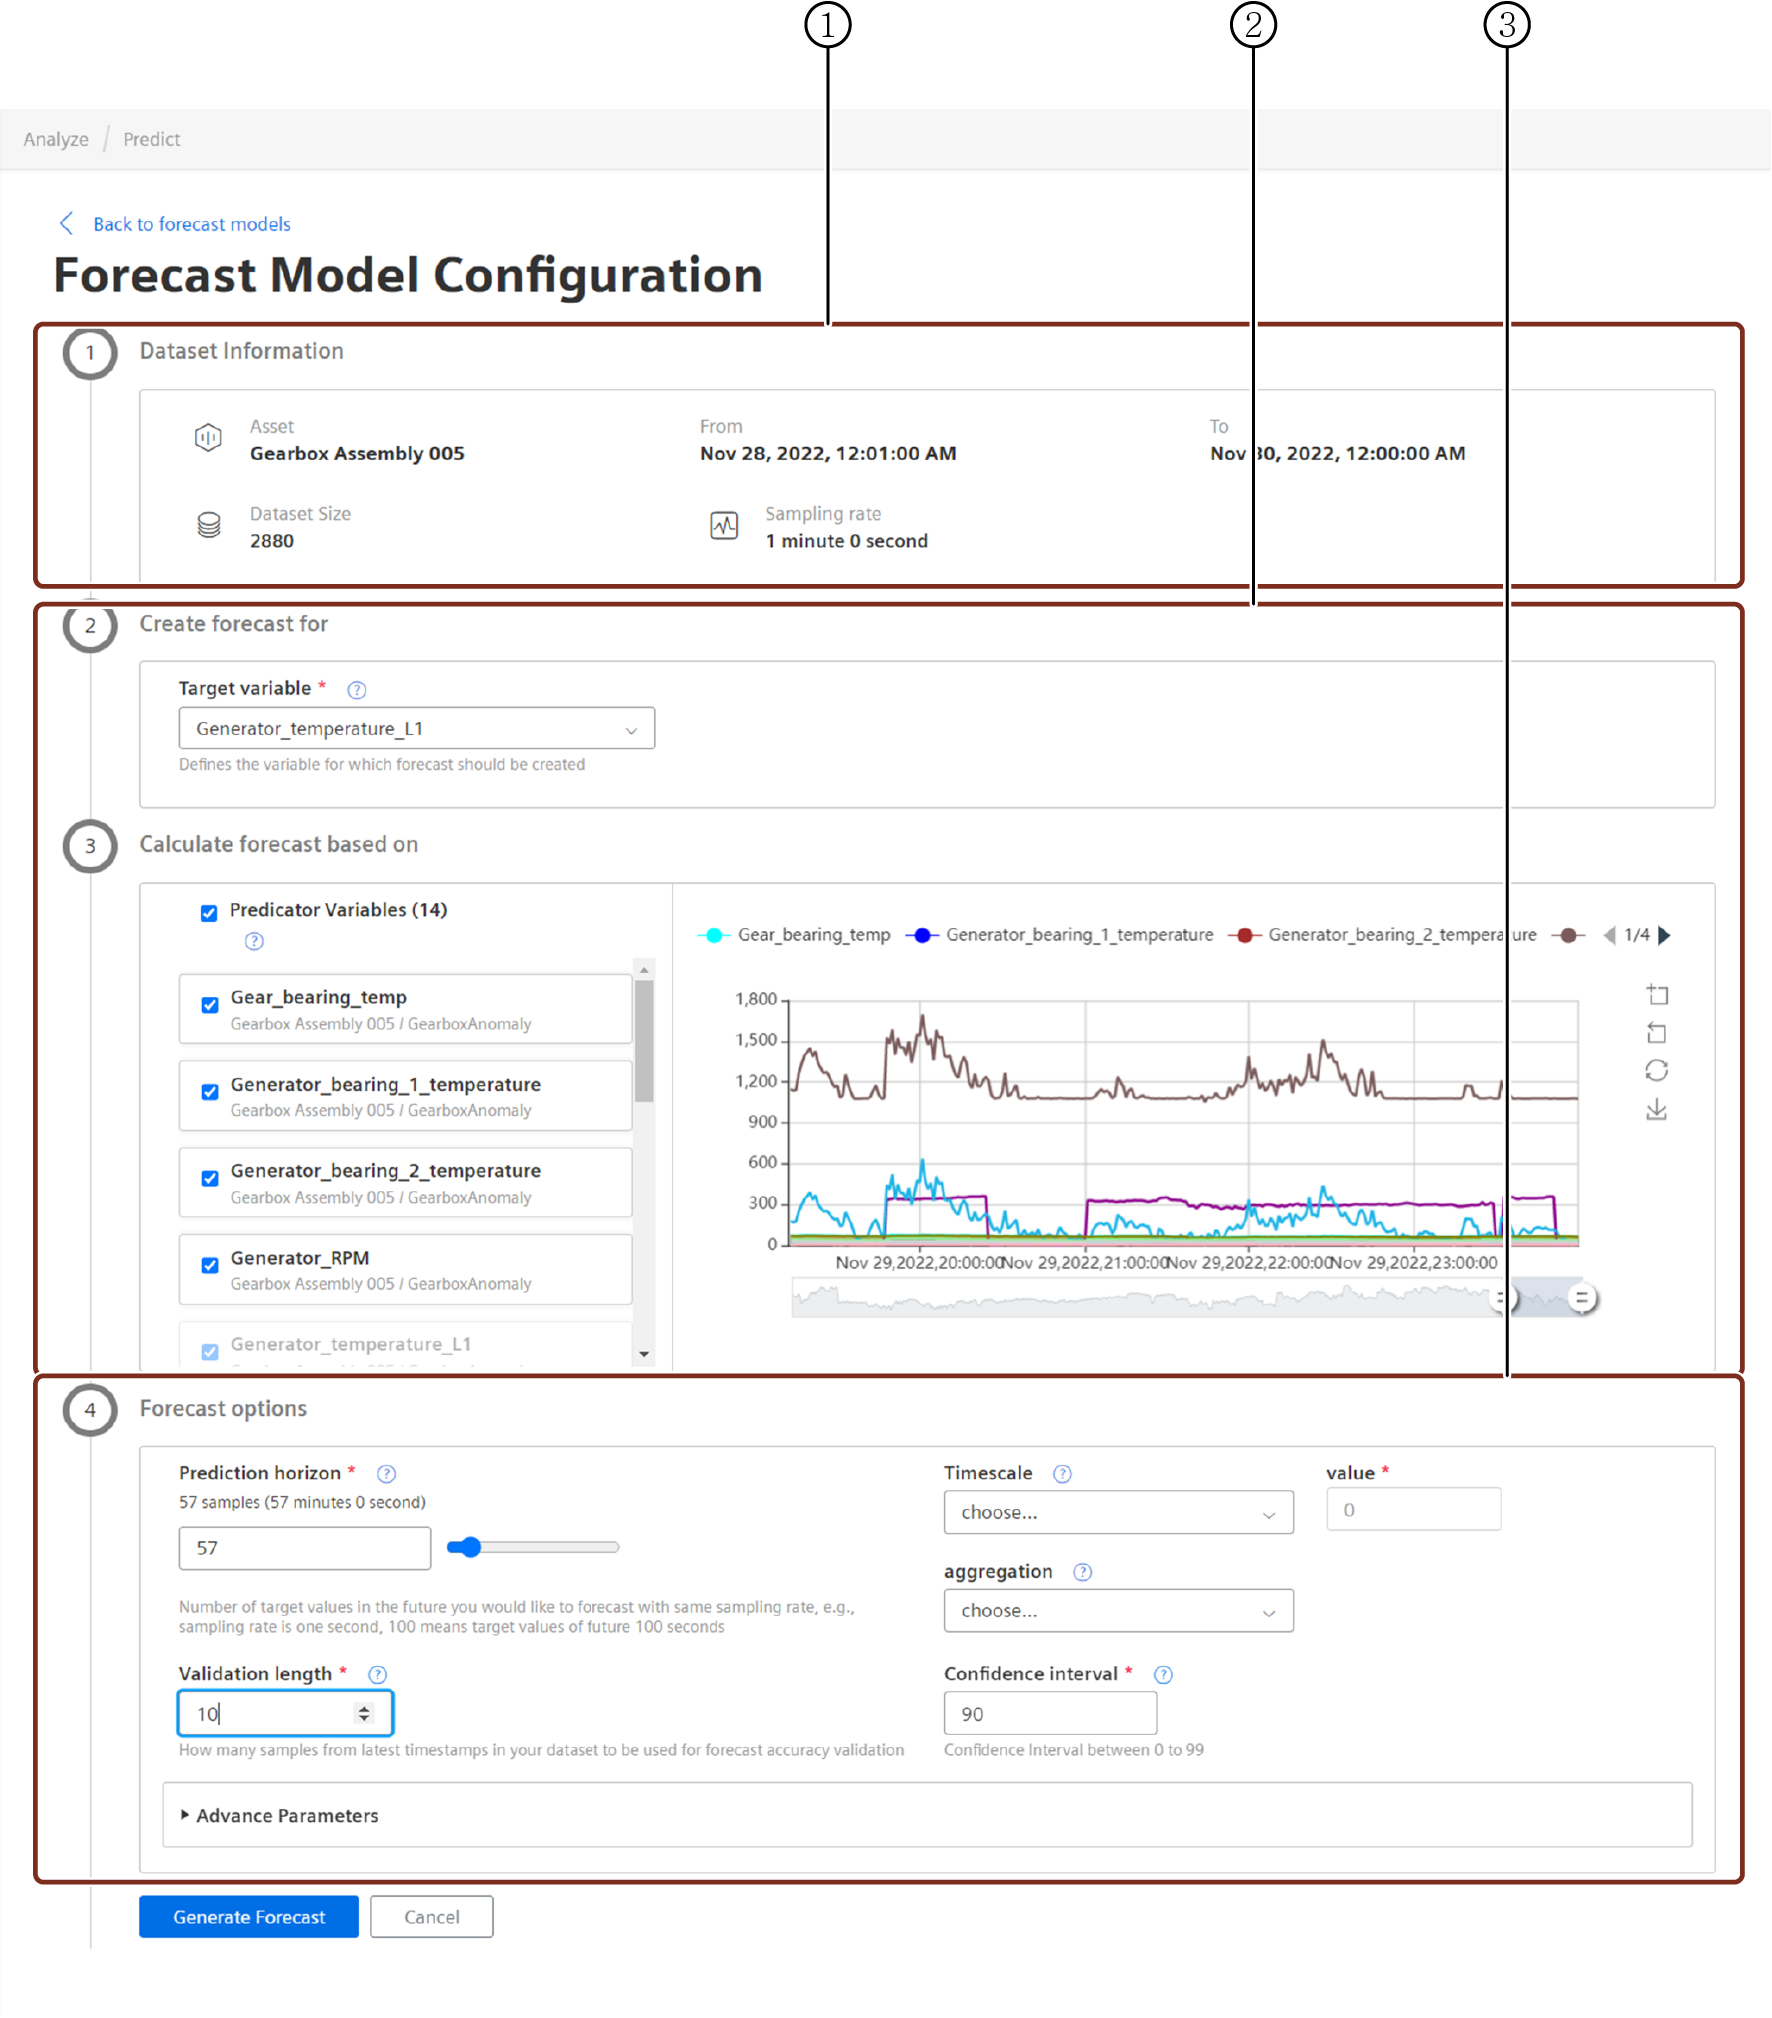
① Dataset information
② Use case details of the forecast
③ Forecast Configuration settings
Generate the Forecast model
To generate the forecast report, proceed with the following steps:
- Open "Predict" in the "Analyze" section.
- Select the "Use Case", and click "Forecast Jobs".
- Select the targeted variable of your choice.
The forecast prediction is prepared for the selected target variable. - Select the input variables of your choice.
- Configure the below settings to generate the forecast report.
- Prediction Horizon: Number of samples or time period in the future for forecasting
- Validation Length: Back-testing length from dataset for accuracy metrics generation
- Confidence Interval: A measurement of percentage to represent the confidence level
- Allow offset: A boolean value that decides whether to use offsets of predictors in model
- Click "Generate Forecast".
Forecast model
The generated forecast model can be used to predict the future data for the selected variables of the asset.
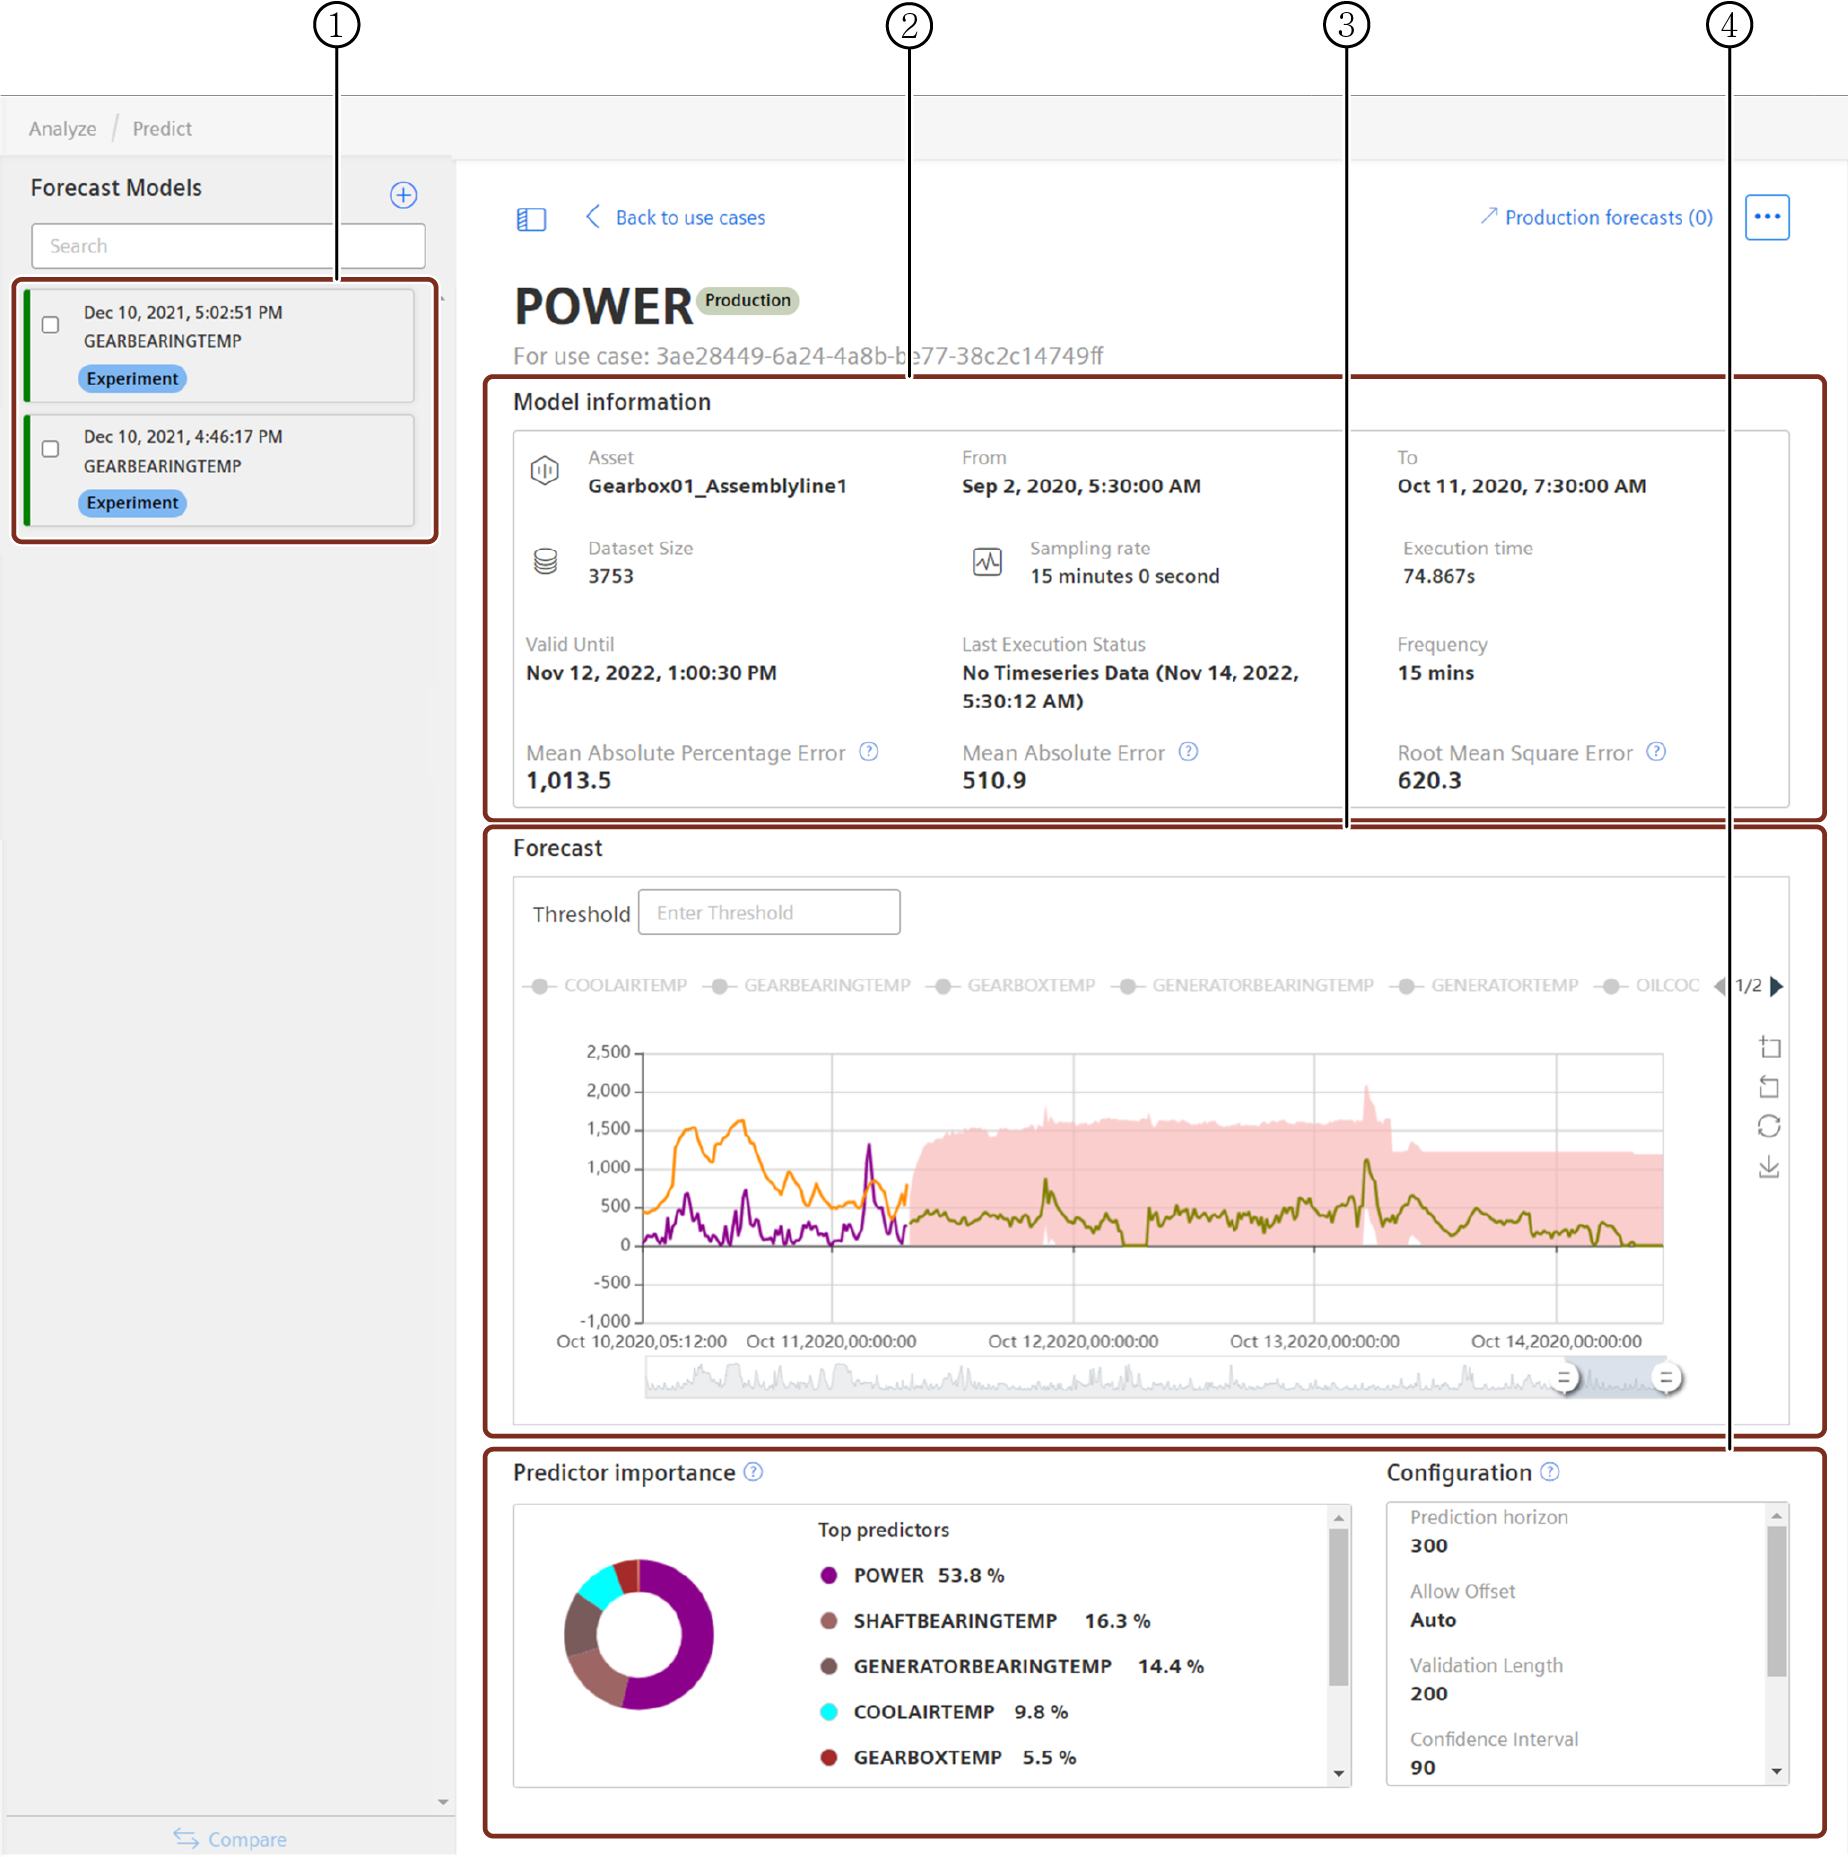
① Forecast Models
② Model information
③ Forecast report
④ Predictor importance indicators
Schedule the forecast model for production
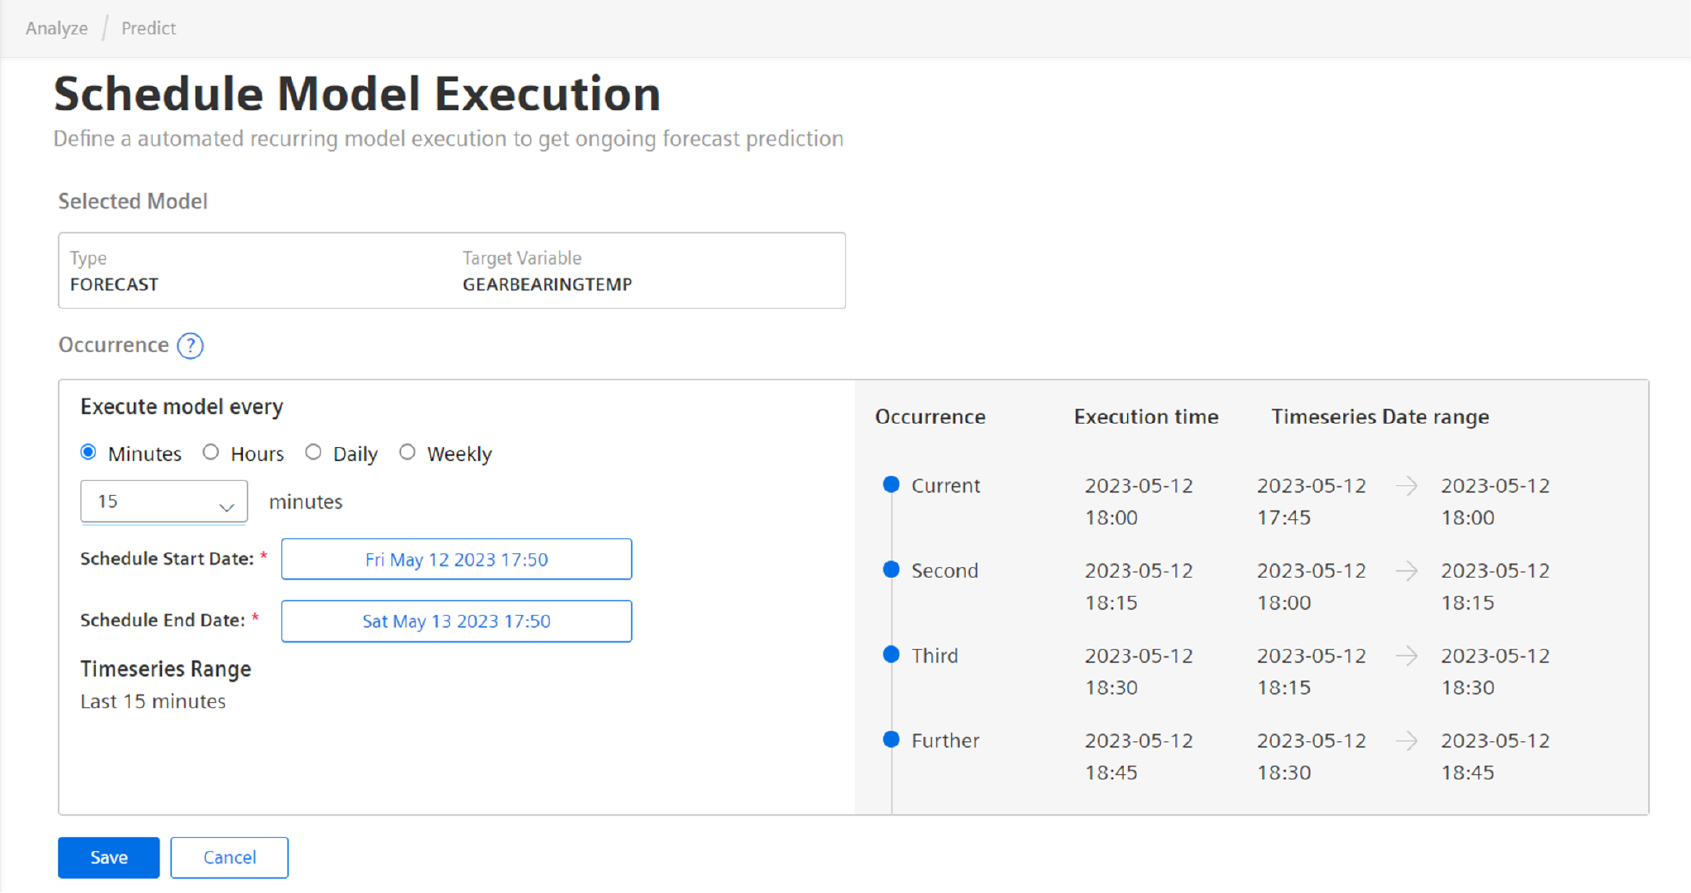
It is now possible to plan and schedule the production of the forecast model which can be executed and evaluated on the frequent intervals as per the preferred time range.
To schedule the production run of the forecast model, proceed with the following steps:
- Open "Predict" in the "Analyze" tab.
- Select the "Use Case", and click "Forecast".
- Select the preferred model from the list of available models.
- Click "Schedule for production".
- Select the preferred frequency for executing the models.
The forcast models can be executed as per the below intervals:- Minutes
- Hourly
- Daily
- Weekly
- Minutes
- Select the preferred date range.
-
Click Save.
Forecast report
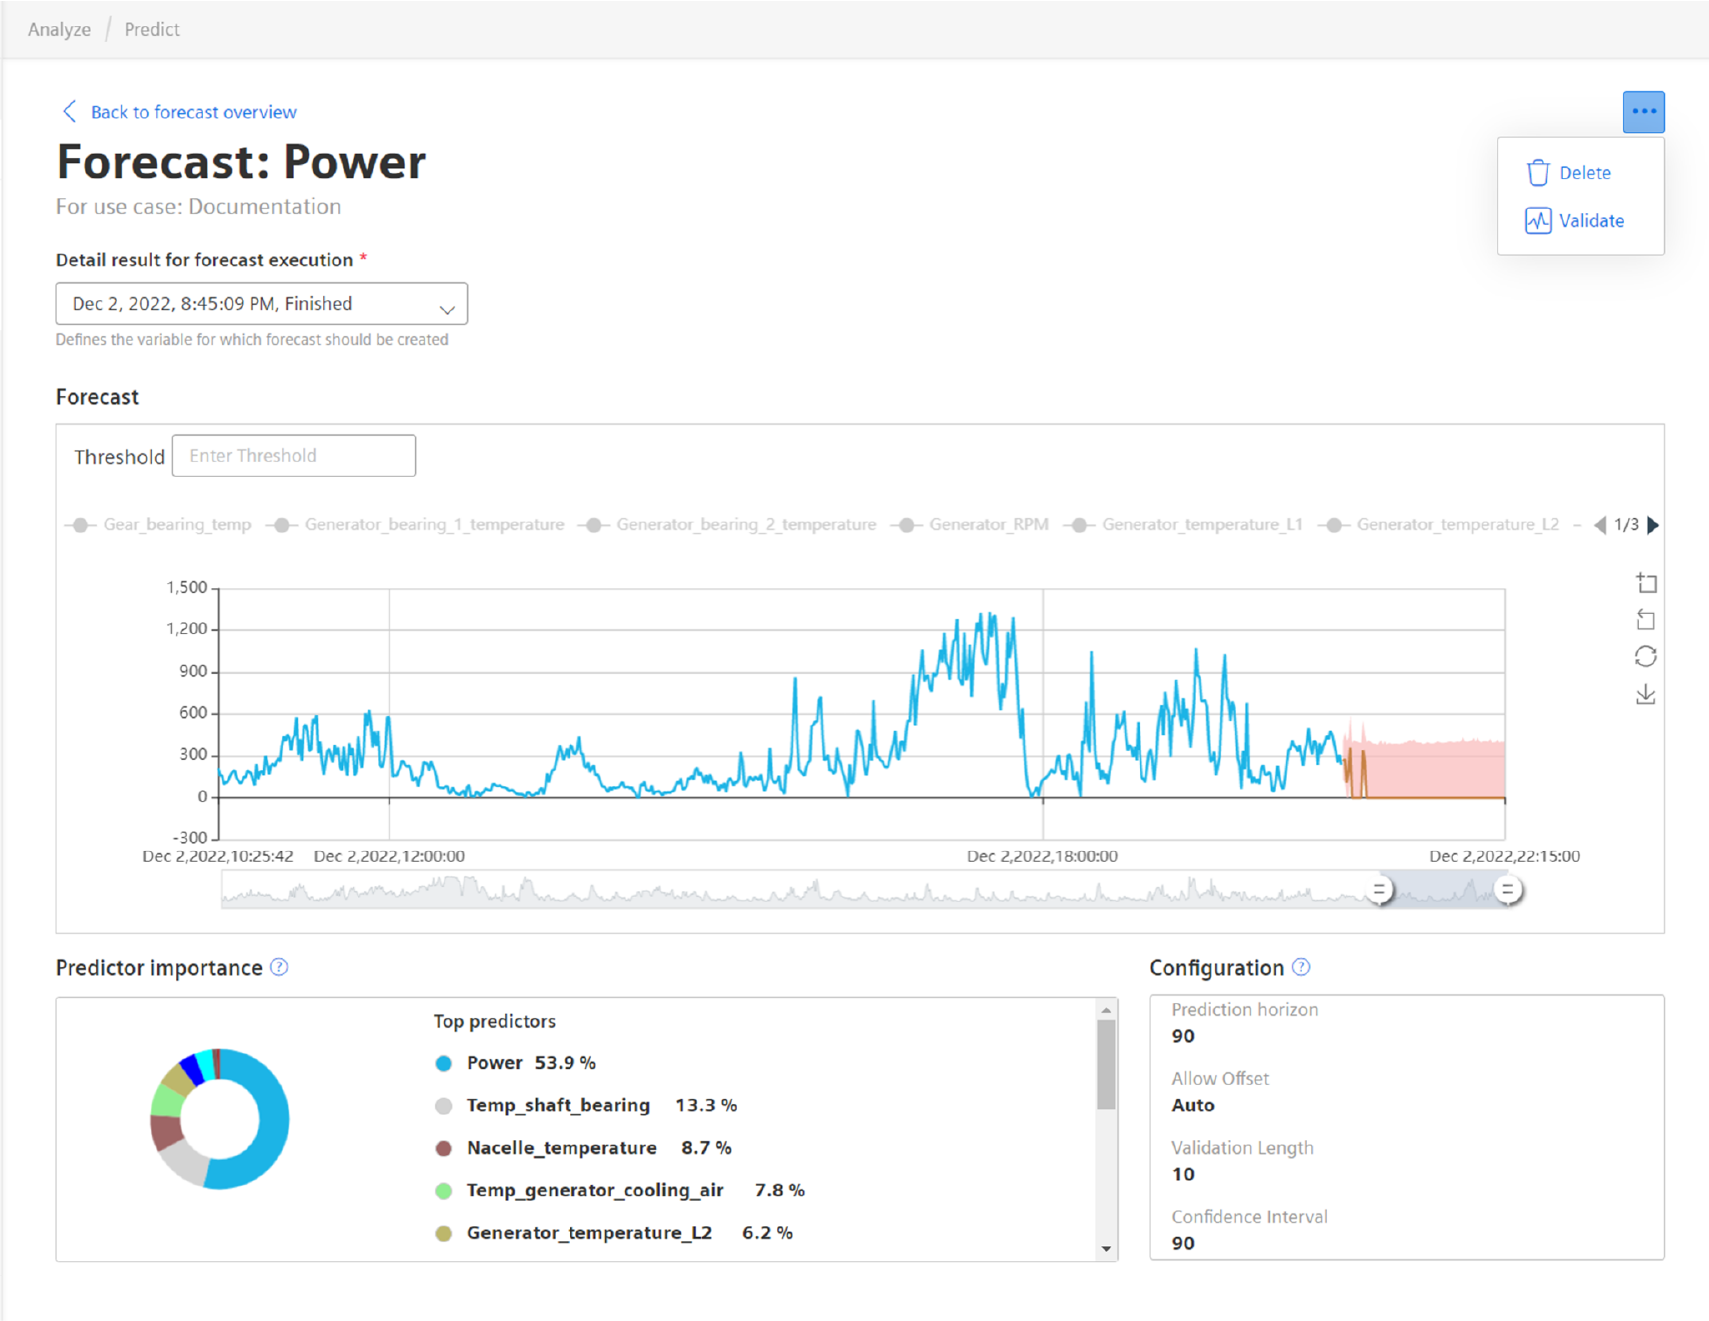
Once the forecast is scheduled for production, the forecast reports are generated as per the schedule. The generated forecast report can be used to predict the future data for the selected variables of the asset. To view the forecast report, click "Production forecasts" and select the preferred report from the "detail result for forecast execution" drop-down.
Save Forecast report in IoT store
Once the forecast reports are generated as per the schedule, then the aggregates (mean, min and max) are calculated based on the forecast prediction results. This report containing aggregated data is inserted back into Insights Hub IoT store. Rules engine can be configured to generate events based on Forecast prediction results.
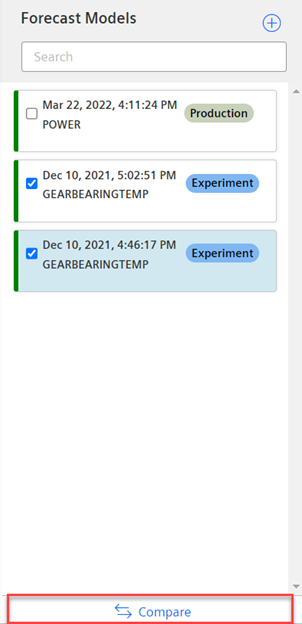
Compare the Forecast report
The "Forecast" extension allows you to predict the future data on multiple instances and compare them for analysis. This comparision of historic forecasting records assits in the better model selection.
Once the forecast report is generated, make the required changes in the "Forecast Configurations" and click "Regenerate Forecast" and compare the two reports.
To compare the forcasting reports, select the various forcasting reports and click "Compare".
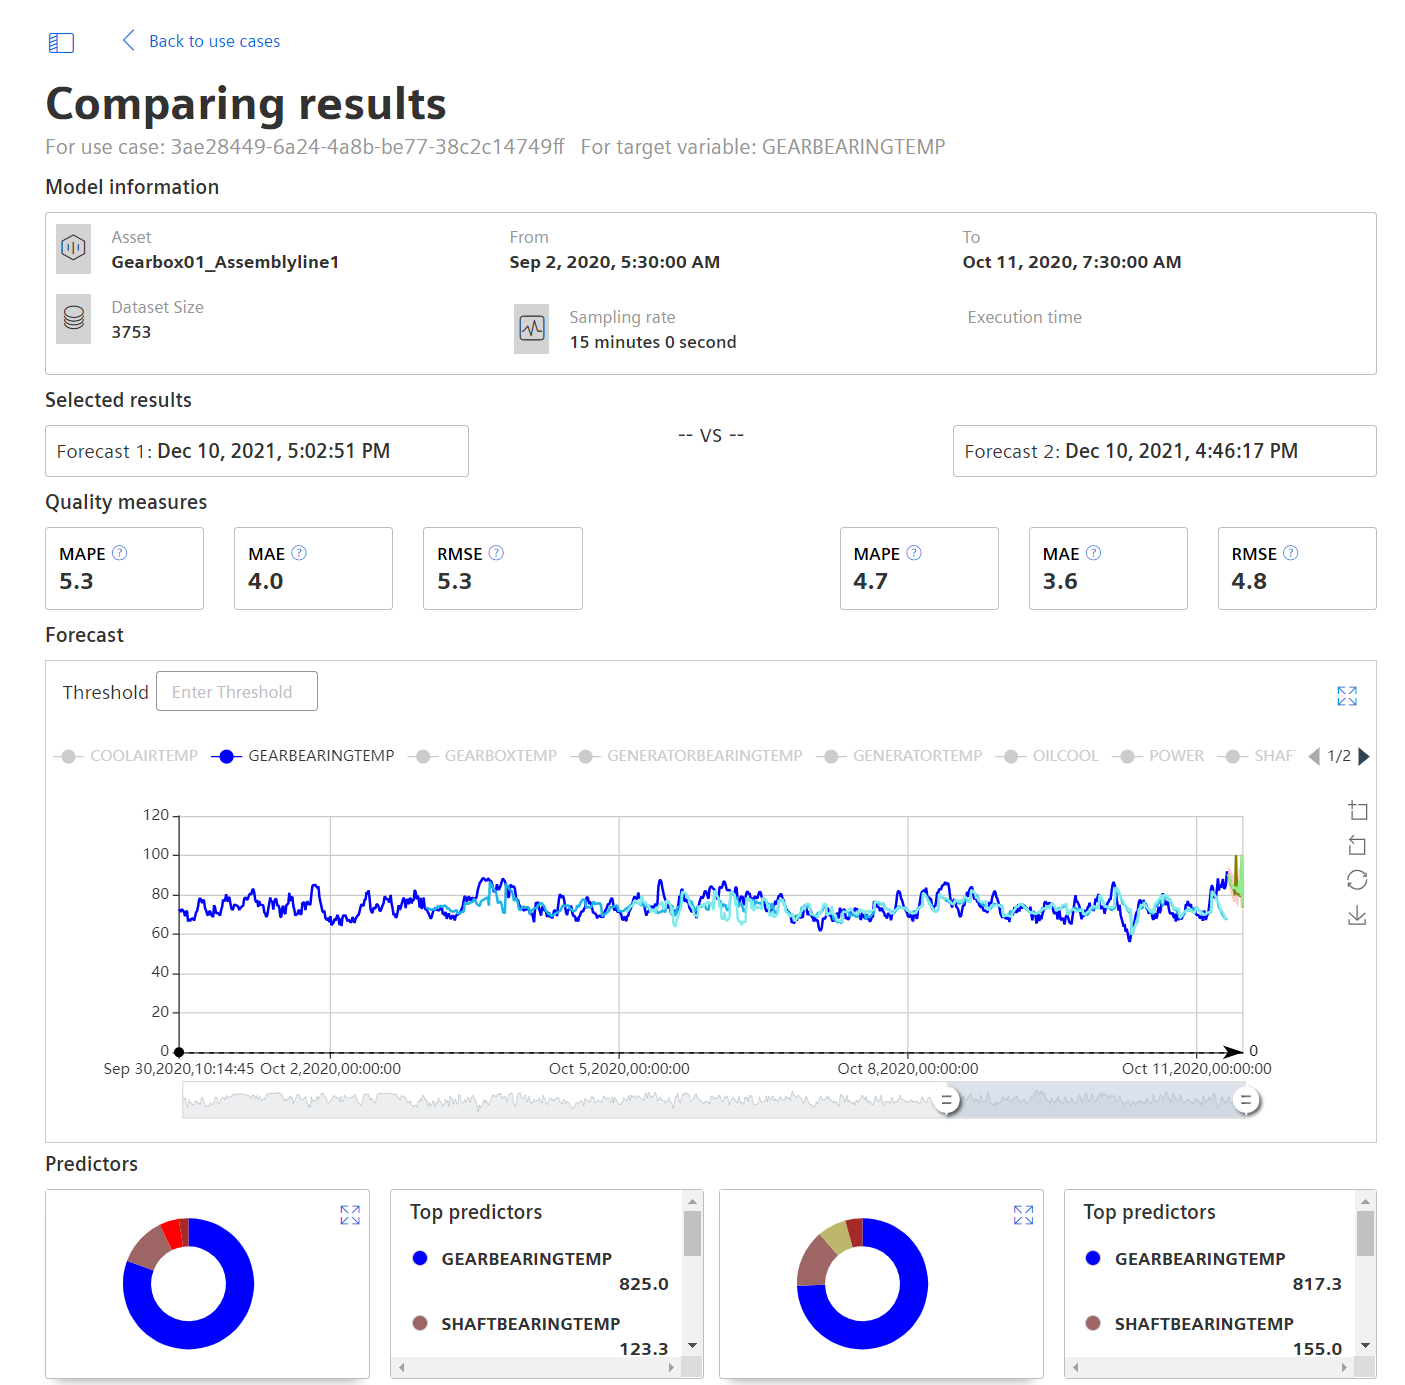
The following figure shows the comparision of the two forecast reports:
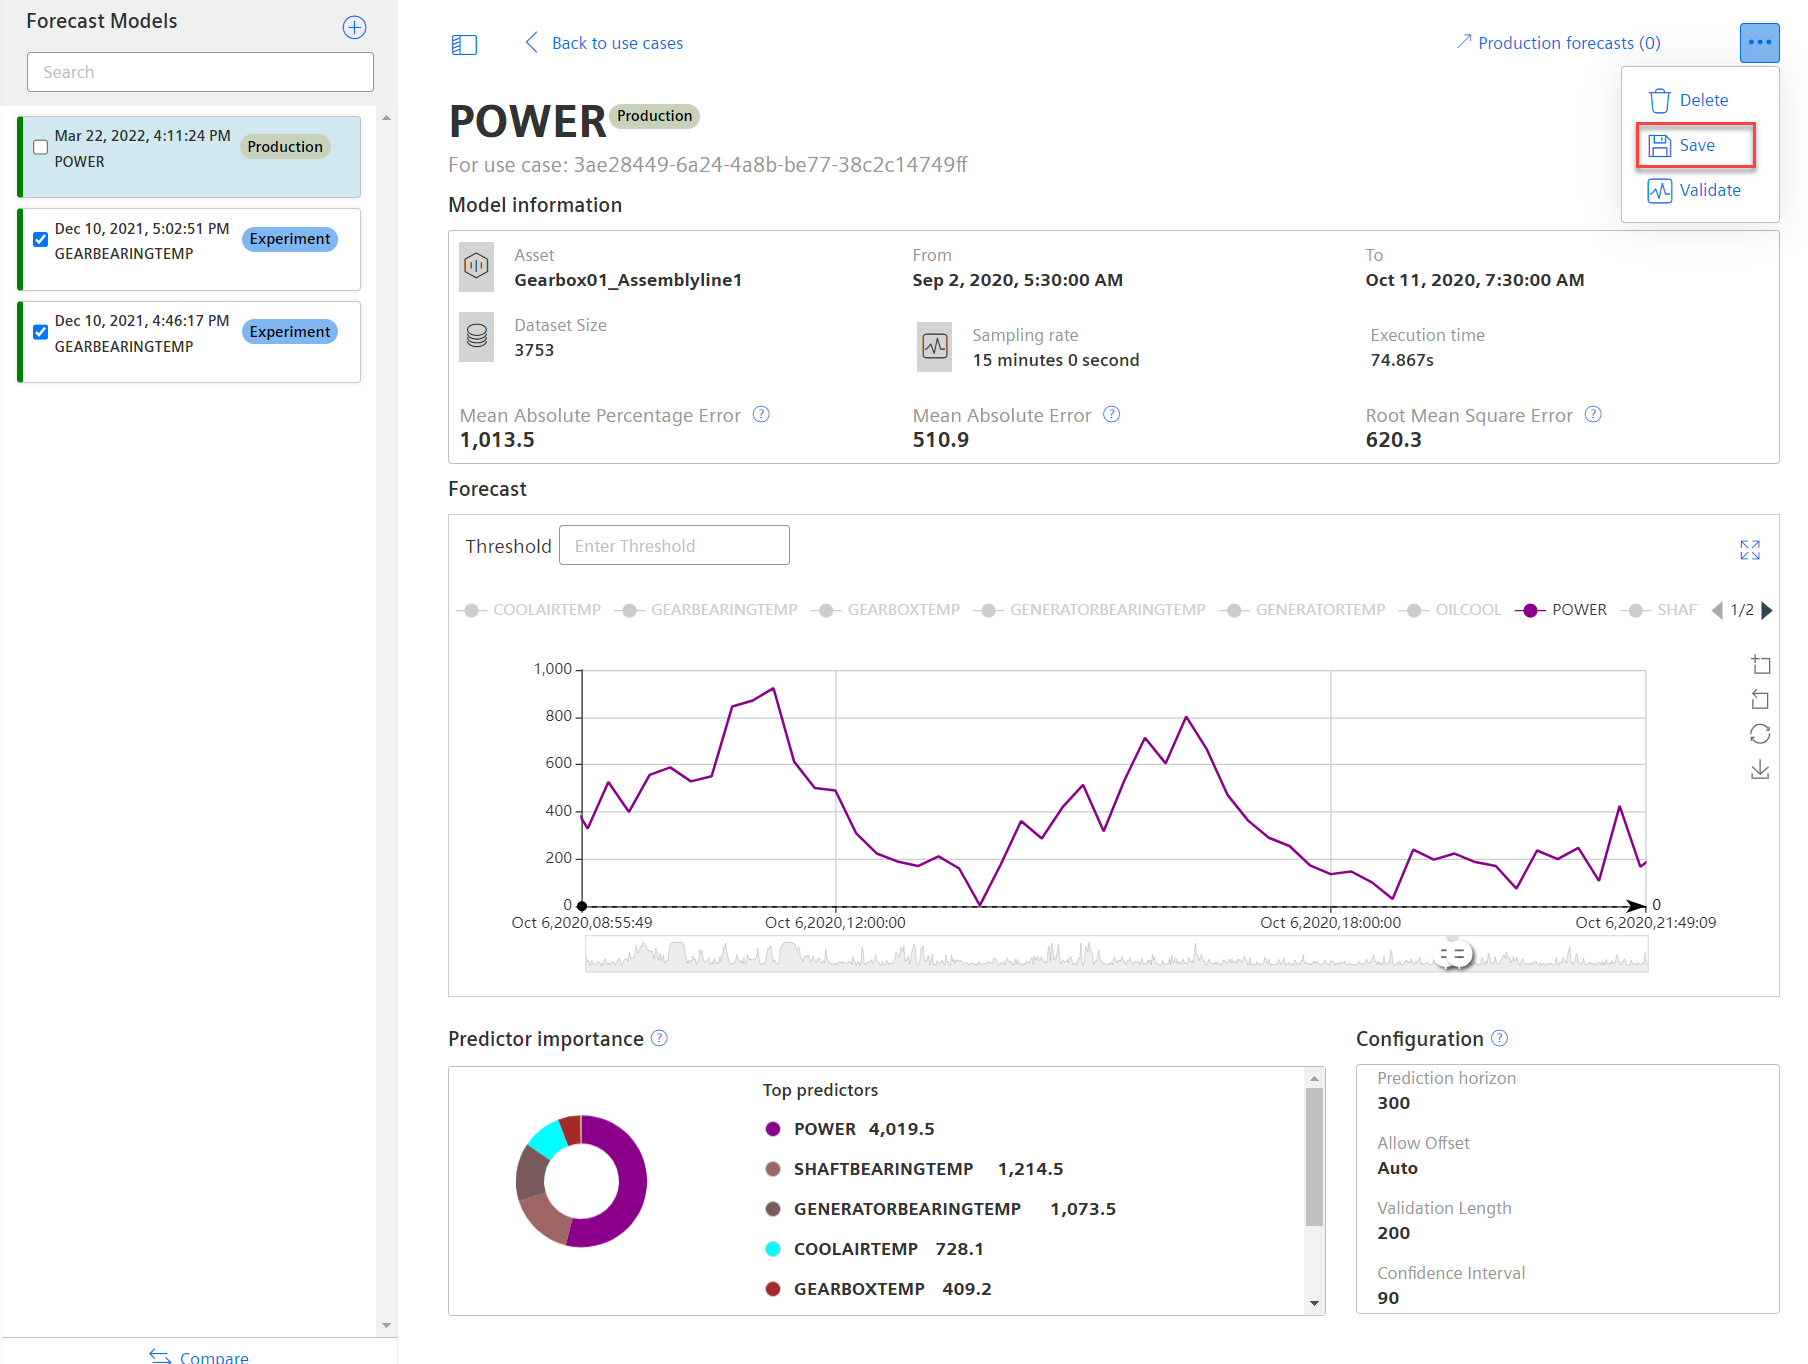
Save the Forecast report
The Forecast Extension allows you to upload the generated reports to integrated Data Lake application.
To save the generated forecast reports, select the report and Click "Save".
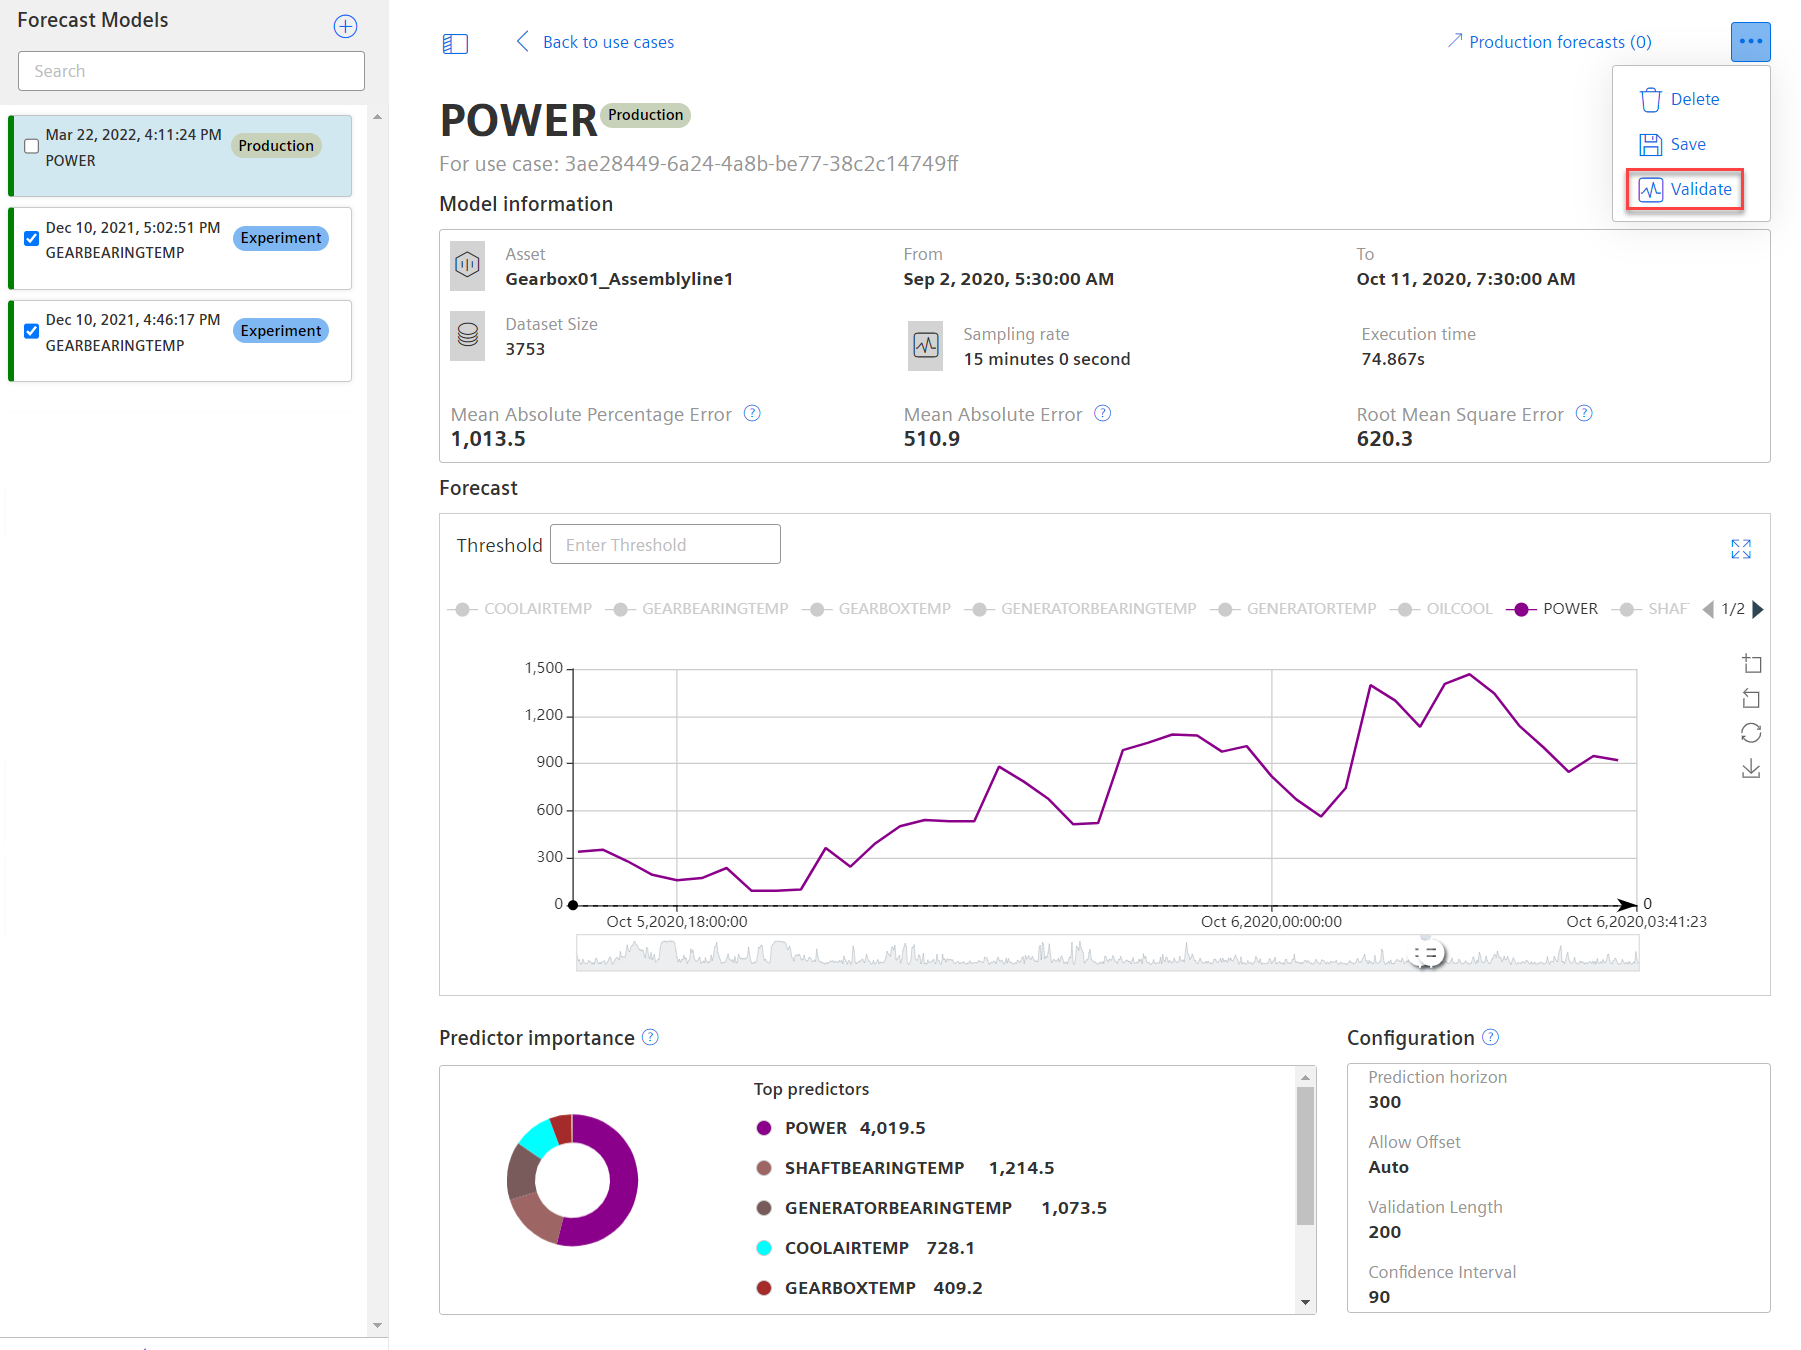
Validate the Forecast Report
The Forecast Extension allows you to compare and validate the actual asset data with the forecast reports.
Note
In order to compare the actual asset data with the forecast report, ensure the actual asset data is uploaded to integrated Data Lake.
To compare and validate the forecast reports with Actual asset data, select the report and click "Validate".
Delete Forecast Reports
To delete the generated forecast reports, select the forecast reports from the list, click  and select "Delete".