Register an application
In order to use any application, you need to register the application. The registration make your application available and can be accessible via generated URL.
Prerequisite
- Before proceeding for registration, it is mandatory to create at least one scope in Roles & Scopes tab for the application. In Developer Cockpit, by default "Admin" role and application scope is created.
- For standard, Insights Hub Monitor plugin and mobile applications: It is only possible to register one version of an application. It is not possible to register another version without de-registering the existing version. You can circumvent this limitation by using different application names or versions.
- For API applications, it is possible to register two versions but not two revisions of an application.
- An application cannot be registered, if it does not have any Roles, since this information needs to be provided to the Industrial IoT Gateway.
User interface
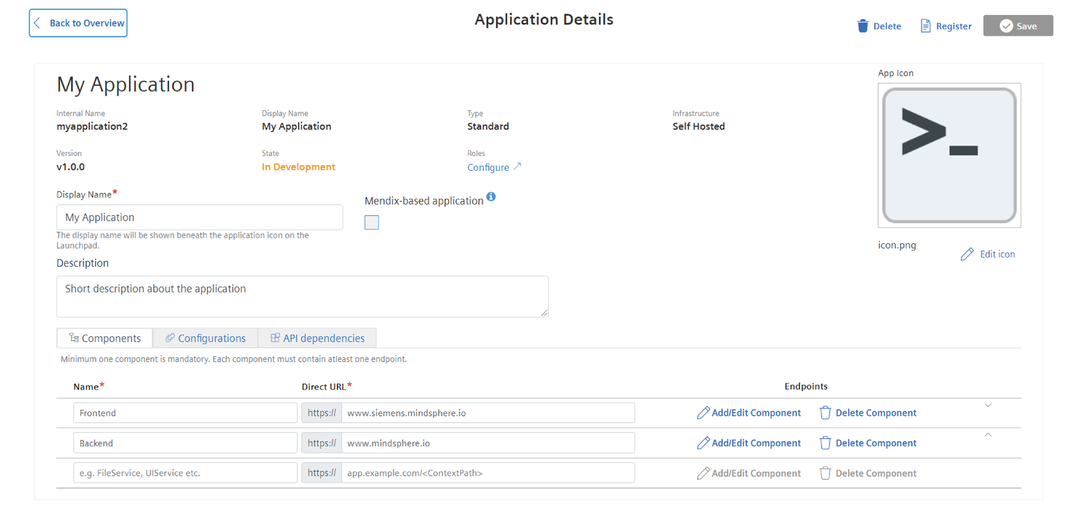
"Application registration" screen:
You can register your application.

Procedure for registering an application
To register the application, follow these steps:
-
In "Dashboard" tab, select your application and click "Register".

-
Click "Proceed With Registration", to confirm the application registration.
Additional step for mobile applications:
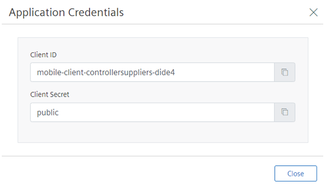
After registering the mobile application, application credentials are displayed. With these credentials, other application can interact or calls to APIs of mobile application in Insights Hub. Also, these credentials provides the security in interacting with other APIs as well. For more information, see Developing Mobile Apps for Insights Hub.
- After the application is registered successfully, a "client ID" and a "client secret" appear in the pop-up window. Save the credentials for future use since they are displayed only once.

- Value of the "client secret" is public for each application. The "Client id" follows the below nomenclature: mobile-client-
<tenant>-<app> - In case you want to view the credentials again, you need to de-register and register the application again thereafter, click "Prepare Release". In the "Prepare Release" window, enter the description and click "Submit".
Result
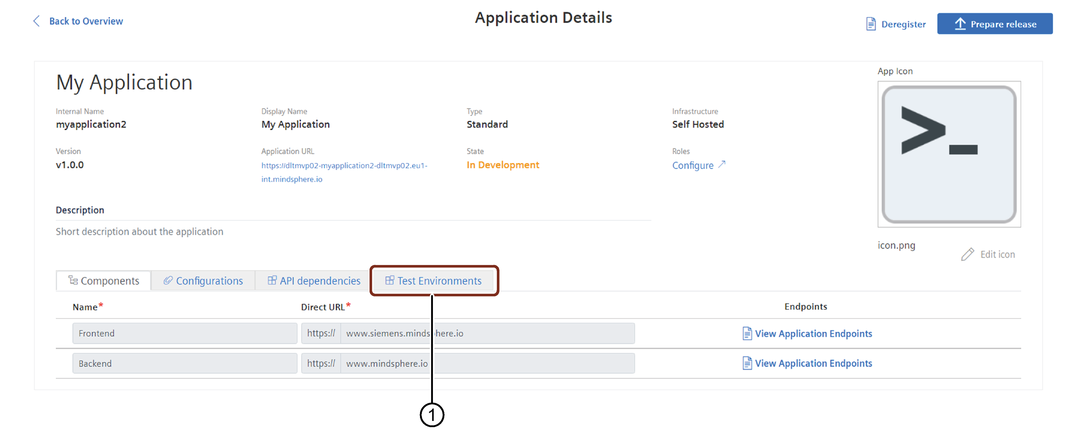
It is now possible to access the application via generated URL or from Launchpad and the application will also be lauched in the new browser tab for test.

① Dedicated test environments tab
After registration, 2 test environments are created in the new "Test Environments" tab and you can now assign your application to the dedicated test envrionments before provisioning it to production environment. In "Test Environments" tab, you can provision the application to the dedicated test environment by clicking "Provision".

① Application will be de-provisioned from the test environment
② Preview the provisioned application
③ Updates the status of the application
④ Application will be provisioned to the test environment
Note
- Insights Hub Monitor plugin, mobile applications and API applications are not visible on Launchpad.
- In Basic Capability package, dedicated test environment is not available.
Example:
URL-Schema: <tenantname>-<applicationname>-<tenantname>.<region>.mindsphere.io
Using this official URL, you are redirected to the application.
Next step
- Test your application.
- Prepare your application for a release. For more information, see Preparing the application release for self hosted and without backend (mobile) type infrastructure.