Data Transformation Actions
The actions you can perform with an ETL flow display in the ETL Flows table in the Actions column. See the Getting Started with Data Transformation topic for more information on user roles and access to ETL flow functionality.
ETL Flows Table
Available actions display when you click the three ellipses in the Actions column in the ETL Flows table, as shown here:

Note
Only the actions permitted by a user's Data Transformation role display in the actions drop-down list.
Actions
The actions available for an ETL flow display according to your user role. All available actions are:
- View: see the ETL flows table
- Run: initiate an ETL flow
- Schedule: configure an ETL flow to run on a schedule
- Edit: make changes to an existing ETL flow
- Copy: copy an ETL flow
- Delete: delete an ETL flow from the ETL Flows table
- Latest Data: retrieve only the latest data when running an ETL flow
- Cancel: cancel a currently running ETL flow
Viewing ETL Flows
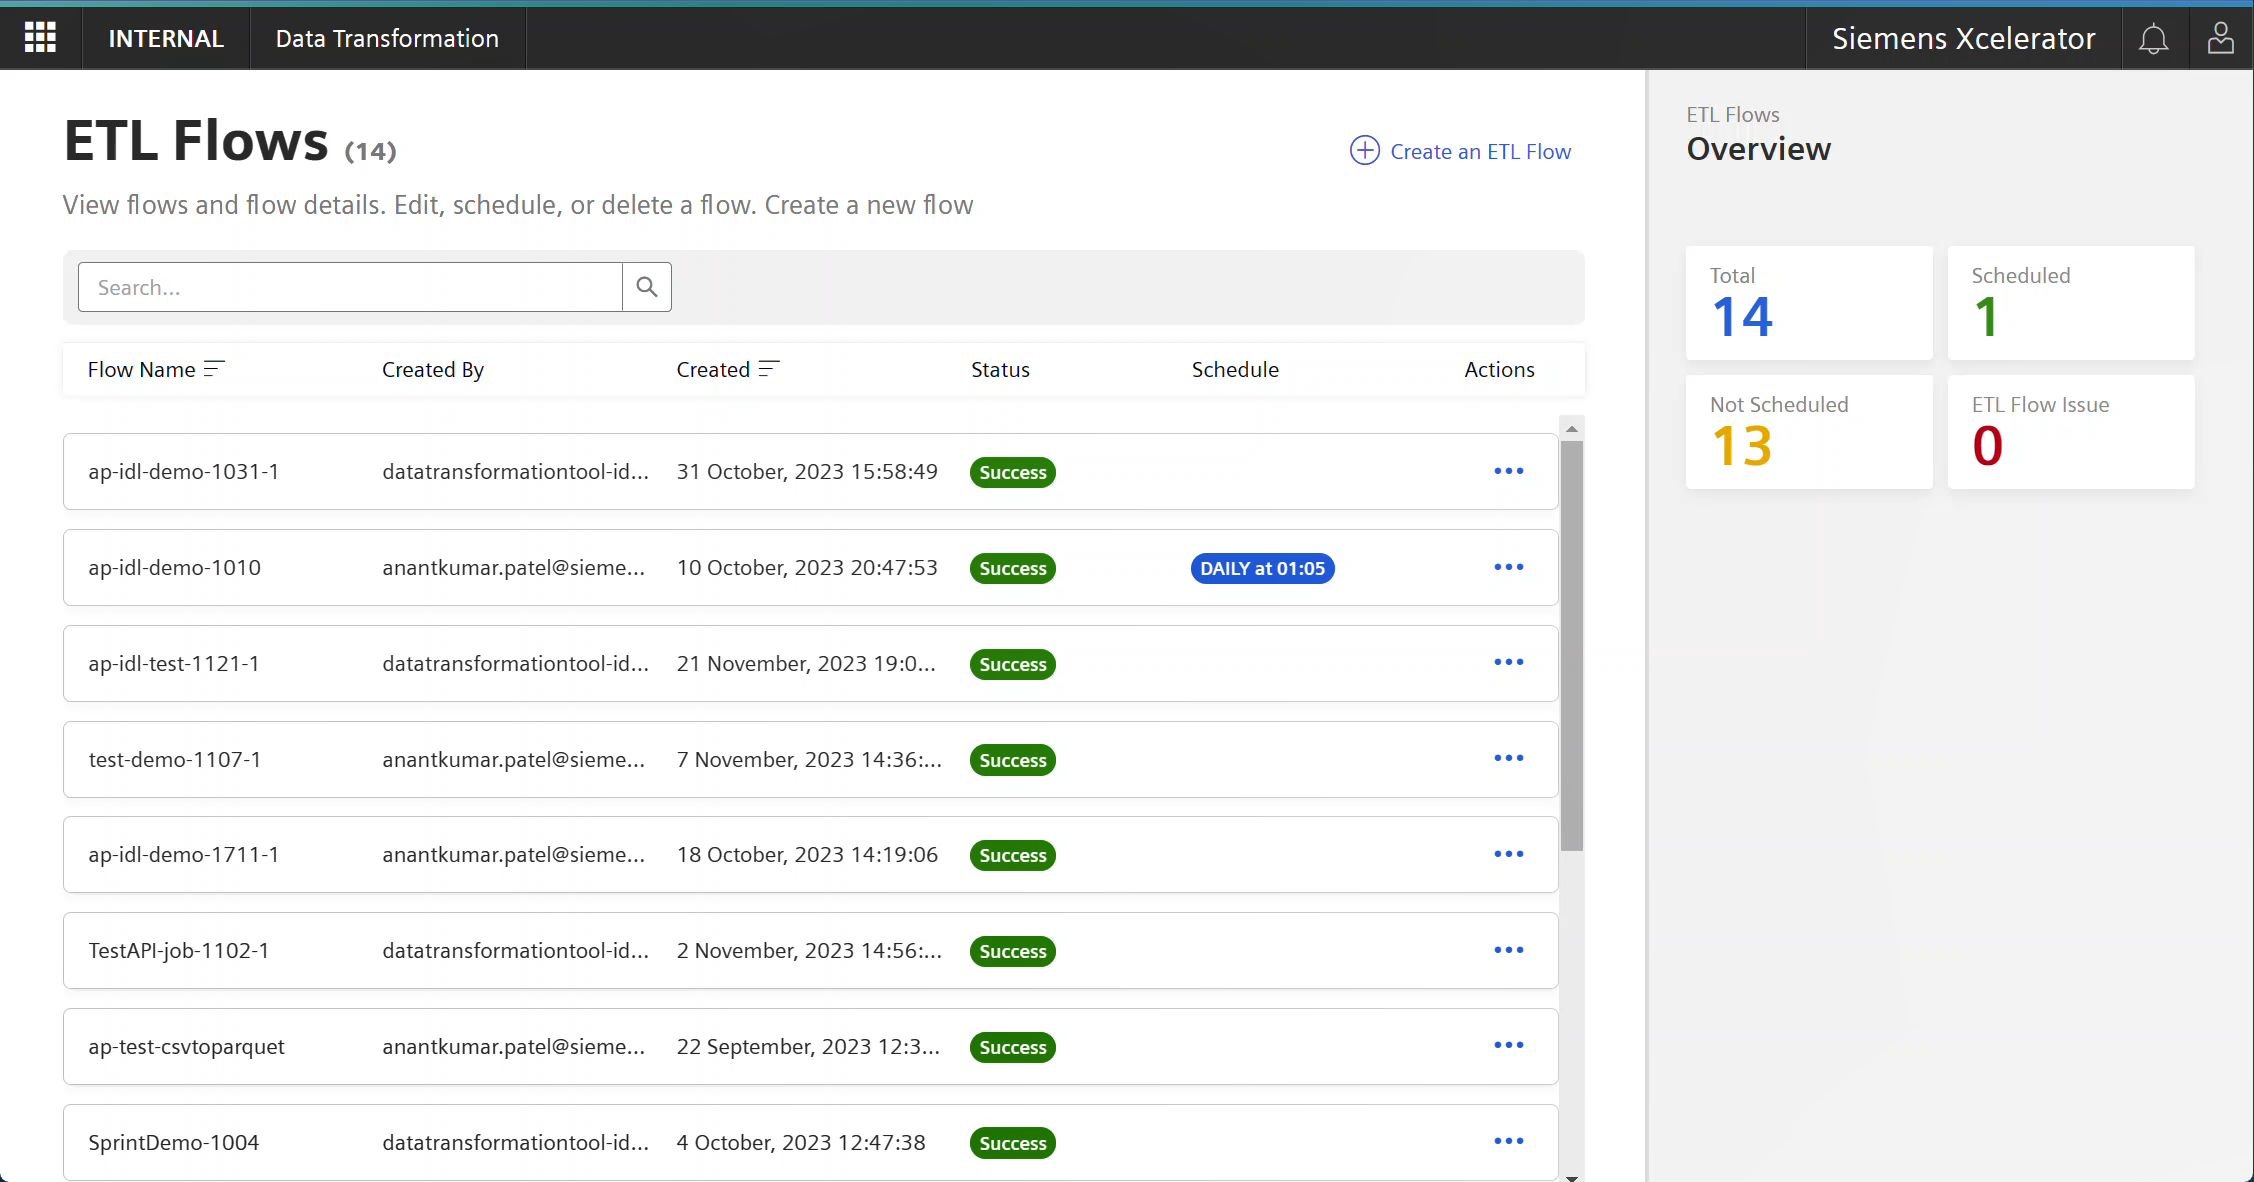
When you open Data Transformation from the Launchpad, the ETL Flows table is the main feature of the Data Transformation page. All user roles can view the ETL Flows table.
ETL Flows Table Illustration
How to View ETL Flows
Click the Data Transformation icon on the launchpad. The Data Transformation page opens and displays the ETL Flows table.
Running an ETL Flow
Depending on the complexity and volume of the data involved and the time it takes to provision the resources, it can take from one minute to two hours to execute an ETL flow.
How to Run an ETL Flow
Follow these steps to initiate an ETL flow:
- Select the row in the ETL Flows table for the ETL flow you want to run.
- Click the three ellipses in the Actions column.
- Select Run from the Actions drop-down list. The running flow details display in the ETL Flow Details panel.
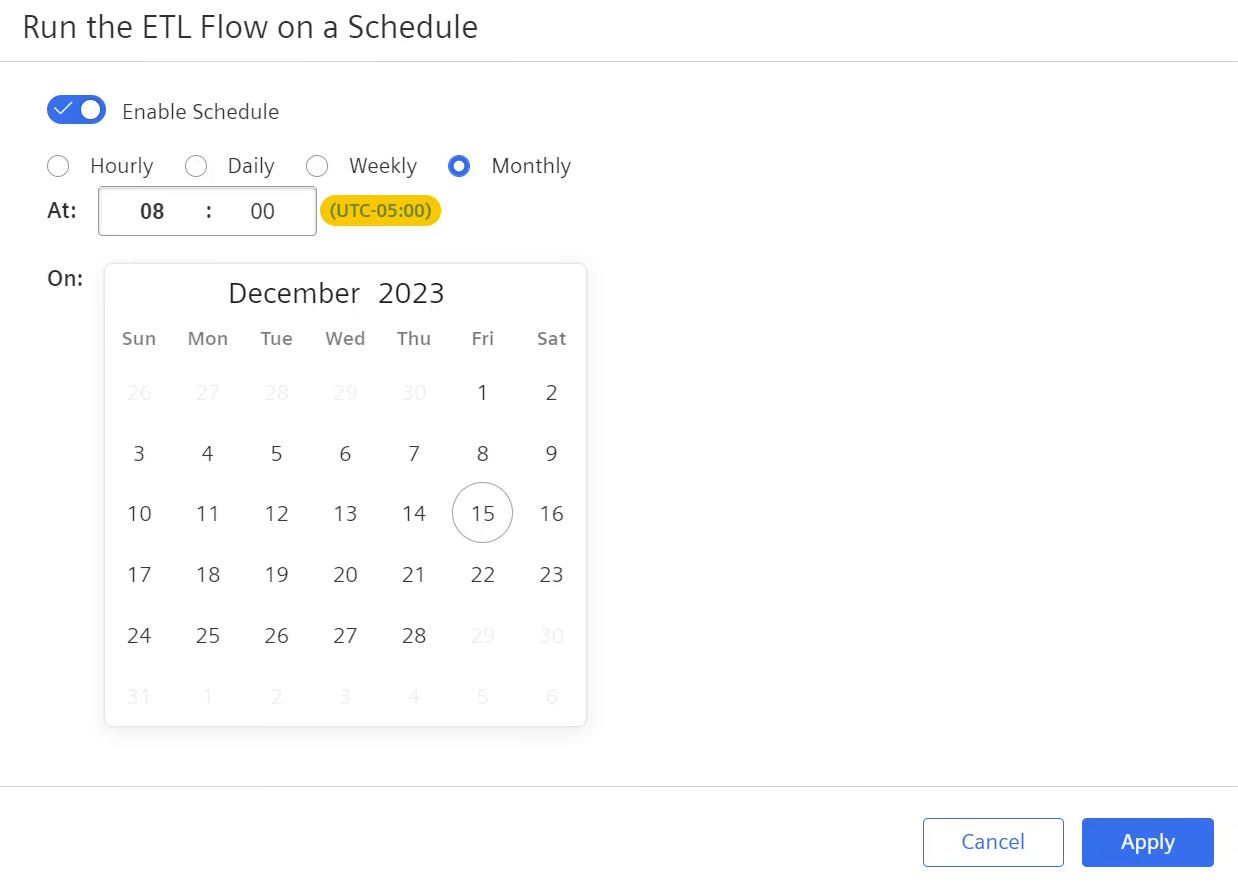
Scheduling an ETL Flow
You can schedule an ETL flow to run automatically on one of the following bases: - Hourly - Daily - Weekly - Monthly
Schedule Dialog Example
How to Schedule an ETL Flow
Follow these steps to schedule an ETL flow:
- Select the row in the ETL Flows table for the ETL flow you want to schedule.
- Click the three ellipses in the Actions column.
- Select Schedule from the Actions drop-down list.
- Slide the 'Enable schedule' toggle to 'On'.
- Select an hourly, daily, weekly, or monthly frequency.
- Select a value for when to run the flow; i.e., hour, day, date, etc.
- Click Apply. A 'Success' message displays.
Editing an ETL Flow
Once a flow is created, you can access it in the ETL Flows table and use the Edit feature to access the script and make any necessary changes.
How to Edit an ETL Flow
Follow these steps to edit an ETL flow:
- Select the row in the ETL Flows table for the ETL flow you want to edit.
- Click the three ellipses in the Actions column for that row.
- Select Edit from the Actions drop-down list. The ETL flow opens for editing.
- Make any edits you need to the ETL Flow Payload script.
- Click Save. The system displays a 'Success' message.
Copying an ETL Flow
Follow these steps to copy an ETL flow:
- Select the row in the ETL Flows table for the ETL flow you want to copy.
- Click the three ellipses in the Actions column for that row.
- Select Copy from the Actions drop-down list. The ETL flow opens.
- Enter a name for the copied ETL Flow.
- Click Save. The system displays a 'Success' message and the newly-named flow appears in the ETL Flows table.
Deleting an ETL Flow
Follow these steps to delete an ETL flow:
- Select the row in the ETL Flows table for the ETL flow you want to delete.
- Click the three ellipses in the Actions column for that row.
- Select Delete from the Actions drop-down list. An 'Are you sure?' message displays.
- Click Okay. The system displays a 'Deleted' message.
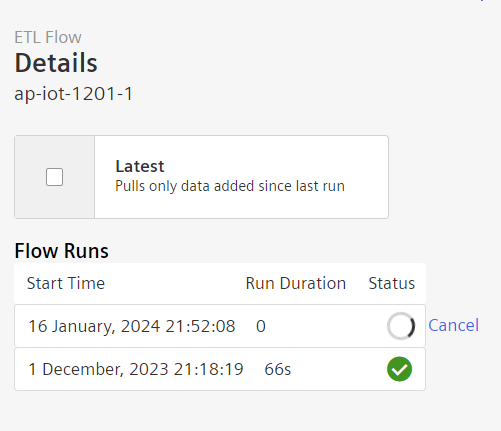
Pulling Only the Latest Data for an ETL Flow
Instead of pulling all of the data from a data source each time you run an ETL flow, you can pull just the new data since the last run. Once the 'Latest' check box is checked each time the ETL flow runs, it continues to pull only the latests data until unchecked.
ETL Flow Run Illustration
This image shows the Details panel, Latest check box, Status column, and the progress spinner and Cancel option that only display for a currently-running ETL flow.
How to Pull Only New Data (Since Last Run)
Follow these steps to pull only data that is new since the last ETL flow run:
- Select the row in the ETL Flows table for the ETL flow you want to only get the latest data for.
- In the right details panel, select the 'Latest' check box.
- Click the three ellipses in the Actions column for that row.
- Select Run from the Actions drop-down list. The date and time display in a new line in the Flow Runs list, along with a progress icon in the status column that spins until the ETL Flow finishes running.
Info
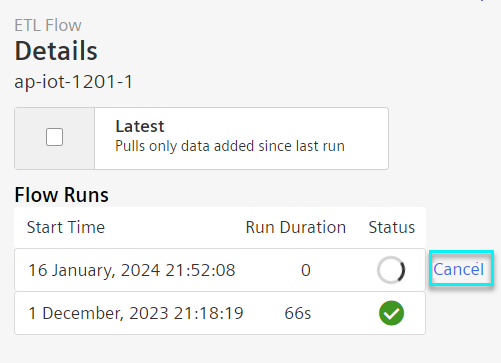
The Progress icon spins while a flow is running. Only currently running flows can be cancelled. See image below.
Canceling an ETL Flow
Click the Cancel link to cancel a currently-running ETL flow, as shown here:
Except where otherwise noted, content on this site is licensed under the Development License Agreement.